Script error: The function "Proc" does not exist. Damage is one of the three physical damage types. Script error: The function "Proc" does not exist. damage is effective at quickly draining Corpusshields, but it does comparatively less to bodies themselves. It does normal damage against the Infested.
The status effect of Script error: The function "Proc" does not exist. damage is Knockback, causing the targets to briefly stagger, wasting their precious moments recovering instead of fighting. This status effect is immediately removed from the target's HUD after the effect is applied. If the target is killed during an Script error: The function "Proc" does not exist. proc, their corpse will be ragdolled, no matter how low Script error: The function "Proc" does not exist. the weapon has.
Type Effectiveness
Script error: The function "Faction" does not exist. Health
Script error: The function "Proc" does not exist. Modifier
Script error: The function "Faction" does not exist. Health
Script error: The function "Proc" does not exist. Modifier
Script error: The function "Faction" does not exist. Health
Script error: The function "Proc" does not exist. Modifier
These weapons deal more than a majority of their physical damage as Script error: The function "Proc" does not exist.. The damage ratio is important for physical damage status effects, because the game weights the likelihood of which proc occurs according to physical damage ratio. Hence, these weapons proc Knockback more than Bleed or Weakened.
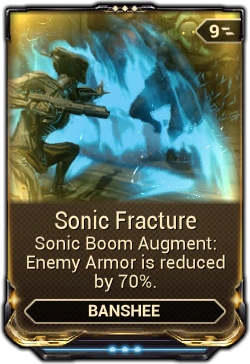
Banshee expends 25energy to channel sound at high velocity to create a shockwave that propagates forward in a 180° cone up to 10 / 12 / 13 / 15 meters away. Enemies caught by the wave are ragdolled several meters and receive 25 / 35 / 40 / 50Impact damage.
The shock wave does not affect enemies behind obstacles in the environment unless Banshee has line-of-sight.
The shock wave will have a very slight delay between activating and knocking down enemies at the maximum range of the ability, as it has a very minute travel time.
Some enemies, including most heavy units, have a cooldown before being able to be knocked back again.
Some enemies will simply be stunned or be knocked down, but most will be pushed back.
Can be used while jumping, sliding, flipping, wall-running or wall-clinging.
Can be used effectively as a source of instant crowd control to get large amounts of enemies out of your face incredibly quickly.
When combined with Energy Siphon and Maximized Ability Range, this ability can be used continuously to keep large crowds of enemies off their feet until death. This is one of the most energy efficient crowd-control effects in the game.
Since Sonic Boom can knock most enemies back, it can be used to instantly kill enemies by sending them down a bottomless pit.
Bugs
Sonic Boom will leave enemies vulnerable to Finisher attacks long after they have gotten back up from the knockdown, even if she doesn't have Savage Silence equipped or has Silence active.
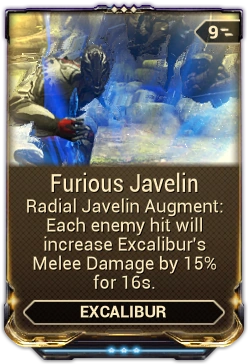
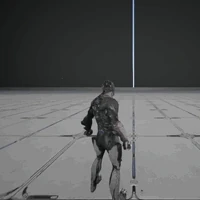
Excalibur expends 75Energy to summon javelins against enemies within a radius of 15 / 18 / 22 / 25 meters. Excalibur then drives his weapon into the ground, launching the javelins into their targets. Each javelin inflicts 500 / 650 / 800 / 1000 damage evenly distributed between Impact, Puncture, adn Slash, with a guaranteed Slash proc and Stagger.
While javelins do notpunch through objects or enemies, their striking position is optimized to ensure a successful hit on their targets when they spawn. This allows the javelins to bypass obstacles in the environment including walls, cover, and Grineer Shield Lancer shields.
Radial Javelin will not target enemies behind obstacles in the environment unless Excalibur has line of sight, or unless the enemy is aware of Excalibur within a short period of time (e.g., an enemy that spots Excalibur and runs out of view can still be targeted by Radial Javelin if the ability is used within a small time frame).
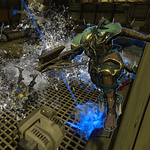
Hydroid expends 25energy to mark a targeted location for orbital bombardment over unrestricted range, calling forth an artillery barrage-like salvo of water missiles from above to strike the marked area 3 / 5 / 8 / 10 meters in radius for 4 / 6 / 8 / 10 seconds. Water missiles launch from above in a salvo of 4 per second, with each missile exploding on impact dealing 150 / 175 / 225 / 300Corrosive damage with a 100%status chance and Stagger to enemies within a 5 meters explosion radius.
Damage does not bypass obstacles in the environment and does not diminish with distance.
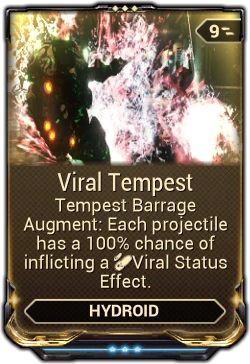
The barrage will be centered on the spot where the reticle is pointing up to the first solid object within view. This allows Tempest Barrage to be cast at distant locations as long as one has line of sight. Note that it tends to fall short if cast through a door or gateway.
When cast on Snow Globe it will not be able to strike through it, but when cast within it will fall through it normally.
Ability Synergy:
Hydroid's Passive allows the first Corrosive stack to remove 50% armor and is able to fully remove all armor at 10 stacks.
Tempest Barrage is a One-Handed Action that allows casting during movement, while midair, and on ziplines.
Can be recast while active to create multiple barrage instances.
Water missiles and their impact indicator circles are affected by Hydroid's chosen Warframe energy color.
Breaks containers and damages turrets/cameras.
Subsuming Hydroid to the Helminth will offer Tempest Barrage and its augments to be used by other Warframes.
Mod for Ability Range to increase the explosion radius of each water missile, allowing more enemies to be damaged and knocked down inside and around the barrage area.
Cast multiple barrages in different directions to lock down chokepoints from incoming enemies.
Combo with Tentacle Swarm to keep enemies locked down in the blast area.
Misc:
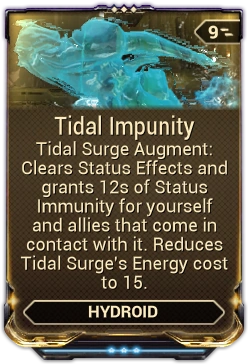
Self status cleanse on cast Invulnerable during dash ? / ? / ? / 40 m/s speed 1 s wave duration Ragdoll on contact Corrosive status on initial hit and variable stacks in contact 50% recast energy discount
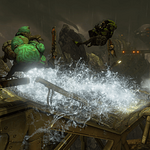
Hydroid expends 50energy to cleanse himself of all negative Status Effects while transforming into liquid and surging forward as a wave of water. While traveling in waveform, Hydroid becomes completely Invulnerable to damage, as his speed increases to ? / ? / ? / 40 meters per second over a duration of 1 second; the wave may be steered during its travel by changing the view direction, and Hydroid may halt his surge early by jumping (default Spacebar ). Enemies within 3 / 4 / 5 / 6 meters of the wave are Ragdolled and pulled along by the riptide, while dealt 100 / 200 / 250 / 300Corrosive damage when caught by the wave and when the wave breaks at the end of the duration, and are inflicted with a variable number of Corrosive Status Effects based on how long they are carried by the wave.
Tidal Surge's pull on enemies attempts to collect them in front of Hydroid's wave. At the end of the surge, pulled enemies are left clumped together at the location where the wave ended.
Hydroid jumping out of Tidal Surge will carry forth its momentum as he travels through the air.
Can be recast while active to remain in waveform and renew the surge for continuous travel toward a new direction. Tidal Surge's energy cost is discounted by 50% if cast again while Hydroid is surging.
Ability Synergy:
Hydroid's Passive allows the first Corrosive stack to remove 50% armor and is able to fully remove all armor at 10 stacks.
Tidal Impunity is a HydroidWarframe Augment Mod for Tidal Surge that allows Hydroid and all allies contacted by the ability to temporarily gain immunity to Status Effects, as well as removing already active ones. Also passively reduces Tidal Surge's base energy cost to 15.
It can be used to reach or pass certain areas of the map.
Bugs
Sometimes when Hydroid emerges from the wave, his "fin" will be gone.
On PS4, if Hydroid is in the middle of a Tidal Surge when all players reach the extraction point, he will be permanently stuck in his dashing pose and simply clip into the drop ship during the "Mission Complete" mini-scene that plays during the loot screen.
Loki expends 25energy to create a holographic decoy within a range of 100 meters at the location on the aiming reticle. With heightened Threat Level, 400Shield and 200Health points increased by 15% of all enemy shields and health within 15 meters of the decoy when cast, the decoy will draw enemy fire and last for a maximum of 7 / 15 / 20 / 25 seconds or until destroyed by enemy attacks.
The decoy's shots do not inflict damage. However, they still count as hits for purposes such as Arcane Strike.
Only 1 decoy can be available at a time. Deploying a new decoy while one is already active will remove the previous decoy from the field.
If enough damage is done to the decoy, it will collapse and disappear.
If aimed at a ceiling or the sky, the decoy will appear directly below the aimed point, allowing it to be placed in higher platforms.
If placed in a position where enemies cannot reach:
Within a few seconds Infested enemies will swap their aggro to another target.
Grineer and Corpus enemies will keep trying to aim at the Decoy until it disappears even if they cannot see or hit it, making it extremely effective if placed in good cover against enemy fire.
Decoy has a tendency to fall through certain props on the map. This means a decoy can be placed on top of something, for example: a pillar, and it will sometimes fall through it, being protected from within the prop.
Decoy's shields regenerate over time.
Has a cast time of ~0.6 seconds.
Subsuming Loki to the Helminth will offer Decoy and its augments to be used by other Warframes.
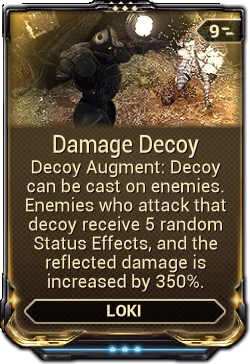
Damage Decoy is a Warframe Augment Mod for Loki's Decoy ability that allows Decoy to be cast onto an enemy, turning that enemy hostile to everything and inciting former allies to attack while having their damage reflected, amplified, and additionally succumbed to 5 random status effects.
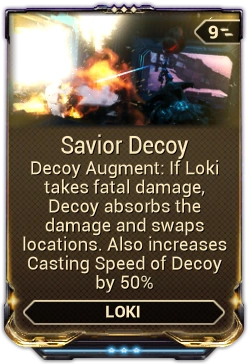
Savior Decoy is a Warframe Augment Mod for Loki that allows Decoy to absorb any fatal damage dealt to the player before switching places, along with passively increasing Decoy's Casting Speed.
Enemies will focus on the decoy if it is deployed closer to them than Loki is, allowing Loki to deal heavy damage or escape an area without being targeted.
Decoy's defenses do not increase at higher levels or with Ability Strength, making it very weak at high levels if not placed in cover.
Decoy can be used in conjunction with Switch Teleport, essentially allowing teleportation to any point where Decoy can be placed. It should be noted that sometimes there is no switch and loki is just teleporting close to decoy, so careful placing is required sometimes.
The hologram blocks lasers from Laser Barriers, allowing passage through when deployed directly on top of them (as they only emit from one side).
Decoy can be used as means to find or lure out hiding enemies.
The copy will only start firing its Lato if there is an enemy close enough to be attracted, but it will not stop firing once all affected enemies are dead. Keep this in mind when using Decoy to scout enemy locations.
Can also be used to hold doors open, which can be useful when the following area is full of enemies, allowing players to engage them from a safer distance.
Limbo can put the decoy in the rift, making it completely invincible against enemies not also in the rift, although this eliminates its ability to apply procs on enemies.
Can obtain bonus shielding from Shield Osprey Specters, adding some shielding while increasing the shield recharge rate and delay of the decoy. The Specter will also automatically prioritize targets like Decoy to protect, just like it will prioritize following other specters. Note that the osprey is terribly weak, and the decoy will attract heavy fire, making the possibility of the specter dying quickly much higher.
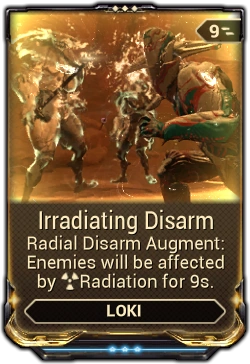
Loki expends 100energy to release a pulse of manipulative energy, temporarily stunning and permanently Disarming enemies within a 10 / 13 / 17 / 20 meter radius. Certain enemies will also take 200 / 200 / 350 / 500Impact damage.
When used on Sentient enemies such as a Battalyst, the gun section on each arm will visibly fall to the ground. Many sentients do not possess a melee attack, so they will just hover around; however their spinning laser attack will still function. After 20-30 seconds one of their gun sections will regenerate and they can begin to fire again, but subsequent casts of Radial Disarm will remove the new guns.
Has a cast time of 0.9 seconds and delay between uses of 0.9 seconds.
This ability is very effective if used with a Bastille on a Defense mission as players can maximize the amount of enemies disarmed.
Bugs
Sometimes, if Radial Disarm is used on enemies that have already been affected by it, they won't be stunned like they normally should.
Rarely, using Irradiating Disarm on infested enemies coated in the Ancient Healer aura may cause none of the infested to take a Radiation proc except the healer.
Casting Radial Disarm rapidly with Natural Talent can cause a 70 second cooldown.
Mesa stands her ground, holsters her current weapon, and draws her Regulators pistols as her secondary Exalted Weapon. While Peacemaker is active, a focus ring appears in the form of a blurred reticle which can be aimed at enemies. Holding the fire button will cause Mesa to auto-target random enemies inside the focus ring up to 50 meters away. Each gunshot will reduce the size of the focus ring until its field of vision is reduced to 15°.
In order to achieve target acquisition with Peacemaker, enemies have to be within range and positioned inside the focus ring, and the player's camera must have line of sight with the enemy.
The formula used to calculate the field of view angle with mods is non-linear and currently unknown.
Mesa's Regulator pistols inflict 50 damage per shot, with a damage multiplier of 1.00x / 1.15x / 1.33x / 1.50x.
This buff is applied twice, additively with each other.
Each buff stacks additively with Damage mods, such as Hornet Strike.
Fire Rate will ramp up from 25% to 100% over 3.5 seconds when firing. Fire Rate will reset if the fire button is released or if no gunshots are fired during a brief period of inactivity.
The Regulators are automatic; players need only to hold down the fire button to continue firing.
Peacemaker costs 25energy to activate. It then drains 15 energy per second while active and will remain active until Mesa's energy is depleted, or the ability is deactivated by pressing the ability key again.
Peacemaker's energy drain is not converted into shields by Augur Mods.
Drawing the Regulators is affected by Casting Speed.
Holstering the Regulators upon deactivation is affected by holster speed mods, but not cast speed.
While Peacemaker is active, Regulators are the only weapon Mesa can use. She also cannot activate any of her other abilities with the exception of Ballistic Battery.
Ability Synergy:
Peacemaker's Regulators can contribute to Ballistic Battery's charge counter, and Ballistic Battery can be deactivated while Peacemaker is active. Stored damage can be applied to a single Regulator shot.
Peacemaker's Regulators are affected by Shooting Gallery's damage bonus.
After a very brief "draw" period, Mesa is completely immobile and vulnerable to damage while Peacemaker is active, although she will resist crowd-controlling status effects and knockdowns.
The Regulators are Mesa and Mesa Prime's signature Exalted Weapon, summoned by activating the ability Peacemaker. Unlike other ranged weapons, the rapid-firing Regulators will automatically target and shoot at enemies within a large aiming circle directed by the player, removing the need for precise aim.
Casting Shatter Shield before activating Peacemaker is recommended, due to Mesa becoming vulnerable to attacks while Peacemaker is active.
While you cannot initiate movement while channeling Peacemaker, it can be cast while falling or immediately after initiating a bullet-jump, thus allowing you to start shooting before you actually arrive at your intended location. Channeling Peacemaker also makes you immune to the stagger effect you would normally receive upon hitting the ground after a long fall.
You can also be moved around by certain entities/enemies, including the Domestik Drone.
Limbo makes a great complement to Mesa when using this ability, as using Banish on Mesa allows her to become immune to enemy damage while also allowing her to damage enemies outside of the Rift Plane with her Peacemaker. If Cataclysm is cast anywhere with enemies inside Mesa may take damage if they fire at her, even she is not inside the Cataclysm but still under the effect of Banish.
While in the Rift Plane you should deactivate Peacemaker whenever possible to regain energy, especially in a group with multiple Energy Siphon Mods.
Similar to most Warframe abilities, Peacemaker targets the enemy's torso to inflict damage. It is particularly effective against Corrupted Vor as all Regulator pistol shots will always hit Vor's energy core, the only body part where he is vulnerable to damage.
Since Mesa stays immobile with Peacemaker active, it's highly suggested to bring a Sentinel with Vacuum equipped to pick up Energy Orbs and prolong the duration Peacemaker stays active.
Because of the red hue that affects the scenery around you, using a red energy color can make it more difficult to see the focus ring, which uses the energy color.
Slotting Crimson Archon Shards for Secondary Critical Chance instead of Ability Strength benefits Peacemaker's overall damage output better due to the higher chance of her Regulators triggering the base 3x critical multiplier rather than the capped additive bonus afforded by increased Ability Strength.
Prioritizing Secondary Critical Chance for the Regulators does have the cost of the Shards not augmenting Mesa's other abilities that would otherwise benefit from Ability Strength.
Bugs
Shots ignore both friendly and hostile snowglobes (Mesa can hit targets on the opposite side of a snowglobe whilst standing outside of it) and certain obstacles (such as Defense cryopods).
Occasionally the draw animation for the Regulator pistols may not occur.
Peacemaker's fire rate is severely hindered when the user's FPS is lower than 30, with lesser FPS resulting in lesser fire rate.
Peacemaker can be utilized by Specters and still allow them to move to a certain degree of minimal slowdown.
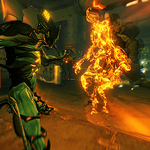
Nekros expends 25energy to lunge at a single enemy target within 20 / 30 / 40 / 50 meters with telekinetic force, dealing 100 / 200 / 350 / 500Impact damage and Knockback. If the target is at or below 25% health, it is instantly killed.
The target's soul is violently ejected from its body, becoming a high-velocity Ragdoll projectile. Enemies that make contact with the projectile are dealt 50Impact damage. When the projectile makes contact with a hard surface, 100Impact damage is inflicted in an area of effect.
Affected enemies are knocked back, and both damage sources can be increased with headshots.
Ability Synergy: A target killed by Soul Punch summons a friendly Shadows of the Dead Shadow copy of the enemy target. If the target survives, they become Marked for Harvest for 3 seconds, creating their Shadow copy if killed while marked.
If the max Shadows count is reached, all active Shadows are healed to full health instead.
Despite having a noticeable visual and audio effect, the skill is perfectly silent and can be used as a means of disposing enemies without alerting nearby units during stealth playthrough.
However, if an enemy is not killed by the ability, the enemies will be alerted.
Can be used while performing many actions without interrupting them, including reloading, charging, and shooting.
Under right circumstances it's possible to exploit physics system to launch ragdolls up with great speed. (Usually when enemies are grouped tightly together or there is an object right behind the enemy).
Best effectiveness can be achieved by standing higher than the target.Optimal height difference is when projectile can hit the ground near the target. Using this method will usually send surrounding enemies flying.
If used correctly, soul punch can be used to send enemies out of the map, which allows players to eliminate dangerous enemies quickly. Also, soul punch can be used to force finishers upon enemies.
The ability will NOT damage other Tenno in the Conclave, however the knock-back effect will still occur. This is useful for stunning the enemy or simply knocking them off the edge of the map.
Reviving allies using Soul Survivor augment mod also counts toward Challenges that count Revives.
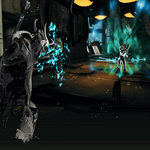
Oberon expends 25energy to smite an enemy target with hallowed light up to 20 / 30 / 40 / 50 meters away, dealing 150 / 200 / 300 / 500 damage distributed evenly between Impact and Radiation as well as a guaranteed Knockdown and Radiation status effect.
The affect target emits 3 / 4 / 5 / 6 orb projectiles that seek out enemies within 5 / 7.5 / 10 / 12.5 meters from the main target, over a duration of 12 seconds. Each orb deals 75 / 85 / 100 / 150Radiation damage, plus 15% / 20% / 25% / 35% of the main target's maximum health and shields divided among the number of orbs, as well as a guaranteed Stagger and Puncture status, and a ?%Radiation status chance.
Orb Damage is affected by Vigorous Swap and other modifiers that affect abilities that deal "weapon damage", including damage boosting abilities such as Eclipse.
If there are more orbs than enemies in homing range, the remainder will fire in random directions bouncing off of any environmental surface they touch, locking on to the first enemy which crosses into their homing range.
Multiple orbs from a single cast can hit the same enemy if they travel close enough to the target after bouncing.
Smite is a one-handed ability and as such will not interrupt full actions such as reloading, shooting, or charging weapons.
Subsuming Oberon to the Helminth will offer Smite and its augments to be used by other Warframes.
Smite Infusion is a Warframe Augment Mod for Oberon that allows Smite to be held on cast, creating a wave of energy traveling outward from the user that temporarily grants the caster and nearby allies additional Radiation damage to all attacks.
Smite's Impact / Radiation damage type is particularly effective vs Corpus Shields and Grineer Alloy Armor, and less effective against most Infested units.
Try using Smite's guaranteed Radiation proc to misdirect enemies by turning a high-threat target and nearby foes against each other.
Moreover, the additional Puncture proc forces enemies to expend more time fighting against their confused comrade.
Bugs
When affected by the critical chance buff from a Smeeta Kavat's Charm, the orbs will deal orange critical hits, though will only do 0-1 additional damage depending on target. (E.g: level 125 Chargers receive 0 additional damage from the critical hits, but level 125 Bombards receive 1 more damage, tested at 154% Ability Strength.)
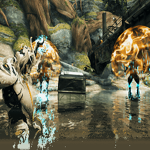
Oberon expends 100energy to lift all enemies within 8 / 10 / 12 / 15 meters up into the air and violently slams them to the ground, dealing 500 / 750 / 1000 / 1250 damage distributed evenly between Impact and Radiation with guaranteed Knockdown and Radiation status, plus an additional 100 / 225 / 400 / 625 damage to enemies already affected by Radiation status effect. An enemy that dies by the effect of this ability has a 25% / 35% / 45% / 50% chance of spawning a Health Orb.
Affected enemies that survive the impact will emit an intense flash of light, Blinding surrounding enemies within 2.5 / 3 / 3.5 / 4 meters that were unaffected by the initial cast, for 1 / 2 / 3 / 4 seconds.
Ability Synergy: Enemies that survive Reckoning while standing on Hallowed Ground will have their armor permanently reduced by 10% / 20% / 30% / 50%.
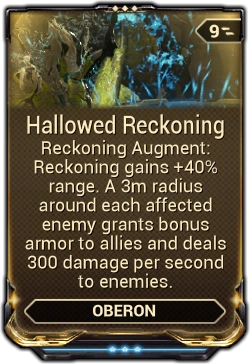
Hallowed Reckoning is a Warframe Augment Mod for Oberon's Reckoning that makes enemies hit drop patches on the ground, dealing Radiation damage over time to enemies and provide armor to allies standing on them. It also passively increases Reckoning's range.
With one player using Corrosive Projection, 100% armor strip can be achieved at 164% Ability Strength.
Use Reckoning when surrounded by a large group of enemies to maximize its offensive effects and health orb generation.
Similar to Smite, Reckoning's Impact / Radiation damage type is particularly effective vs Corpus Shields and Grineer Alloy Armor, while being less effective against most types of Infested units.
Reckoning's widespread Radiation proc can be used to tactically nullify the threat of a large area of enemies, relieving allies outside of the area (temporarily) from needing to deal with them.
Enemies blinded by Reckoning's outer flashes are vulnerable to melee finishers.
With the health-to-energy conversion of an equipped Equilibrium mod, dropped health orbs from Reckoning may meet or exceed the ability's energy cost.
Pair with the Health Conversion mod to gain additional armor from Reckoning's health orbs.
Against higher level enemies, Ability Strength benefits health orb generation by increasing Reckoning's potential to kill.
Using Smite and Hallowed Ground to confuse enemies before using Reckoning, successfully increasing damage output.
Reckoning already has a 100% chance to confuse targets, increasing its own damage with further casts.
Bugs
Occasionally, if Oberon is knocked down just as Reckoning is cast, enemies will be attacked as normal without Oberon doing the skill animation. Only upon standing up from being previously knocked down does Oberon then perform the animation.
Casting Smite then immediately casting Reckoning removes the casting animation of Reckoning, allowing for player movement while casting Reckoning.
Rarely, spamming the ability on a group of enemies will make some enemies hover permanently in the air, much to the effect of Bastille. This may be caused by an enemy that is being lifted is struck again by the ability but not brought down.
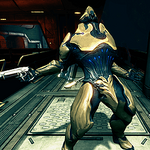
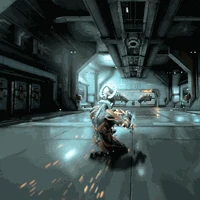
Rhino expends 25energy to charge forward with aggression, covering a distance of 6 / 8 / 10 / 12 meters at a speed of 40 / 42 / 44 / 48 meters per second. Enemies within 1.5 / 1.6 / 1.8 / 2 meters of Rhino are dealt 150 / 250 / 450 / 650Impact damage and are Ragdolled.
Rhino's Health is immune to damage while charging.
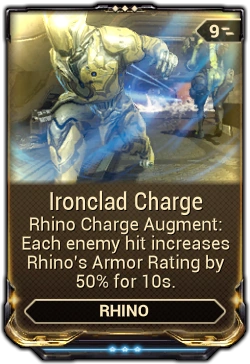
If Rhino Charge is successfully recast within a window of 1 second after the previous cast, its damage will be multiplied by 2x, its charge range will be multiplied by 1.25x, and its energy cost will be reduced by 50%. Any additional successful casts within the "Combo Window Time" will multiply Rhino Charge's damage by 4x, multiply its charge range by 1.5x, and reduce its energy cost by 75%.
Energy cost reduction is applied to Rhino Charge's modified activation cost. As an example, with a maxed Streamline the next successful cast will consume 25 × 0.7 × 0.5 = 8.75 energy, and any successful cast thereafter will consume 25 × 0.7 × 0.25 = 4.375 energy.
The duration of the combo window and the respective damage multiplier for the next successful cast are displayed underneath the HUD's targeting reticle.
If no casts are performed within the combo window, the damage, charge range, and energy cost will reset.
Ability Synergy:
If Iron Skin is active, damage from Rhino Charge will have a 100%Blast status chance.
Rhino Charge deals an additional 100% damage to enemies affected by Rhino Stomp.
Can be used to pass through Laser Barriers unharmed in most cases.
When under the cloaking effects of Ghost and Stalk, the cloak will end only when all nearby enemies are killed or from moving out of range.
Can be activated while jumping, sliding, clinging to a wall, or executing a front flip.
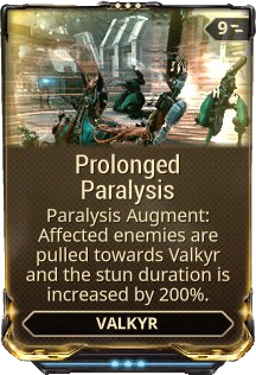
Valkyr expends 5energy and unleashes 33% of her shields, Stunning enemies 5 / 7 / 8 / 10 meters while damaging them by her current shields multiplied by 200% / 250% / 300% / 350% as Impact damage and Knockback with a strength of 400 / 600 / 800 / 1000.
Damage bypasses obstacles in the environment and is increased by body-part multipliers.
The shield percentage used in the damage calculation accounts for Valkyr's shields at the time Paralysis is cast, not after the shield drain has been applied.
As an example, if Valkyr has 150 shields and a max ranked Intensify at the time a rank-4 Paralysis is cast, Paralysis will deal: Shields × 3.5 × (1 + Strength Mods) =150 × 3.5 × 1.3 = 682.5 damage.
Valkyr's shields will be reduced to: Shields × 0.67 =150 × 0.67 = 100.5 shields.
Stunned enemies are vulnerable to Finisher attacks. If the enemy cannot be attacked with a Finisher (either due to positioning or the enemy type), it will be susceptible to Stealth Damage Multipliers from melee attacks for the duration of the stun. As with other stealth attacks, coming into physical contact with the enemy while attacking will temporarily remove the damage bonus.
Shields drained this way will reset the shield recharge delay, as if Valkyr was hit.
Installing a decent Redirection and Fast Deflection mod helps by greatly improving the damage output as they are being utilized by this ability.
Redirection increases the damage dealt through greater total amount of shields lost.
Fast Deflection helps recover lost shields quickly.
Extended uses of this ability will recommend installations of Vitality and Steel Fiber mods in order to overcome damages after the Paralysis effects.
The way Paralysis is treated is similar to Banshee's Sonic Boom dealing a blast with tremendous knockbacks, but doing a full 360 angle of damage with half of the original range.
Paralysis can be used within the duration of Hysteria allowing Valkyr to expend her shields with no trouble receiving damage. This will still drain her shields in spite of her invulnerability.
This ability can be spammed due to its very low energy cost, this will heavily divide shields down to 0 if expended drastically, but it will give potential stunlocks to lesser enemies effectively.
This ability synergizes well with Squad Shield Restore, as burst of shield recharges allow Valkyr to spam full loads of shield damage at a group of enemies more effectively.
In Sabotage Missions which you need to destroy several small cylinders after the reactor core has been exposed, a single Paralysis is sufficient to quickly destroy all the cylinders.
Bugs
When used repeatably, Valkyr's scream may sometimes skip over itself and not play. This is merely audible however.
Paralysis only does approximately half the damage it should.
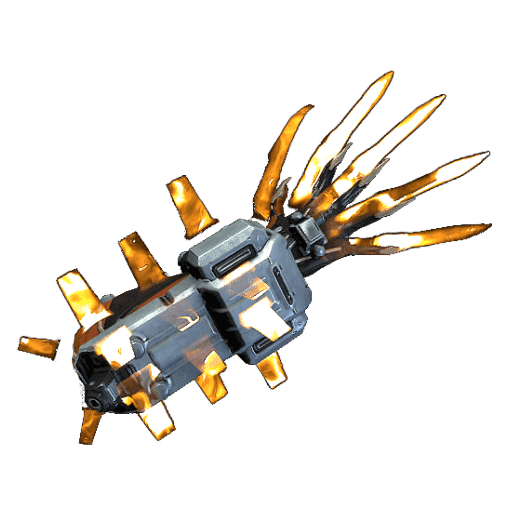
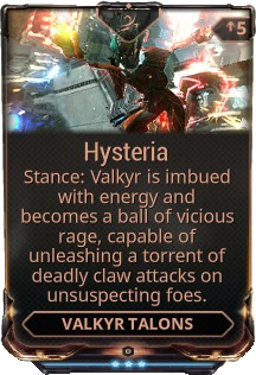
Overcome with rage, Valkyr unleashes a pair of energy talons, the Valkyr Talons, as her melee Exalted Weapon. Normal attacks deal 100 / 125 / 200 / 250 damage within 2 meters and all of Valkyr's attacks heal her for 1% / 2% / 4% / 5% of the damage dealt.
Damage is distributed evenly between Impact, Puncture, and Slash.
As an example, with a maxed Pressure Point, Shocking Touch and Intensify, the normal attacks of a rank-3 Hysteria will deal Base Damage × (1 + Damage Mods) × (1 + Elemental Mods) × (1 + Strength Mods) = 250 × (1 + 1.2) × (1 + 0.9) × (1 + 0.3) = 1,358.5 damage.
The mods that can be equipped on and affect Valkyr Talons include:
While officially Set Mod bonuses do not affect Exalted Weapons (with the exception of the Sacrificial Mod Set), the Gladiator Mod Set can still apply if equipped on Melee and not on the Exalted Weapon itself.
Hysteria's innate lifesteal is calculated from the total damage of Valkyr's melee attacks after resistances are applied. Hysteria's lifesteal is also additive when combined with other sources of lifesteal
For example, a maxed Life Strike and a rank-3 Hysteria will yield Base Lifesteal + Lifesteal Mods =5% + 20% = 25% lifesteal on heavy hits.
Certain attacks will still push Valkyr away, and shock waves will cause her to bounce into the air. However, these attacks will not force Valkyr to the ground.
Statuses that were already active when Hysteria was cast will not be removed. However, Valkyr will be immune to their damage regardless.
Valkyr emits an aura with a radius of 5 meters around her while Hysteria is active, and 30% of the total damage she ignores is stored. If any enemies within this aura have Line of Sight of Valkyr when Hysteria is deactivated, Valkyr will be dealt 25% of all stored damage as Impact damage.
The aura will continue to grow up to 20 meters and each kill reduces it by 1 meter. The aura cannot be decreased below 5 meters.
Stored damage is calculated from the total damage Valkyr ignores before resistances are applied.
The amount of stored damage can be monitored at the top right of the HUD under Hysteria's ability icon.
Stored damage dealt bypasses shield gating and can kill instantly if too large.
Stored damage is reset upon swapping weapons.
Highlighted enemies become unmarked if Valkyr moves out of range, negating the damage taken when Hysteria expires.
Since enemies need line-of-sight, invisibility prevents the damage.
After activation, a percentage counter will appear on the ability icon. The percentage increases from 0% to 100% over the course of 40 seconds.
Hysteria costs 25energy to activate, then consumes 2.5 energy per second at 0% while active. The cost will increase by an additional 2.5 until it caps out at 15 energy per second at 100%. Hysteria will remain active until either Valkyr's energy is depleted, or the ability is deactivated by casting it again (default 4 ).
Hysteria's energy drain is not converted into shields by Augur Mods.
Hysteria is affected by and can trigger Warframe arcanes, Exodia Might , and Melee Crescendo (even though the benefit from exodia might is minimal and it does not share the same combo counter as the melee weapon thus not benefiting directly from Melee Crescendo).
While Hysteria is active, Valkyr can cast other abilities and use primary and secondary weapons. Switching weapons will disable Hysteria's effects, including making her vulnerable to damage again; it will also pause the energy cost increase but will continue to drain energy at the current rate.
Hysteria comes installed with its own unique stance. Additional combos will be unlocked as Hysteria increases in rank.
Hysteria is a unique Stance exclusive to Valkyr Talons that can only be acquired and used by activating Valkyr's fourth ability, Hysteria. This Stance overrides the Stance on any currently equipped melee weapon for as long as Hysteria remains active.
A "sweep attack" is an arcing melee strike that intends to hit an enemy with the edge of the blade (the length of obround melee hitbox).
A "thrust attack" is a melee strike that intends to hit an enemy with the tip of the blade (the rounded edge of obround melee hitbox).
A "360/spin attack" is a sliding sweep attack that hits targets around the player (not always in a 360° arc, but is usually above 180°).
A "direct slam attack" is a melee strike that hits a single target at the epicenter of a slam attack.
A "radial slam attack" is the area-of-effect component of the melee slam attack. Affected by the Seismic Wave mod.
A "ranged attack" is any melee attack that launches a ranged projectile or can hit targets beyond melee range.
View Full Legend
Average Damage Multiplier per second only applies to single-target DPS calculations.
Note that hits marked as "Radial Slam Attack" will not apply at the epicenter of a single target hit so these will not be accounted for in Avg Dmg Multi/s calculations.
Combo animation lengths are approximate and are only accurate within a few tenths of a second.
Each tile marking in stance preview gifs are 2m apart.
Combos labeled with an asterisk (*) are shared between weapons within the same weapon type.
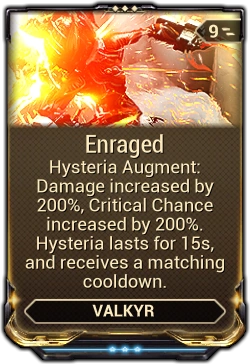
Enraged is a Warframe Augment Mod for Valkyr's Hysteria that increases its damage and critical chance but fixes its duration to 15 seconds and adds a matching cooldown. The base Energy cost is also increased to 50, while the Energy drain over time is removed.
There may be a dark red hue for the duration of Hysteria, making it difficult to see enemies. This is especially problematic if Infested Parasites are nearby.
Turning 'Color Correction' off in Options > Display can alleviate this issue.
Her invulnerability can be taken advantage of in reviving teammates in exchange for consuming energy and not attacking enemies with her powerful claws.
This can also be used to escape powerful opponents at the middle point of this ability. Allowing greater hit and run tactics.
It's preferable to use Steel Charge over Growing Power when modding for pure damage as the former adds more damage to Hysteria than the latter.
It's recommended to activate Melee Auto-targeting System in the options as Valkyr's awkward attack animations may miss a lot.
Players who suffer low FPS (Frames per second) may want to avoid attack speed boosts, such as Warcry, while using Hysteria. High attack speeds can result in a loss of DPS as melee attacks are "semi-automatic".
Heavy Attacks in Hysteria open enemies to Finishers, allowing you to reliably use the damage boost without spending energy on her Paralysis ability.
This finisher also knocks enemies down, allowing for a successive ground finisher for a quick burst of high damage.
Bugs
Using Hysteria the moment you are downed by enemies will cause you to bug. Sometimes, you will only be able to use your actual melee weapon, but it will swing as though it is your claws; Other times you will be able to use your other weapons, and all while being invincible. You must wait until the effect ends for the bug to clear.
Attacks outside the vulnerability radius of Hysteria are still counted to the damage received in the Hysteria status, however these additional points do no effect at the end of the duration.
If only a melee weapon is equipped in the player's loadout, casting Hysteria while holding either a Codex or Synthesis Scanner will cause Hysteria's attacks to instead use the equipped melee's quick-attacks, while also rendering both combos and blocking unusable.
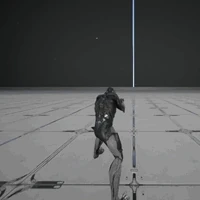
From the ground, charge and release to launch Zephyr into an airborne hover. From the air, tap to dash forward, or aim down to dive bomb enemies below.
Zephyr generates a powerful gust of wind for propulsion, expending 25energy while grounded or 12.5 energy while airborne, to soar toward the aiming reticle at a speed of 30 meters per second for 1 second. While in flight, Zephyr rides an air current with a 1.5 / 1.6 / 1.8 / 2 meters radius, which inflicts ? / ? / ? / 750Slash damage and Knockdown to all enemies it contacts.
If cast from the ground, aiming at any direction propels Zephyr forward, while aiming straight down causes Zephyr to skyrocket upward.
If cast while airborne, aiming at any direction propels Zephyr forward, while aiming straight down or within a 45 degree angle toward the ground causes Zephyr to perform a Dive Bomb technique.
Zephyr maintains a portion of the momentum generated by Tail Wind once the dash ends.
If Zephyr slams into an obstacle such as a wall during her dash, she can immediately break away from the surface by performing a wall jump (default Spacebar ).
At the end of each Tail Wind dash, Aim Glide will be reset. To repeatedly aim glide without landing, Zephyr must first stop aiming then aim down sights (default hold RMB while in midair) to reactivate this maneuver after each successive dash.
Zephyr executes different aerial combat techniques with Tail Wind depending on the activation conditions:
While Zephyr is airborne, casting Tail Wind directly downward or within a 45 degree angle toward the ground, causes Zephyr to nose dive to the location at an initial speed of 1 / 2 / 3 / 5 meters per second; during the dive, Zephyr will continue to accelerate until impact. On impact, Zephyr creates an explosion in a 4 / 5 / 6 / 7 meters radius around the landing point that inflicts ? / ? / ? / 4,500 base Impact damage amplified by height of the dive and Knockdown.
Total explosion damage depends on the height at which Tail Wind is activated:
Total explosion damage is calculated by multiplying the base damage by 0.2 × Activation Height (e.g., activating Tail Wind at 15 meters will yield 0.2 × 15 × 4500 = 13,500 damage at max rank).
Activating Dive Bomb at a height less than 4 meters will only inflict base damage.
Damage bypasses obstacles in the environment and does not decrease with distance.
Dive Bomb will only activate Heavy Impact if the required height is achieved.
Performing a dive bomb during a Bullet Jump causes Zephyr to softly rebound away from the landing point and back into the air.
Hover Glide
While Zephyr is airborne, holding down the ability key then releasing it (default 1 ) causes Zephyr to expend 12.5 energy then drain 5 energy per second to immediately arrest her momentum then sustain her altitude in a continuous hover. While hovering in the air, Zephyr may attack with, switch and reload her weapons, as well as cast her abilities; as she hovers, Zephyr may also glide along the horizontal plane using the movement keys (default WASD ) at a reduced movement speed, accelerate by using Sprint (default hold LShift ), and slide toward the directional input (default WASD + hold LCtrl ) to strafe quickly.
Hover Glide's energy drain is not converted into shields by Augur Mods.
Hover Glide will automatically deactivate when Zephyr's energy pool fully depletes, upon touching a horizontal surface, performing a Tail Wind dash, dodge roll (default tap LShift ), jump (default Spacebar ), bullet jump (default LCtrl + Spacebar ), quick melee attack or melee slam attack (default E ).
Cannot be activated while Zephyr is grounded. If already active, holding down the ability key results in a Tail Wind dash.
Activating Tail Wind multiple times allows Zephyr to propel herself farther into the air, effectively simulating flight. There is a slight cooldown between activation.
Can be used to pass through Laser Barriers unharmed in most cases.
Casting Tail Wind interrupts reloading.
Air current visual effects are affected by Zephyr's chosen Warframe energy color.
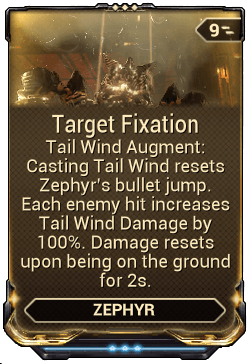
Target Fixation is a Warframe Augment Mod for Zephyr that increases Tail Wind's damage for every enemy it hits, and applies a 2-second grace period when touching the ground before the buff is lost. It also resets double jump and bullet jump.
Propelling from the ground is inefficient, it's recommended to jump and dash vertically for more distance.
Aim glide can be used to significantly increase the distance traveled, as all momentum is conserved for the duration of the aim glide.
Bugs
After second activation of this ability gravity increases to normal until Zephyr lands (confirmed as bug in Community Hot Topics).
Occasionally, when "Tail-winding" closely to an Extraction point on Solo, Zephyr's body will be frozen in Tail Wind state, as she supposedly locks herself into the Extraction pod with all her limbs properly placed.
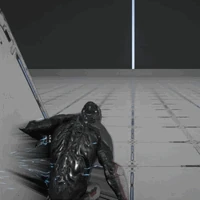
While Zephyr is in the air, she will nose dive into the ground at an initial speed of 1 / 2 / 3 / 5 meters per second. Upon impacting the ground, Zephyr creates an explosion that deals a minimum of 100 / 150 / 200 / 250Impact damage within a 4 / 5 / 6 / 7 meter radius. The final damage depends on the height at which Dive Bomb is activated:
Final damage is calculated by multiplying the minimum damage by 0.2 × Activation Height (e.g., activating Dive Bomb at 15 meters will yield 0.2*15*250 = 750 damage at max rank).
Activating Dive Bomb at a height less than 4 meters will only inflict minimum damage.
Minimum damage and speed are affected by Ability Strength, and the damage does not decrease with distance.
Damage bypasses obstacles in the environment, and affected enemies suffer a Knockdown.
Dive Bomb will always activate Heavy Impact due to the speed of the dive.
Can only be cast while in the air.
Tips & Tricks
This ability synergies well with the Heavy Impact mod, as the instant acceleration provided by the Dive Bomb gives enough speed for the falling effect to deliver great damage at a large radius.
A max-rank Tail Wind jump with a Dive Bomb at the apex should land with enough speed to get 3x the Heavy Impact base damage (4x is possible if you jump a few meters higher using a crate). With just these three mods at max you can easily get 250 + 250*3.6 + 1200 = 2350 damage for 25 + 25 energy (Tail Wind blast-off, Dive Bomb smash and Heavy Impact blast).
Maximization
Maximization is a form of specialization: mods may be blended to result in values that vary between the top-end limits listed here. Click any maximized link to learn how to build it.
Without Energy Conversion, increases speed to 16.15 meters per second and minimum damage to 807.5.
Increases the cost to 38.75 energy.
Bugs
There seems to be a bug that greatly inhibits her damaging range, failing to damage anything you directly hit or is at point blank range (during the 2/7/14 Livestream the developers confirmed that it appears the damage is being applied below the ground level rather than ground level. As a result, enemies are effectively out of range).
There's another bug that makes her use her standing animation and drop down without a damaging explosion if she is too close to the ground (and this range is quite large for such a bug, unless unintended).
Trivia
Script error: The function "Proc" does not exist. damage can be procced on players by enemies, however only the slight visual effect and sound effect will play, and the player will not be staggered nor have the Status displayed on their hud.
Script error: The function "Proc" does not exist. damage is one of three base damage stats (the other being Script error: The function "Proc" does not exist. and Script error: The function "Proc" does not exist.) which replaced the previous Bullet and Physics Impact damage types of weapons.
")
")
")
")
")
")


