Script error: The function "Proc" does not exist. Damage is one of the three physical damage types. It is effective against all forms of flesh, but it stops short against Grineerarmors.
Script error: The function "Proc" does not exist. damage's unique status effect is Bleed, a DoT (damage-over-time effect) that inflicts 35% of your weapon or ability's base damage per tick (7 ticks in 6 seconds) as Finishing damage, which bypasses shields and is not affected by armor or enemy resistances.
Mods that boost finishing damage does NOT affect slash procs themselves, since slash procs go off of the base damage of the weapon, which these mods do not increase. It will however, boost slash procs that occur when dealing a finisher attack on enemies, since these mods will essentially boost the base damage of the weapon.
Multiple instances of the effect can stack on the same target with each instance having its own timer.
Base damage mods and combo multipliers will increase the damage of bleed ticks while mods increasing Script error: The function "Proc" does not exist. damage will not. If the proc occurs together with a headshot and/or critical hit, the bleed ticks are also multiplied by a headshot multiplier and/or critical damage multiplier respectively. In case of melee weapons, another 8x stealth damage multiplier is applied to the bleed ticks if the Warframe is in a stealth state.
While bleeding, the target will have small bursts of blood come out every fraction of a second where they were hit to trigger this proc. Corpus proxies will have a similar effect, only with what seems like oil coming out instead of blood.
Weapons with Script error: The function "Proc" does not exist. damage as the highest damage type have a tendency to dismember corpses into multiple parts, which is considerably valuable for a Nekros using Desecrate as each part can spawn a Health Orb and some loot. Note that this characteristic may be disabled due to gore settings or regional locks: the Japanese version of WARFRAME, for example, does not allow for as much corpse dismemberment.
Type Effectiveness
Script error: The function "Faction" does not exist. Health
Script error: The function "Proc" does not exist. Modifier
Script error: The function "Faction" does not exist. Health
Script error: The function "Proc" does not exist. Modifier
Script error: The function "Faction" does not exist. Health
Script error: The function "Proc" does not exist. Modifier
These weapons deal the majority of their physical damage as Script error: The function "Proc" does not exist.. The damage ratio is important for physical damage status effects, as the game weights the likelihood of which proc occurs according to physical damage ratio. Hence, these weapons proc Bleed more than Knockback or Weakened.
Ash expends 25energy to throw 1 / 1 / 2 / 2 shuriken to strike enemies standing within a 6 meter radius around him, or home in on enemies within 60 meters and a 90° angle of the aiming reticle. Each Shuriken inflicts 100 / 250 / 350 / 500Slash damage with a guaranteed Status Effect on hit.
The Bleed DoT inflicts 43.75% of the initial damage per tick for a total of 9 ticks over 9 seconds, due to Ash's passive. The Bleed damage bypasses armor.
Should Shuriken hit an enemy's head, the Bleed DoT will inflict 87.5% of the initial damage per tick for the same duration.
Shurikens do not require direct line of sight to home in on enemies.
Shurikens can bypass obstacles in the environment to strike targets behind walls and objects.
Shurikens will travel toward the aiming reticle on a slight angle if no enemies were standing close to Ash or within the targeting range and homing angle. Enemies will still receive damage and proc if hit by these Shurikens.
Can be cast in rapid succession and since Slash procs ignore armor and can be stacked, this can bypass the high scaled armor of Grineer units.
Shuriken can be used to seek out nearby hidden enemies due to its homing feature.
However, Shuriken will often try to seek enemies that you've run past, making it miss both the enemy you ran past and the target you were trying to hit.
Using the Seeking Shuriken augment, Ash can strip armor of any enemy entirely with only 143%Ability Strength. It works great on bosses, especially in Sorties when they are high level.
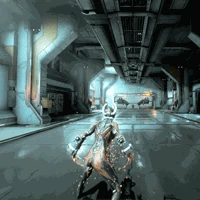
Excalibur expends 25Energy to dash forward 6 / 8 / 10 / 12 meters to cut enemies down with his Exalted Blade, automatically chaining to additional enemies within ? / ? / ? / 7 meters. Each strike inflicts 100 / 125 / 200 / 250Slash damage with a guaranteed Slash proc and Knockdown.
Slash Dash is affected by Aim Glide.
Slash Dash is affected by momentum, but will not change momentum outside of its animation. Thus, whichever way you were going before you cast Slash Dash you will continue to go unless stopped, by other means, at same speed. This will affect how far your Slash Dash will go when not targeted.
Chained Slash Dash can be cancelled by jumping or rolling.
Slash Dash gains 25% additional damage for each combo multiplier, up to a 3.75x damage multiplier at 12x combo, or 4.0x with Venka Prime equipped at 13x combo.
Mods equipped on Exalted Blade do not affect Slash Dash unless it is active.
Slash Dash's damage composition is not affected by Chromatic Blade.
Slash Dash's cone length is not affected by melee range mods (e.g., Reach).
Every instance of damage adds to the Melee Combo Counter regardless of the amount of enemies hit or if Excalibur physically made contact with the target.
Excalibur has Health invulnerability to damage during Slash Dash. Shields will still take damage and Energy Draining affects can still be applied to Excalibur, such as from Ancient Disruptors.
Airborne enemies, such as Hellions and Ospreys, can also be targeted, but are still difficult for Slash Dash to traverse to unless the aim button is held for Aim Glide physics to take effect.
If there are no enemies within its targeting area, Slash Dash will make Excalibur dash forward in the direction of aim, allowing it to be used as a mobility aid when reaching high places.
Can be used to pass through Laser Barriers unharmed in most cases.
Can be used while jumping, sliding, forward flipping, wall running or clinging to a wall.
Slash Dash can damage enemies across the Rift Plane.
Slash Dash will hit through a Grineer Shield Lancer's Shield.
With high Ability Range and not aiming at enemies, players can launch themselves into the air, travel with high velocity and long distance.
Can be used to pass through Corpus laser doors mostly unharmed.
Perfect for medium-distance traveling.
With the proper mods this is one of the most damage-efficient AoE abilities in the game, doing massive damage to multiple targets for very little cost.
Invulnerability allows players to deal with enemies by repeatedly casting Slash Dash without fear of damage from enemies or status procs during the animation. However, being that there is no invulnerability overlap between the end of the first cast and the beginning of the second cast, there is a small window for Excalibur to receive damage.
Casting Slash Dash while Exalted Blade is active will allow players to increase the amount of damage they deal and hit a larger amount of enemies without having to build for range.
Pressing the melee button at any time during the targeted Slash Dash cast will cancel the rest of ability's targets and summon your melee weapon instantly.
Bugs
It is possible to get stuck on an enemy during the duration of the ability, and in most cases the enemy will not take damage.
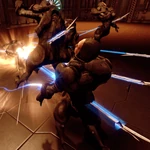
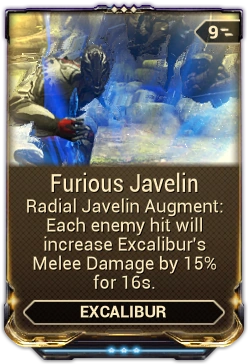
Excalibur expends 75Energy to summon javelins against enemies within a radius of 15 / 18 / 22 / 25 meters. Excalibur then drives his weapon into the ground, launching the javelins into their targets. Each javelin inflicts 500 / 650 / 800 / 1000 damage evenly distributed between Impact, Puncture, adn Slash, with a guaranteed Slash proc and Stagger.
While javelins do notpunch through objects or enemies, their striking position is optimized to ensure a successful hit on their targets when they spawn. This allows the javelins to bypass obstacles in the environment including walls, cover, and Grineer Shield Lancer shields.
Radial Javelin will not target enemies behind obstacles in the environment unless Excalibur has line of sight, or unless the enemy is aware of Excalibur within a short period of time (e.g., an enemy that spots Excalibur and runs out of view can still be targeted by Radial Javelin if the ability is used within a small time frame).
Equinox calls forth the serenity of night or calamity of day, surrounding herself in an aura of moonlight's gleam or sunlight's glare with a radius of 10 / 12 / 15 / 18 meters.
Mend & Maim expends 50Energy to activate, then drains 3.5 energy per second while active. Mend & Maim will end when Equinox's energy is depleted, Equinox is incapacitated, Mend & Maim is deactivated by casting Metamorphosis, or by pressing the ability key again (default 4 ).
Night Equinox emits a regenerative aura that grants 10 / 15 / 20 / 25Shield per enemy killed within range to Equinox and her allies inside the aura. Mend accumulates 50% / 55% / 60% / 75% of damage dealt to killed enemies' shield and health while they are within the aura radius. Upon deactivating Mend, all stored hitpoints are evenly distributed to the shields and health of Equinox and her allies within range.
Shields gained from enemies killed can accumulate Overshields.
The total amount of accumulated hitpoints is visible under Mend's icon beside Equinox's shield and health indicators.
Hitpoints restored per ally is calculated with the following expression: HP Restored per Ally = Total Accumulated HP ÷ (Equinox + Number of Allies).
When Equinox and her allies are healed, health restoration is prioritized over shield restoration (i.e., Mend will fully restore health before it can fully restore shields). This becomes apparent should there be an insufficient amount of stored hitpoints to completely heal Equinox and her allies within range when Mend is deactivated.
Allies are only healed up to their maximum shields and health; therefore, any excess accumulated hitpoints are effectively lost.
On Defense Objects, Mend restores up to 500 shields over 5 seconds which does not stack with similar restoration effects.
Day form
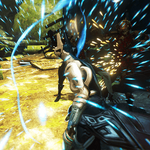
Day Equinox emits a lacerating aura that deals 75 / 100 / 125 / 150Slash damage with a 100% status chance and Stagger to all enemies within range. Maim accumulates 50% / 55% / 60% / 75% of damage dealt to killed enemies' shield and health while they are within the aura radius as Slash damage. Upon deactivating Maim, all stored damage is released in a violent burst that affects all enemies within range.
Aura damage is affected by Ability Strength, while the damage conversion percentage is not.
Enemies damaged by the aura are temporarily stunned.
The aura damage, proc, and stun will only apply once to each individual enemy.
The total amount of accumulated damage is visible under Maim's icon beside Equinox's shield and health indicators.
Upon deactivation the total accumulated damage is transformed into an area of effect Slash damage, which bypasses obstacles in the environment, against all enemies currently within the aura. Damage diminishes with distance but is not divided among the enemies.
AoE Damage (for each enemy) = Accumulated Damage × (1 - Distance to the Enemy ÷ Aura Radius)
Damage calculation here is before enemy's damage reduction
Casting Maim while Provoke is active will increase the aura damage.
Affected enemies are visually lashed by energy whips as they receive damage.
Maim can be recast to apply the aura damage, proc, and stun on previously affected enemies; however, recasting requires deactivation which will discharge all stored damage.
Aura range is visibly determined by the glistening wave-like energy on all surfaces around Equinox.
Enemies in range are highlighted in Equinox's energy color at its highest color intensity.
Cast delay of 2 seconds and deactivation delay of 1 second are affected by Casting Speed.
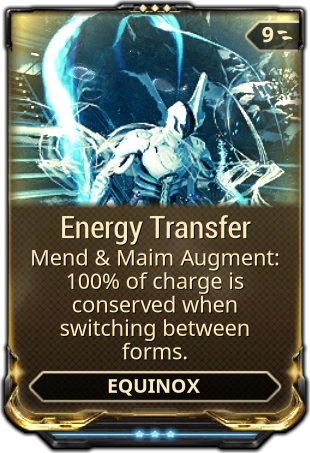
Energy Transfer is a Warframe Augment Mod for Equinox that allows Mend & Maim to remain active when switching forms via Metamorphosis, transforming the stored damage OR health charge into the corresponding opposite.
Mend can easily acquire a sufficient amount of charge to heal any allies and recover shields.
Mend & Maim will only absorb allies' damage on enemy health if a Warframe ability is involved.[citation needed]
While active, Mend & Maim will continue to store damage even in operator mode.
As Maim deals only Slash damage, it is less effective against heavily armored enemies like Grineer.
Maim is, however, quite effective against the Infested as they possess no armor and their health classes, except for Sinew, are vulnerable to Slash damage.
As damage accumulation/health conversion rate is not affected by Ability Strength, Mend & Maim wouldn't require high Ability Strength to be effective, especialy if built for effect upon deactivation.
Note that Mend's shield restored per kill is still affected by Ability Strength.
Misc:
Self status cleanse on cast Invulnerable during dash ? / ? / ? / 40 m/s speed 1 s wave duration Ragdoll on contact Corrosive status on initial hit and variable stacks in contact 50% recast energy discount
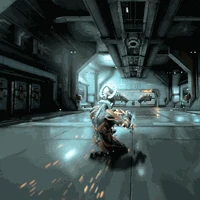
Hydroid expends 50energy to cleanse himself of all negative Status Effects while transforming into liquid and surging forward as a wave of water. While traveling in waveform, Hydroid becomes completely Invulnerable to damage, as his speed increases to ? / ? / ? / 40 meters per second over a duration of 1 second; the wave may be steered during its travel by changing the view direction, and Hydroid may halt his surge early by jumping (default Spacebar ). Enemies within 3 / 4 / 5 / 6 meters of the wave are Ragdolled and pulled along by the riptide, while dealt 100 / 200 / 250 / 300Corrosive damage when caught by the wave and when the wave breaks at the end of the duration, and are inflicted with a variable number of Corrosive Status Effects based on how long they are carried by the wave.
Tidal Surge's pull on enemies attempts to collect them in front of Hydroid's wave. At the end of the surge, pulled enemies are left clumped together at the location where the wave ended.
Hydroid jumping out of Tidal Surge will carry forth its momentum as he travels through the air.
Can be recast while active to remain in waveform and renew the surge for continuous travel toward a new direction. Tidal Surge's energy cost is discounted by 50% if cast again while Hydroid is surging.
Ability Synergy:
Hydroid's Passive allows the first Corrosive stack to remove 50% armor and is able to fully remove all armor at 10 stacks.
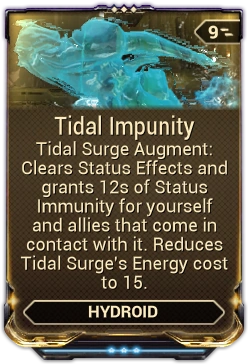
Tidal Impunity is a HydroidWarframe Augment Mod for Tidal Surge that allows Hydroid and all allies contacted by the ability to temporarily gain immunity to Status Effects, as well as removing already active ones. Also passively reduces Tidal Surge's base energy cost to 15.
It can be used to reach or pass certain areas of the map.
Bugs
Sometimes when Hydroid emerges from the wave, his "fin" will be gone.
On PS4, if Hydroid is in the middle of a Tidal Surge when all players reach the extraction point, he will be permanently stuck in his dashing pose and simply clip into the drop ship during the "Mission Complete" mini-scene that plays during the loot screen.
Nova expends 25energy to create 3 / 4 / 5 / 6 antimatter particles that orbit her and automatically launch themselves one by one every 1 second at enemies within 7 / 8 / 10 / 12 meters inflicting 80 / 100 / 120 / 150Slash damage. Each particle persists on Nova indefinitely until launched, granting her 5%Damage Reduction as they orbit her.
Damage reduction is capped at 90%, up to 18 particles.
While active, a counter becomes visible on the ability icon that displays the number of available particles.
Null Star cannot be recast until all particles have been used.
Subsuming Nova to the Helminth will offer Null Star and its augments to be used by other Warframes.
If Garuda subsumes Null Star or Nova subsumes Blood Altar, then the particles will not target enemies currently impaled by Blood Altar.
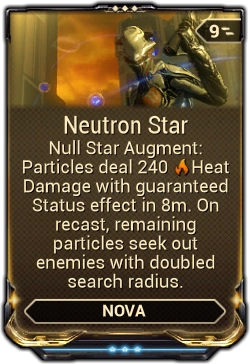
Neutron Star is a Warframe Augment Mod for Nova that allows all active Null Star particles to be detonated by pressing the ability key (1 ), seeking out enemies and dealing area-of-effect damage with a guaranteed Heat proc. Neutron Star's seek radius is doubled than that of Null Star's.
Because each particle grants 5% damage reduction, the maximum amount of damage reduction currently achievable is 90%. A total of 18 particles is needed to reach this value. This is achievable with at least 300% modded Ability Duration for a max rank Null Star.
When you are full on energy and come across extra energy spheres laying on the floor, you can cast a "free" Null Star and instantly go back to full energy. This allows you to easily keep stars active for each encounter.
Stars will launch themselves at unaware enemies, alerting them if they survive. This makes this ability sub-optimal for stealth oriented missions.
For offensive purposes, it can deal a good amount of damage to a single target by itself, dealing a total of 1200 damage after all six particles have launched (or more, if you are using Continuity and Constitution). Keep in mind that each particle will stun on hit, allowing you to continually stagger a target while you attack them.
Defensively, it is wise to use it before reviving an ally or accessing a terminal, as you are very vulnerable when doing either. Activating Null Star beforehand can stun or kill any enemies nearby that decide to attack you, preventing you from taking a lot of unnecessary damage.
On higher enemy ranks Nova may wish to use the skill in the same manner as Rhino's Iron Skin and recast it every time it is depleted as this will prevent her from being blindsided by enemies that are stuck in corners or behind obstacles. This is particularly important in Grineer tilesets because infantry will often jam themselves into corners on either side of the round doorways and open fire as soon as the player passes by.
To focus on keeping Null Star particles for damage reduction, it might be beneficial to have Ability Range lower than 100%. Lower range will prevent particles from seeking enemies at a distance.
Null Star particles will seek deactivated Bursa in range. It is advisable to stay away to prevent wasting the particles.
The Molecular Fission augment will allow Molecular Prime to restore up to two charges of Null Star per enemy killed while under its effects.
Bugs
If you are spamming melee attacks while you cast or right after you cast Null Star, it will render you unable to perform any melee attack for a short duration even though your cast animation is already finished.
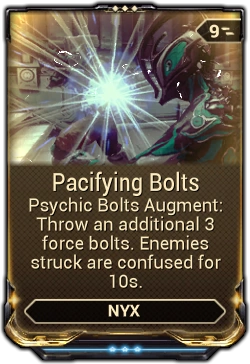
Nyx expends 50energy to launch 3 / 4 / 5 / 6 flying bolts of telekinetic energy toward her aiming reticle, which psychically seek out nearby enemies within her Line of Sight and 60 meters. Each psychic bolt dissipates and applies a Stagger on successful hit, temporarily removing enemy Armor and Shields by 20% / 40% / 60% / 80% and SlowingInfested by 5% / 10% / 15% / 20% for 5 / 7 / 9 / 11 seconds.
Shield strip removes a percentage of the current maximum value, as such it has diminishing returns on subsequent casts against the same enemies. Armor strip, however, is a percentage of an enemy's total.
Enemies can still gain bonus shield buffs (such as from Shield Ospreys), which are added after the shield strip value. This bonus shield buff can not be removed by Psychic Bolts.
Bolts will disappear after traveling for a few seconds if they do not strike targets.
Number of bolts in flight is shown on the ability icon. Once the bolts expire, the number on the ability icon will indicate how many enemies are currently debuffed.
Can be recast while enemies are still debuffed. Recasting will cancel the effect on previous remaining target(s).
Targeted enemies will briefly radiate energy as a visual indicator, and an audio cue will be played.
Psychic Bolts is a one-handed action. As such, it can be used while performing various maneuvers and actions without interruption.
With one player using Corrosive Projection, 100% armor strip can be achieved at 103% Ability Strength.
Psychic Bolts synergizes well with damage types that are effective against health classes (e.g. Cloned Flesh and Flesh), like Slash and/or Viral.
On the other hand, Corrosive or Magnetic, which is effective against armor/shield classes, gains less benefit from Psychic Bolts' full debuff.
A max rank Augur Secrets will put your Ability Strength at 124%, stripping defenses by 99% without removing their damage weaknesses to Corrosive, Radiation, and Magnetic.
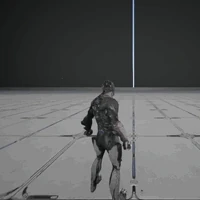
Valkyr expends 25energy to fire a grappling hook that covers a range of 25 / 40 / 60 / 75 meters. If the hook hits terrain, Valkyr will be pulled towards the hook's location. If an enemy is hooked, they will be Ragdolled and pulled towards Valkyr's location while dealt 300 / 400 / 500 / 600Slash damage.
Pull strength is affected by the distance Rip Line is cast, as well as the verticality of the angle.
The more vertical the pull of Rip Line is, the stronger it will be, making it far more effective at vertical traversal than horizontal traversal.
Rip Line can pull Valkyr across chasms and long gaps; however, Valkyr is not pulled the full distance to the hook's location.
If Rip Line is successfully cast within a window of 1 second after the previous cast, its damage will be multiplied by 200%, and its energy cost will be reduced by 50%. Any successful cast thereafter will multiply Rip Line's damage by 400% and reduce its energy cost by 75%.
Energy cost reduction is applied to Rip Line's modified activation cost. As an example, with a maxed Streamline the next successful cast will consume 25 × 0.7 × 0.5 = 8.75 energy, and any successful cast thereafter will consume 25 × 0.7 × 0.25 = 4.375 energy.
Combo window cannot be decreased below 0.5 seconds.
The duration of the combo window and the respective damage multiplier for the next successful cast are displayed underneath the HUD's targeting reticle.
If no casts are performed within the combo window, the damage and energy cost will reset.
Despite having a noticeable visual and audio effect, Rip Line is silent.
Rip Line is a one-handed ability when cast onto terrain and can be used while performing various maneuvers and actions without interruption. However, when casting on enemies (while grounded) will cause interruption.
Rip Line has a slight delay between activation and pulling either an enemy or Valkyr, as the grappling hook has a minute travel time.
Cast delay of ~0.9 seconds is affected by Casting Speed.
Rip Line when used targeting Nullifiers will pass through the shield. When moving through the shield, momentum is preserved and Rip Line will not be cancelled.
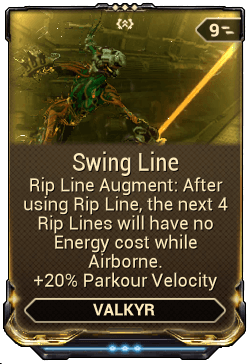
Swing Line is a Warframe Augment Mod for Valkyr that enables the ability to, after an initial cast of Rip Line, grant successive uses of Rip Line without using energy if cast while airborne and inside the combo window. It also passively increases Parkour Velocity.
This is another alternative ability for players to take advantage of heights quickly, similarly to Wormhole or Tail Wind, pulling Valkyr to elevated areas which are not accessible with traditional movement.
While being pulled, Valkyr can perform a divekick by crouching (default Ctrl ). If Valkyr is too close to the ground, crouching will cause her to slide instead.
As Rip Line is silent, it can be used as a mean of disposing enemies without alerting nearby units during stealth playthroughs.
Rip Line will consistently mutilate enemies killed by the hook, as with heavily Slash-focused weapons. The pieces of their dismembered corpse will also be flung in Valkyr's general direction.
Can be very helpful when used in tandem with a DesecratingNekros, as each corpse will yield its own loot.
Can potentially impede stealth play, as enemies may become alerted at the sight of either corpse. Targeting selectively and thinking ahead should help avoid such situations.
Pulled enemies that were not killed immediately are laid prone, setting them up for Ground Finishers.
It is possible to Rip Line onto a rocket fired from an Ogris.
Very effective during Capture missions as it can bring the target near Valkyr or her teammates.
Actively moving forward (default W ) before and while being pulled will increase your overall travel distance. Movement speed bonuses such as Volt's Speed or Zephyr's Jet Stream may increase this further. [Further testing required]
Sprinting and Maglev make no noticeable impact on speed or distance, however.
Very effective in PvP, as it allows the user to either quickly travel around an arena or pull and knock-down the opponent, rendering them an easy target.
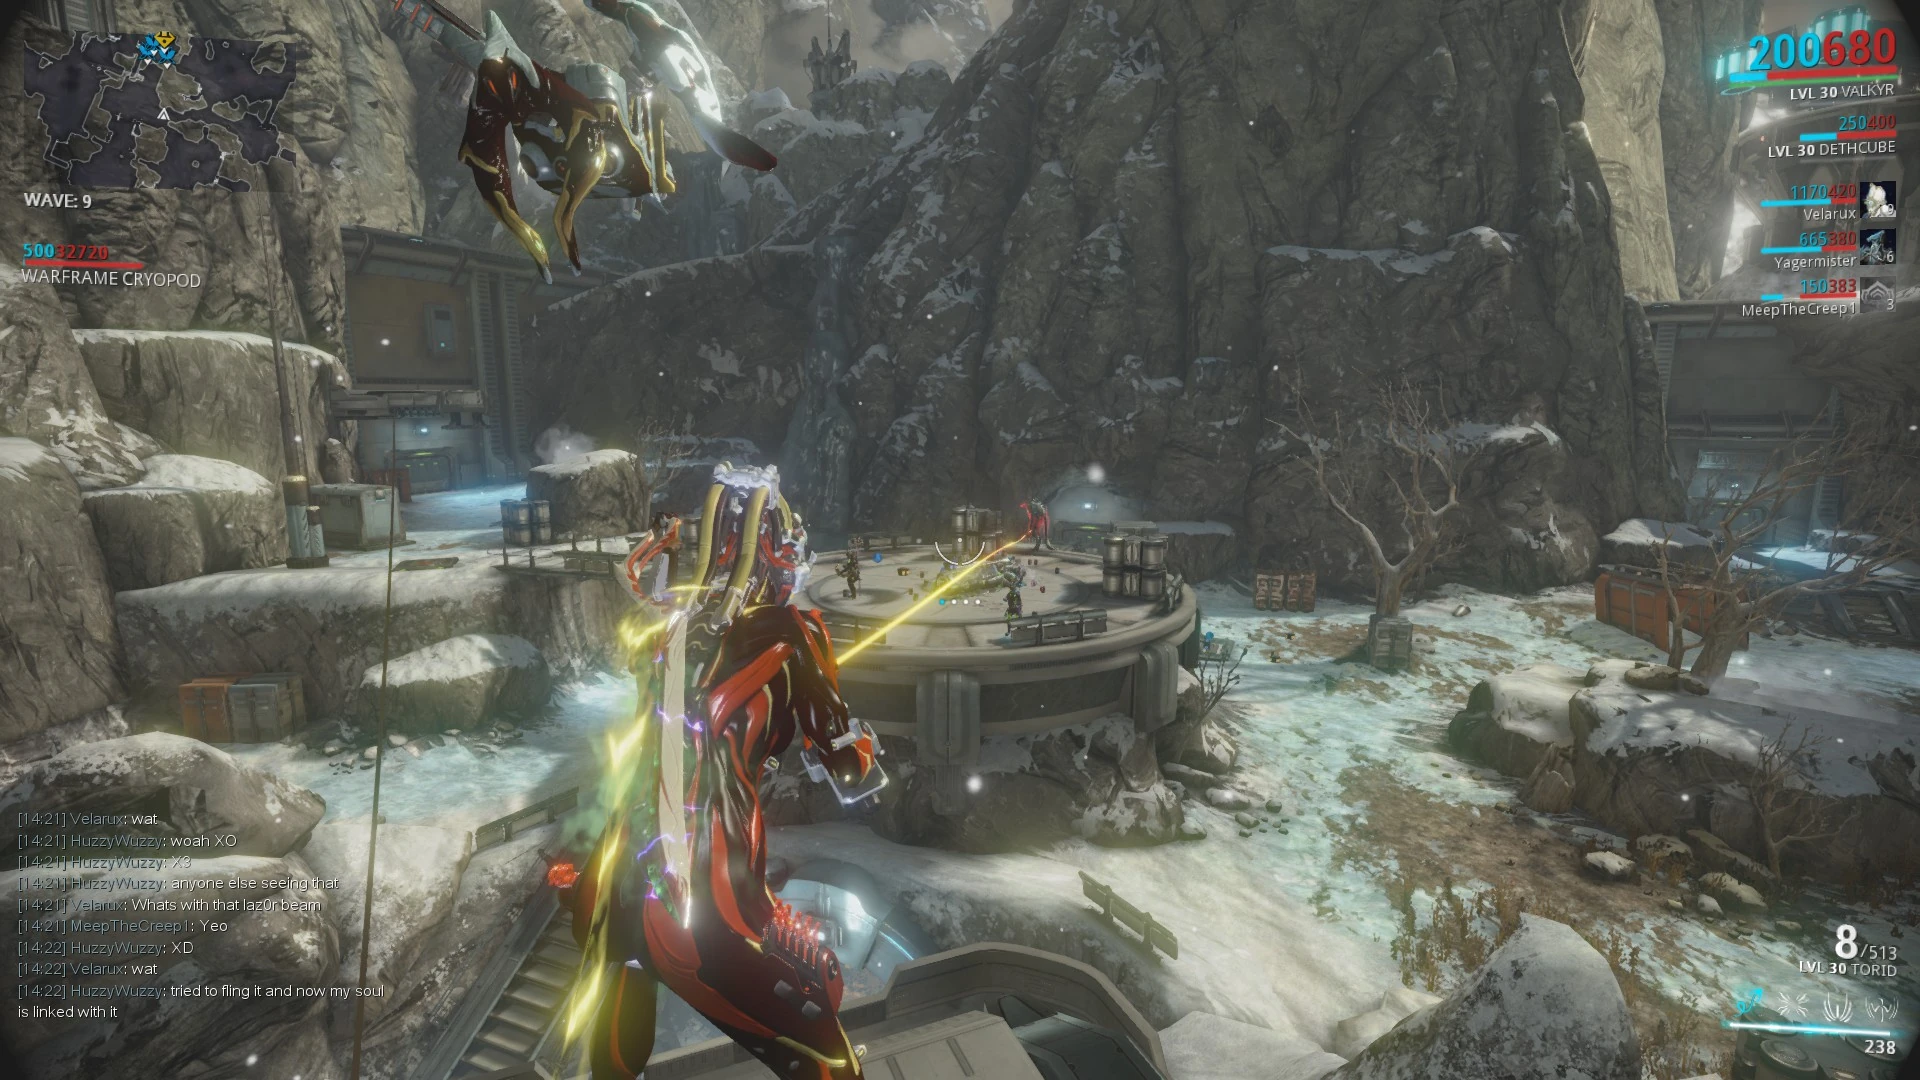
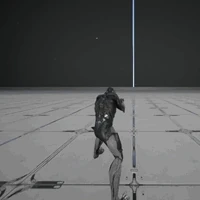
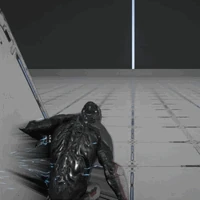
Very rarely, attempting to pull an enemy with Rip Line will neither damage nor pull the them. Additionally, the line itself will remain tethered between Valkyr and the enemy until it is killed. (See picture)
Rip Line remaining tethered to an enemy
When used on a sloped part of ground, occasionally Rip Line will slowly pull Valkyr forwards then launch her upwards into the air.
Continuous use of Rip Line in a short period of time may cause Valkyr to be pulled out of the map on Grineer Asteroid tilesets.
Casting Rip Line while going up Corpus Gas City elevators causes her to fall through them, leaving her trapped within the shaft.
Despite Rip Line being fully silent, killing unalerted enemies will not trigger Stealth Kill Affinity and cancels the stealth kill counter.
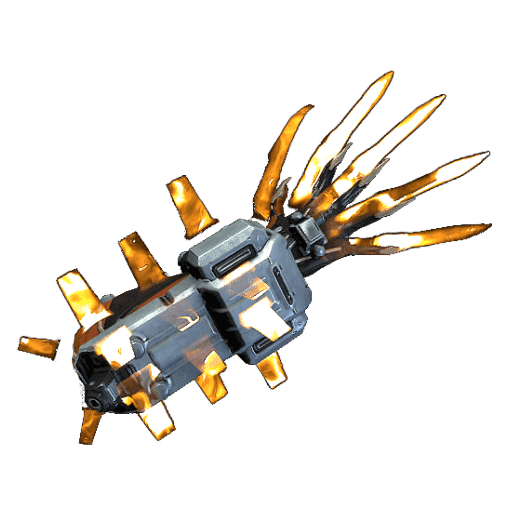
Overcome with rage, Valkyr unleashes a pair of energy talons, the Valkyr Talons, as her melee Exalted Weapon. Normal attacks deal 100 / 125 / 200 / 250 damage within 2 meters and all of Valkyr's attacks heal her for 1% / 2% / 4% / 5% of the damage dealt.
Damage is distributed evenly between Impact, Puncture, and Slash.
As an example, with a maxed Pressure Point, Shocking Touch and Intensify, the normal attacks of a rank-3 Hysteria will deal Base Damage × (1 + Damage Mods) × (1 + Elemental Mods) × (1 + Strength Mods) = 250 × (1 + 1.2) × (1 + 0.9) × (1 + 0.3) = 1,358.5 damage.
The mods that can be equipped on and affect Valkyr Talons include:
While officially Set Mod bonuses do not affect Exalted Weapons (with the exception of the Sacrificial Mod Set), the Gladiator Mod Set can still apply if equipped on Melee and not on the Exalted Weapon itself.
Hysteria's innate lifesteal is calculated from the total damage of Valkyr's melee attacks after resistances are applied. Hysteria's lifesteal is also additive when combined with other sources of lifesteal
For example, a maxed Life Strike and a rank-3 Hysteria will yield Base Lifesteal + Lifesteal Mods =5% + 20% = 25% lifesteal on heavy hits.
Certain attacks will still push Valkyr away, and shock waves will cause her to bounce into the air. However, these attacks will not force Valkyr to the ground.
Statuses that were already active when Hysteria was cast will not be removed. However, Valkyr will be immune to their damage regardless.
Valkyr emits an aura with a radius of 5 meters around her while Hysteria is active, and 30% of the total damage she ignores is stored. If any enemies within this aura have Line of Sight of Valkyr when Hysteria is deactivated, Valkyr will be dealt 25% of all stored damage as Impact damage.
The aura will continue to grow up to 20 meters and each kill reduces it by 1 meter. The aura cannot be decreased below 5 meters.
Stored damage is calculated from the total damage Valkyr ignores before resistances are applied.
The amount of stored damage can be monitored at the top right of the HUD under Hysteria's ability icon.
Stored damage dealt bypasses shield gating and can kill instantly if too large.
Stored damage is reset upon swapping weapons.
Highlighted enemies become unmarked if Valkyr moves out of range, negating the damage taken when Hysteria expires.
Since enemies need line-of-sight, invisibility prevents the damage.
After activation, a percentage counter will appear on the ability icon. The percentage increases from 0% to 100% over the course of 40 seconds.
Hysteria costs 25energy to activate, then consumes 2.5 energy per second at 0% while active. The cost will increase by an additional 2.5 until it caps out at 15 energy per second at 100%. Hysteria will remain active until either Valkyr's energy is depleted, or the ability is deactivated by casting it again (default 4 ).
Hysteria's energy drain is not converted into shields by Augur Mods.
Hysteria is affected by and can trigger Warframe arcanes, Exodia Might , and Melee Crescendo (even though the benefit from exodia might is minimal and it does not share the same combo counter as the melee weapon thus not benefiting directly from Melee Crescendo).
While Hysteria is active, Valkyr can cast other abilities and use primary and secondary weapons. Switching weapons will disable Hysteria's effects, including making her vulnerable to damage again; it will also pause the energy cost increase but will continue to drain energy at the current rate.
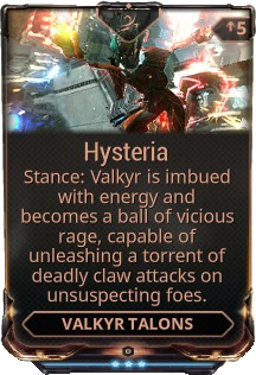
Hysteria comes installed with its own unique stance. Additional combos will be unlocked as Hysteria increases in rank.
Hysteria is a unique Stance exclusive to Valkyr Talons that can only be acquired and used by activating Valkyr's fourth ability, Hysteria. This Stance overrides the Stance on any currently equipped melee weapon for as long as Hysteria remains active.
A "sweep attack" is an arcing melee strike that intends to hit an enemy with the edge of the blade (the length of obround melee hitbox).
A "thrust attack" is a melee strike that intends to hit an enemy with the tip of the blade (the rounded edge of obround melee hitbox).
A "360/spin attack" is a sliding sweep attack that hits targets around the player (not always in a 360° arc, but is usually above 180°).
A "direct slam attack" is a melee strike that hits a single target at the epicenter of a slam attack.
A "radial slam attack" is the area-of-effect component of the melee slam attack. Affected by the Seismic Wave mod.
A "ranged attack" is any melee attack that launches a ranged projectile or can hit targets beyond melee range.
View Full Legend
Average Damage Multiplier per second only applies to single-target DPS calculations.
Note that hits marked as "Radial Slam Attack" will not apply at the epicenter of a single target hit so these will not be accounted for in Avg Dmg Multi/s calculations.
Combo animation lengths are approximate and are only accurate within a few tenths of a second.
Each tile marking in stance preview gifs are 2m apart.
Combos labeled with an asterisk (*) are shared between weapons within the same weapon type.
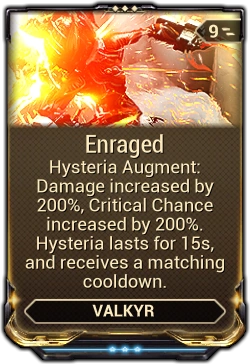
Enraged is a Warframe Augment Mod for Valkyr's Hysteria that increases its damage and critical chance but fixes its duration to 15 seconds and adds a matching cooldown. The base Energy cost is also increased to 50, while the Energy drain over time is removed.
There may be a dark red hue for the duration of Hysteria, making it difficult to see enemies. This is especially problematic if Infested Parasites are nearby.
Turning 'Color Correction' off in Options > Display can alleviate this issue.
Her invulnerability can be taken advantage of in reviving teammates in exchange for consuming energy and not attacking enemies with her powerful claws.
This can also be used to escape powerful opponents at the middle point of this ability. Allowing greater hit and run tactics.
It's preferable to use Steel Charge over Growing Power when modding for pure damage as the former adds more damage to Hysteria than the latter.
It's recommended to activate Melee Auto-targeting System in the options as Valkyr's awkward attack animations may miss a lot.
Players who suffer low FPS (Frames per second) may want to avoid attack speed boosts, such as Warcry, while using Hysteria. High attack speeds can result in a loss of DPS as melee attacks are "semi-automatic".
Heavy Attacks in Hysteria open enemies to Finishers, allowing you to reliably use the damage boost without spending energy on her Paralysis ability.
This finisher also knocks enemies down, allowing for a successive ground finisher for a quick burst of high damage.
Bugs
Using Hysteria the moment you are downed by enemies will cause you to bug. Sometimes, you will only be able to use your actual melee weapon, but it will swing as though it is your claws; Other times you will be able to use your other weapons, and all while being invincible. You must wait until the effect ends for the bug to clear.
Attacks outside the vulnerability radius of Hysteria are still counted to the damage received in the Hysteria status, however these additional points do no effect at the end of the duration.
If only a melee weapon is equipped in the player's loadout, casting Hysteria while holding either a Codex or Synthesis Scanner will cause Hysteria's attacks to instead use the equipped melee's quick-attacks, while also rendering both combos and blocking unusable.
From the ground, charge and release to launch Zephyr into an airborne hover. From the air, tap to dash forward, or aim down to dive bomb enemies below.
Zephyr generates a powerful gust of wind for propulsion, expending 25energy while grounded or 12.5 energy while airborne, to soar toward the aiming reticle at a speed of 30 meters per second for 1 second. While in flight, Zephyr rides an air current with a 1.5 / 1.6 / 1.8 / 2 meters radius, which inflicts ? / ? / ? / 750Slash damage and Knockdown to all enemies it contacts.
If cast from the ground, aiming at any direction propels Zephyr forward, while aiming straight down causes Zephyr to skyrocket upward.
If cast while airborne, aiming at any direction propels Zephyr forward, while aiming straight down or within a 45 degree angle toward the ground causes Zephyr to perform a Dive Bomb technique.
Zephyr maintains a portion of the momentum generated by Tail Wind once the dash ends.
If Zephyr slams into an obstacle such as a wall during her dash, she can immediately break away from the surface by performing a wall jump (default Spacebar ).
At the end of each Tail Wind dash, Aim Glide will be reset. To repeatedly aim glide without landing, Zephyr must first stop aiming then aim down sights (default hold RMB while in midair) to reactivate this maneuver after each successive dash.
Zephyr executes different aerial combat techniques with Tail Wind depending on the activation conditions:
While Zephyr is airborne, casting Tail Wind directly downward or within a 45 degree angle toward the ground, causes Zephyr to nose dive to the location at an initial speed of 1 / 2 / 3 / 5 meters per second; during the dive, Zephyr will continue to accelerate until impact. On impact, Zephyr creates an explosion in a 4 / 5 / 6 / 7 meters radius around the landing point that inflicts ? / ? / ? / 4,500 base Impact damage amplified by height of the dive and Knockdown.
Total explosion damage depends on the height at which Tail Wind is activated:
Total explosion damage is calculated by multiplying the base damage by 0.2 × Activation Height (e.g., activating Tail Wind at 15 meters will yield 0.2 × 15 × 4500 = 13,500 damage at max rank).
Activating Dive Bomb at a height less than 4 meters will only inflict base damage.
Damage bypasses obstacles in the environment and does not decrease with distance.
Dive Bomb will only activate Heavy Impact if the required height is achieved.
Performing a dive bomb during a Bullet Jump causes Zephyr to softly rebound away from the landing point and back into the air.
Hover Glide
While Zephyr is airborne, holding down the ability key then releasing it (default 1 ) causes Zephyr to expend 12.5 energy then drain 5 energy per second to immediately arrest her momentum then sustain her altitude in a continuous hover. While hovering in the air, Zephyr may attack with, switch and reload her weapons, as well as cast her abilities; as she hovers, Zephyr may also glide along the horizontal plane using the movement keys (default WASD ) at a reduced movement speed, accelerate by using Sprint (default hold LShift ), and slide toward the directional input (default WASD + hold LCtrl ) to strafe quickly.
Hover Glide's energy drain is not converted into shields by Augur Mods.
Hover Glide will automatically deactivate when Zephyr's energy pool fully depletes, upon touching a horizontal surface, performing a Tail Wind dash, dodge roll (default tap LShift ), jump (default Spacebar ), bullet jump (default LCtrl + Spacebar ), quick melee attack or melee slam attack (default E ).
Cannot be activated while Zephyr is grounded. If already active, holding down the ability key results in a Tail Wind dash.
Activating Tail Wind multiple times allows Zephyr to propel herself farther into the air, effectively simulating flight. There is a slight cooldown between activation.
Can be used to pass through Laser Barriers unharmed in most cases.
Casting Tail Wind interrupts reloading.
Air current visual effects are affected by Zephyr's chosen Warframe energy color.
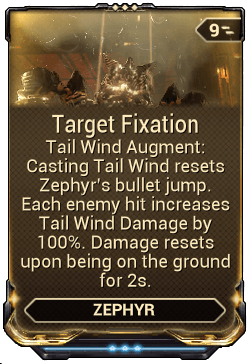
Target Fixation is a Warframe Augment Mod for Zephyr that increases Tail Wind's damage for every enemy it hits, and applies a 2-second grace period when touching the ground before the buff is lost. It also resets double jump and bullet jump.
Propelling from the ground is inefficient, it's recommended to jump and dash vertically for more distance.
Aim glide can be used to significantly increase the distance traveled, as all momentum is conserved for the duration of the aim glide.
Bugs
After second activation of this ability gravity increases to normal until Zephyr lands (confirmed as bug in Community Hot Topics).
Occasionally, when "Tail-winding" closely to an Extraction point on Solo, Zephyr's body will be frozen in Tail Wind state, as she supposedly locks herself into the Extraction pod with all her limbs properly placed.
")


")
 (25 KB)")
")