Highly effective against Infested Flesh. Moderately effective against Grineer Flesh, Corpus Flesh, and Fossilized Infested. Slash Status Effect temporarily ignores the target's armor and causes them to bleed over time for extra damage.
—In-game Description
Slash Damage is one of the three physical damage types. It is effective against all forms of flesh, but it is less effective against GrineerFerrite Armor and CorpusRobotics.
However, while Slash damage suffers a reduction to armor, the damage from its corresponding status effect, Bleed, does not since it deals Cinematic damage rather than Slash.
The status effect of Slash damage is Bleed. It applies a DoT effect after a 1 second delay, dealing a tick of damage each second for 6 seconds. Each tick deals Cinematic damage equal to:
Notice that modded base damage calculation used for DoT is not the same as normal damage calculations, ignoring physical and elemental damage bonuses : mods like Buzz Kill has no effect on Slash Proc Damage.
Additional Multipliers include modded critical multiplier on Critical Hit and multipliers on Enemy Body Parts; these stack multiplicatively with each other.
Multiple instances of the effect can stack on the same target, with each instance having its own timer, but only up to 10 tick numbers are actually shown, the rest are hidden to save performance.
While bleeding, the target will have small bursts of blood come out every fraction of a second where they were hit to trigger this proc. Machinery and Robotic enemies will instead bleed oil.
Because the damage from this status effect is Cinematic damage, it can bypass Ferrite Armor and Alloy Armor, which can help compensate for Slash damage's penalty against armor.
Slash tick damage and proc duration
Time from initial proc
0s
1s
2s
3s
4s
5s
6s
7s
Tick damage occured?
✗
✓
✓
✓
✓
✓
✓
✗
Enemy Behavior[]
Slash procs from enemies only deal 10% of the hit's base damage instead of 35%.
Increasing Slash Proc Damage[]
Because Bleed scales off of the base damage of the weapon, the amount of damage dealt is not affected by elemental mods nor physical-type mods like Contagious Spread and Buzz Kill, but is affected by Faction Damage Mods and Base Damage mods like Pressure Point.
Slash procs scale with damage multipliers such as Headshots and Critical Hits, which greatly increases the damage dealt. However weakspots generated by Sonar or Detect Vulnerability only increase the initial hit, not the DoT.
For example, tick damage for a weapon with an innate 100 damage, Serration, and Bane of Grineer will be:
As can be seen in the above calculations for tick damage, Faction Damage is applied twice, making their effective bonus = (1+Faction Bonus)^2. Which is +69% for the 30% Faction Damage mods and +140.25% for the 55% Primed Faction Damage mods.
Unlike other DoT effects, enemy armor will have no effect on slash proc damage despite decreasing the initial damage. In other words, slash procs will deal the same damage per tick against the same target at differing levels. Thus, buffs/debuffs that increase/decrease enemy armor will also have no effect on slash proc damage.
Melee weapon types that force proc Bleeds on Heavy Attacks[]
Railjack <DT_SLASH>Slash Damage results in a Tear Status Effect which increases damage dealt to enemy ships.
—In-Game Description
The status effect of Slash damage against Railjack space enemies is Tear, increasing the damage the target ship takes by 7.5% for 20 seconds, with subsequent procs stacking multiplicatively with itself.
Dismemberment[]
Enemies killed by Slash damage to the torso can result in their corpse being bisected, which is considerably valuable for a Nekros using Desecrate, as each part of the body can spawn a Health Orb and some loot (note that individual limbs that have been removed from a corpse cannot be Desecrated, only large parts of the body). Corpses can also be quickly meleed to dismember them; however, an enemy's corpse can only ever be mutilated twice—if melee spam ended up lopping two limbs from a corpse, it will not be possible to then attempt to bisect it to get two desecrate rolls. Note that this characteristic may be disabled due to gore settings or regional locks: the Japanese version of WARFRAME, for example, does not allow for much corpse dismemberment.
Bleed damage does not dismember a body if it is the cause of death, only direct Slash damage from weapons. Consequently, Hunter Munitionscannot be used on its own to cause dismemberment. Weapons must have over 50% of their physical (IPS) damage as Slash damage to dismember. Weapons with exactly 50%, such as the Soma, do not initially dismember, but for example can be modded with Sawtooth Clip to bump slash damage above 50%, and thus enable dismemberment. Elemental mods have no effect on this ratio and can therefore be included and still cause dismemberment. As an alternative, the "gore" attribute from Amalgam Ripkas True Steel mod also applies itself to the rest of the player's equipped weapons, companions, and Warframe abilities, and they will function identically to the dismemberment mechanic, whilst ignoring the weapon's IPS disposition.
As with all damage types ineffective against armor, Slash damage's type modifier works in two ways: it decreases the damage dealt in the same way as a type modifier against hitpoints and increases the armor's value by a percentage of the target's armor for the damage calculation. Practically speaking, this means that Slash damage is reduced by -50% and damage is further reduced by 150% of a target's whole Alloy Armor. Similarly, Slash damage is reduced by 115% of a target's whole Ferrite Armor and the base damage is reduced by -15%.
These weapons deal the majority of their physical damage as Slash. The damage ratio is important for physical damage status effects, as the game weights the likelihood of which proc occurs according to physical damage ratio. Hence, these weapons proc Bleed more than Impact's Stagger or Puncture's Weakened.
The following stances have at least one combo with a forced Slash proc. Note that all stances for Gunblade, Fist, Sparring, Staff, Hammer, and Nunchaku weapons do not have have a forced Slash proc.
Ash expends 25energy to throw 1 / 1 / 2 / 2 shuriken to strike enemies standing within a 6 meter radius around him, or home in on enemies within 60 meters and a 90° angle of the aiming reticle. Each Shuriken inflicts 100 / 250 / 350 / 500Slash damage with a guaranteed Status Effect on hit.
The Bleed DoT inflicts 43.75% of the initial damage per tick for a total of 9 ticks over 9 seconds, due to Ash's passive. The Bleed damage bypasses armor.
Should Shuriken hit an enemy's head, the Bleed DoT will inflict 87.5% of the initial damage per tick for the same duration.
Shurikens do not require direct line of sight to home in on enemies.
Shurikens can bypass obstacles in the environment to strike targets behind walls and objects.
Shurikens will travel toward the aiming reticle on a slight angle if no enemies were standing close to Ash or within the targeting range and homing angle. Enemies will still receive damage and proc if hit by these Shurikens.
Can be cast in rapid succession and since Slash procs ignore armor and can be stacked, this can bypass the high scaled armor of Grineer units.
Shuriken can be used to seek out nearby hidden enemies due to its homing feature.
However, Shuriken will often try to seek enemies that you've run past, making it miss both the enemy you ran past and the target you were trying to hit.
Using the Seeking Shuriken augment, Ash can strip armor of any enemy entirely with only 143%Ability Strength. It works great on bosses, especially in Sorties when they are high level.
Misc:
3 (number of hits per mark) 2 (number of Shadow Clones) Slash status per hit 50 % (invisible mark discount) 100 % (energy discount for Teleport on marked enemy)
Ash toggles a state of intense focus as he searches for targets to assassinate. During targeting mode, enemies within 50 meters from Ash that are seen near the aiming reticle become highlighted and tagged with a death mark above their head, consuming 12energy per enemy.
Leaving this range while targeting will unmark enemies and refund the energy.
When 1 or more enemies are marked, reactivating the ability will create 2 Shadow Clones that teleport to each marked enemy, striking them with 3 Finisher attacks that inflict 750 / 1000 / 1500 / 2000True damage per hit with a guaranteed Slash status effect.
Blade Storm gains 25% additional damage for each combo multiplier, up to a 3.75x damage multiplier at 12x combo, or 4.0x with Venka Prime equipped at 13x combo. The Innodems additive stats from Evolution II: Perk 2: increase the attack speed by 25%.
Reactivating Blade Storm with no marks will toggle off targeting mode instead.
While in targeting mode, Ash emits black smoke and his vision darkens.
Blade Storm has no casting animations, so Ash can still perform all other functions normally such as maneuvering, casting other abilities, and firing or reloading weapons.
Ash cannot re-enter targeting mode while his Shadow Clones are attacking marked enemies.
Ability Synergy:
Invisibility by means of Smoke Screen or other allied abilities will halve the energy cost of Blade Storm to 6 energy per enemy.
While Blade Storm is attacking, Teleport can be cast on a marked enemy at 0 energy cost to include Ash in the assault. Ash becomes invulnerable for the duration as he teleports and strikes all remaining marked enemies in a cinematic sequence.
While joining Blade Storm costs no energy, Ash must have enough energy to cast Teleport to join.
Strikes by Ash deal the same damage as his clones, but will attack enemies not targeted by his clones at the moment. He consumes marks, which generally accelerates the assault, when the enemy is not dying from the first hit.
Ash can regenerate his shields during the animation.
Rising Storm is an AshWarframe Augment Mod that allows the clones generated by Blade Storm to contribute additional hits to the Melee Combo Counter, as well as increases the duration the Melee Combo Counter lasts.
Blade Storm can be activated while zooming in with a ranged weapon. This can be used to more precisely pick targets.
You are invincible while using Blade Storm. This can be used to give time to regenerate your shields.
Blade Storm can be used to pick up items that are very far away or in dangerous situations (an item surrounded by 5 enemies for example). This generally requires a sentinel's Vacuum skill for maximum effectiveness. Simply target an enemy near something you want to pick up and activate the ability. Since you return to your starting point you will return to your "safe spot" but will have picked up health orbs, energy orbs, resources, and even mods.
Blade Storm can be used to start long melee combo chains to gain additional bonus melee damage.
Blade Storm can be empowered by performing melee combo chains before casting, as the ability's damage benefits greatly from the bonus melee damage multiplier.
Since Blade Storm deals True damage, the ability is well suited to dealing with Conculysts and Battalysts.
Ash's second ability, Smoke Screen, synergizes well with this ability, reducing both the energy cost per mark and Ash's vulnerability when marking enemies.
Similarly, Arcane Trickery also synergizes well, since it can be triggered by Blade Storm and reduces the cost per mark.
Blade Storm allows Ash to easily trigger Arcane Ultimatum, giving him a boost in survivability.
Blade Storm finishers also trigger Exodia Might with Zaws, allowing substantial health regeneration without the use of Life Strike.
Considering Blade Storm has a 100% chance to proc Bleed, dealing 43.75% of the base damage 10 times in 9 seconds, the ability actually does 2,000 + ((2,000×0.4375)×10) = 10,750 damage in 9 seconds, making it one of the most powerful abilities in the game if modded and used accordingly.
If used during sliding, Blade Storm seems to use a shorter version of finishing animations, which reduces total animation time.
Blade Storm benefits greatly from the effects of Body Count, Drifting Contact, and Gladiator Rush. Instead of having a 3 second delay before the combo counter disappears, the delay will be 3+12+10+6 = 31 seconds.
Using the Rising Storm augment will further increase the delay.
Since Ash only spawns 2 Shadow Clones, it's highly suggested to equip attack speed mods as the time needed for the Shadow Clones' animations can make gameplay sluggish, especially if a large amount of enemies are marked.
Joining Blade Storm has multiple benefits for Ash:
Becoming invulnerable allows Ash to ignore status effects, such as Toxin, and regenerate his shields.
The rate in which attacks are dealt is increased as there will be 3 attackers instead of 2.
The amount of hits added to the combo counter from the ability will be higher than if Ash were to not join.
Using Teleport on an unmarked enemy while Ash's Shadow Clones are attacking marked ones will result in the unmarked enemy being marked without consuming any energy. Ash will then join Blade Storm until all marks are expended.
Enemies attacked by Blade Storm this way are only attacked once.
Bugs
On certain unspecific occasions Ash will become invulnerable after using Blade Storm. It should also be noted that Blade Storm can cause lag commonly.
Very rarely, after using Blade Storm, Ash will float and become invincible. He is unable to jump or fall down, use melee weapons (or primaries/secondaries in some cases), or use Blade Storm again. Pressing E will teleport to a random enemy and perform a purely aesthetic Blade Storm attack which does no damage. This appears to occur when Blade Storm's initial target is killed before Blade Storm begins.
On some occasions (most likely related to latency), Ash will remain vulnerable whilst being unable to exit this bugged state without getting killed (as in, actually dying and using a revive charge, as revived by a teammate will not end this glitch).
This may occur when the initial target for Blade Storm is killed (by another player/procs) during the teleporting animation, causing Ash to teleport to his casting location, and initiate this bug.
To deactivate the bug, Ash can prompt a "falling out of level" event by power wall climbing to the sky if there is a wall in the map that allows him to. This will respawn Ash to a random location on the ground and deactivate the bug.
Very Rarely, when Ash finishes using Blade Storm he will appear at the location where he used it with 0 Health, unable to move, unable to use weapons, and unable to be damaged by enemies. Any on screen prompts that occur, such as Defense and Interception wave prompts, will not be presented to Ash in this state. Ash cannot be revived as he isn't considered down despite the fact that he has 0 health. The only way to fix this bug is to wait for the mission to end or leave the mission.
If wielding a melee weapon when cast, Blade Storm will occasionally perform Finisher attacks on enemies. This does not occur if the player is hosting.
Occasionally, Ash will fall out of the map after using Blade Storm, where he will either teleport back to the original casting position or die.
If Blade Storm is cast and Ash's holograms seek out a Mind Controlled target, they will attack the target indefinitely until either the Mind Controlled target dies or its duration expires.
Attempting to use Blade Storm against another player when fighting in the Dojo will cause Ash to become invincible and hover in the air. In this state, Ash can only move and use firearms.
When Ash has no melee weapon equipped, it is possible in some cases for Ash to attain an unmodded Skana after using Bladestorm. This Skana is not listed in the end of mission screen, nor in the in-game gear list, and is lost upon dying or completion of the mission.
When used on a Crewship during Railjack missions, and using teleport to join the fray, Ash can grow 10x in size and will be too large to move around not only the Crewship but also the Railjack. Player will have to return to dock to reset size.
Become a spinning vortex of death. Hold <PRE_ATTACK> to accelerate the maelstrom, increasing damage or target an enemy by tapping <PRE_ATTACK> to dash toward them. Hitting enemies inflicted with Sentient Wrath creates a destructive blast.
Misc:
Knockdown & stagger immunity 2 (damage ticks per second) 50 m (dash distance) 10 m (dash slam radius) Dash knockback on hit 10% Slash Status Chance
Caliban levitates and rapidly rotates to generate a tempest of lacerating energy spanning a radius of 8 / 10 / 11 / 12 meters around himself. While active, Caliban gains Knockdown and Stagger immunity as Razor Gyre inflicts 200 / 300 / 400 / 500Slash damage per second, and heals by 1 / 2 / 3 / 4 health per second for each enemy hit. Damage and healing per second are divided into 2 ticks per second, each with a chance to stagger and 10%SlashStatus Chance. Enemies must remain in range and line-of-sight of Caliban to be affected..
While active, Caliban can accelerate his rotation by holding down the fire key (default LMB ), increasing damage by 50 / 50 / 75 / 100 for each second the hotkey is held. The stored damage continuously amplifies the spinning Slash attack and grants and single-use damage bonus to the dash Impact attack. The accumulated damage is lost when Razor Gyre is deactivated or Caliban dashes to an enemy.
Damage increase on Slash damage is halved per tick similar to how the starting damage per second is split over 2 ticks per second. (e.g. Charging 100 damage adds 50 per tick or 100 per second.)
Damage increases by many increments of 1 rather than 100 on every second.
Damage increase is shown as a Razor Gyre buff icon beside Caliban's shield and health indicators.
While active, tapping the fire key (default LMB ) while an enemy is on the reticle causes Caliban to rapidly dash to them from up to 50 meters away for no additional energy cost, dealing 150 / 200 / 350 / 500Impact damage plus the stored Impact damage all in a 10 meter radius, inflicting knockback and Knockdown effects of variable strength. The stored damage is reset to 0 whether he impacts his target or not.
Knockback force is weaker on the target the further Caliban travels, and weaker on surrounding targets the further they are from the point of impact.
When dashing upwards into aerial or Lifted enemies, Caliban can bounce high into the air.
Caliban can dash to an enemy target while there are obstructions in his path. He will cancel the dash if he cannot move for more than 1.5 seconds.
Caliban first expends 25Energy to activate Razor Gyre, then drains 4 energy per second to continuously channel the ability. For every 1Impact damage stored by Caliban's acceleration, Razor Gyre drains an additional 0.02 energy per second which resets to the base energy drain amount upon triggering the dash. Razor Gyre ends when Caliban runs out of energy or when manually deactivated by pressing the ability key again (default 1 ).
Cannot collect Pickups but can vacuum them along as floating items, including Energy Orbs.
Activation and deactivation is not affected by Casting Speed.
Activating and deactivating Razor Gyre are full-body animations that stop Caliban's movement and other actions.
Bugs
Caliban can use the Gear and Emote menu while channeling Razor Gyre. If he performs a selected Emote, Razor Gyre cannot be deactivated manually until the player uses the ESC menu and resumes the game.
Slash and stagger enemies with a crystal blast that inflicts Bleed. Enemies afflicted with this Status Effect have an increase chance of dropping Health and Energy Orbs.
Slice apart the wicked with stalactic spikes and shatter their remains into precious minerals. Citrine expends 25Energy to flick a seeking cluster of crystal shards over a sight detection cone spanning 14 meters. Enemies struck by her crystals receive 250 / 300 / 400 / 500Impact and Slash damage with guaranteed status effects. While afflicted with Slash status from this ability, affected enemies have a crystal hovering above their heads to indicate 50%Health Orb drop chance and 20%Energy Orb drop chance on death.
Orb drop chances modded above 100% yield a guaranteed orb and a chance to drop a second orb.
Drop chance percentage in decimals is rounded down to the nearest whole number in-game.
Fractured Blast damages and breaks destructible Objects in the environment bypassing its line of sight restriction.
Ability Synergy:
Increased Health Orb drop chance allows Citrine to strengthen her Geoluminesence Passive.
Fractured Blast contributes kills and assists to increase Preserving Shell's damage reduction.
If Citrine casts Fractured Blast while standing inside Prismatic Gem's aurora, the Impact and Slash status duration are extended, while the gem sweeps its beam to each impacted enemy individually in rapid succession to inflict one instance of damage and a set of status effects.
Can be recast while active. Slashing already affected enemies extends the orbs drop chance kill window.
Casting Fractured Blast is an upper-body animation that allows movement and Maneuvers while interrupting other actions.
Subsuming Citrine to the Helminth will offer Fractured Blast and its augments to be used by other Warframes.
However, Subsumed Fractured Blast's damage is reduced to 125 / 150 / 200 / 250, Health Orb drop chance reduced to 25%, and Energy Orb drop chance reduced to 10%.
Recast on already affected enemies to extend the time needed to kill them for orb drops.
Use the damage numbers from Slash status to visually keep track of the enemies' whereabouts, even when hidden behind obstacles.
Select bright energy colors to make the floating crystal indicator overhead more visible.
Impact status interrupts the enemy's actions. Since Fractured Blast uses a quick upper-body animation, Citrine can use this brief moment of opportunity to immediately follow up with weapon attacks or other abilities.
Excalibur expends 25Energy to dash forward 6 / 8 / 10 / 12 meters to cut enemies down with his Exalted Blade, automatically chaining to additional enemies within ? / ? / ? / 7 meters. Each strike inflicts 100 / 125 / 200 / 250Slash damage with a guaranteed Slash proc and Knockdown.
Slash Dash is affected by Aim Glide.
Slash Dash is affected by momentum, but will not change momentum outside of its animation. Thus, whichever way you were going before you cast Slash Dash you will continue to go unless stopped, by other means, at same speed. This will affect how far your Slash Dash will go when not targeted.
Chained Slash Dash can be cancelled by jumping or rolling.
Slash Dash gains 25% additional damage for each combo multiplier, up to a 3.75x damage multiplier at 12x combo, or 4.0x with Venka Prime equipped at 13x combo.
Mods equipped on Exalted Blade do not affect Slash Dash unless it is active.
Slash Dash's damage composition is not affected by Chromatic Blade.
Slash Dash's cone length is not affected by melee range mods (e.g., Reach).
Every instance of damage adds to the Melee Combo Counter regardless of the amount of enemies hit or if Excalibur physically made contact with the target.
Excalibur has Health invulnerability to damage during Slash Dash. Shields will still take damage and Energy Draining affects can still be applied to Excalibur, such as from Ancient Disruptors.
Airborne enemies, such as Hellions and Ospreys, can also be targeted, but are still difficult for Slash Dash to traverse to unless the aim button is held for Aim Glide physics to take effect.
If there are no enemies within its targeting area, Slash Dash will make Excalibur dash forward in the direction of aim, allowing it to be used as a mobility aid when reaching high places.
Can be used to pass through Laser Barriers unharmed in most cases.
Can be used while jumping, sliding, forward flipping, wall running or clinging to a wall.
Slash Dash can damage enemies across the Rift Plane.
Slash Dash will hit through a Grineer Shield Lancer's Shield.
With high Ability Range and not aiming at enemies, players can launch themselves into the air, travel with high velocity and long distance.
Can be used to pass through Corpus laser doors mostly unharmed.
Perfect for medium-distance traveling.
With the proper mods this is one of the most damage-efficient AoE abilities in the game, doing massive damage to multiple targets for very little cost.
Invulnerability allows players to deal with enemies by repeatedly casting Slash Dash without fear of damage from enemies or status procs during the animation. However, being that there is no invulnerability overlap between the end of the first cast and the beginning of the second cast, there is a small window for Excalibur to receive damage.
Casting Slash Dash while Exalted Blade is active will allow players to increase the amount of damage they deal and hit a larger amount of enemies without having to build for range.
Pressing the melee button at any time during the targeted Slash Dash cast will cancel the rest of ability's targets and summon your melee weapon instantly.
Bugs
It is possible to get stuck on an enemy during the duration of the ability, and in most cases the enemy will not take damage.
Excalibur expends 75Energy to summon javelins against enemies within a radius of 15 / 18 / 22 / 25 meters. Excalibur then drives his weapon into the ground, launching the javelins into their targets. Each javelin inflicts 500 / 650 / 800 / 1000 damage evenly distributed between Impact, Puncture, adn Slash, with a guaranteed Slash proc and Stagger.
While javelins do notpunch through objects or enemies, their striking position is optimized to ensure a successful hit on their targets when they spawn. This allows the javelins to bypass obstacles in the environment including walls, cover, and Grineer Shield Lancer shields.
Radial Javelin will not target enemies behind obstacles in the environment unless Excalibur has line of sight, or unless the enemy is aware of Excalibur within a short period of time (e.g., an enemy that spots Excalibur and runs out of view can still be targeted by Radial Javelin if the ability is used within a small time frame).
Excalibur draws an ethereal Skana, the Exalted Blade, and wields it as his melee Exalted Weapon. Normal attacks inflict 100 / 125 / 200 / 250 damage within 2 meters.
Damage is distributed between 15%Impact, 15%Puncture, and 70%Slash.
Slide attacks inflict 214 / 267.5 / 428 / 536 damage and Blind enemies within 5 meters over a duration of 6 seconds at the cost of 25 energy.
Aerial attacks and slam attacks inflict 200 / 250 / 400 / 500 damage, and slam attacks inflict an additional 50Impact damage within 5 meters.
Normal, slide, and aerial attacks will emit an energy wave in the direction of aim. Energy waves have the same base damage as the attacks that release them, inflicts Stagger, and fly at a constant speed of 15 m/s until they dissipate after 2.5s which corresponds to a maximum distance of 37.5 meters.
The energy waves and Exalted Blade itself are considered separate entities and will both deal damage separately.
Energy waves will punch through and hit enemies and terrain regardless of thickness up to their maximum range.
Energy wave lifetime decreases 0.5s (7.5m) for every enemy hit from the max lifetime of 2.5s (37.5m).
Wave damage falls off linearly with distance from 100% to 85% between 0 and 6.5m and 28% to 0% between 6.5m and 37.5m.
Being a Sword, Exalted Blade will always gain the 10% damage and attack speed bonuses of Excalibur's Passive.
As an example, with a maxed Pressure Point, Shocking Touch and Intensify, the normal attacks and corresponding energy waves of a rank-3 Exalted Blade will deal Base Damage × (1 + Swordsmanship Bonus + Damage Mods) × (1 + Elemental Mods) × (1 + Strength Mods) =250 × (1 + 0.3) × (1 + 0.1 + 1.2) × (1 + 0.9) = 1,420.25 damage.
The mods that can be equipped on and affect Exalted Blade include:
Note that apart from physical damage mods and Shattering Impact, all mods will still affect Exalted Blade when Chromatic Blade is equipped.
While officially Set Mod bonuses do not affect Exalted Weapons (with the exception of the Sacrificial Mod Set), the Gladiator Mod Set can still apply if equipped on Melee and not on the Exalted Weapon itself.
Each melee attack adds to the Melee Combo Counter while energy waves and radial damage from slam attacks do not.
Slash status effects generated from waves while Relentless Combination is equipped will grant combo counts to Exalted Blade.
The combo counter will reset when equipped with Xoris.
Exalted Blade's combo counter decay is affected by Naramon's Power Spike.
Radial damage from slam attacks diminishes with distance, does not have a critical chance, is not affected by the Melee Combo Counter, and will cause enemies within range to suffer a Knockdown.
Ground finishers inflict 400% of the total modified damage from normal attacks. Prompted Finishers inflict 3200% of the total modified damage from normal attacks as True damage.
Exalted Blade costs 25Energy to activate, then consumes 2.5 energy per second while active and will remain active until Excalibur's energy is depleted, or the ability is deactivated by pressing the ability key again.
Exalted Blade's energy drain is not converted into shields by Augur Mods.
Exalted Blade is not affected by and can not trigger Exodia Arcanes with the exception of Exodia Might, which Exalted Blade both triggers and is affected by.
While active, Exalted Blade will use an exclusive stance with its own set of combo attacks.
Ability Synergy: Slash Dash will receive a +10% bonus to its base damage from Excalibur's Passive and each hit will release an energy wave when Exalted Blade is active.
Damage isn't affected by the combo counter, even if built with the physical blade.
Low wave flight speed.
Requires energy to activate and keep active.
Slide attack blinds do not open affected enemies to Finisher Attacks.
As an Exalted Weapon, it cannot benefit from, nor contribute to the set bonus of any Set Mods (excluding the Sacrificial Mod Set; the Gladiator Mod Set can still apply if equipped on Melee Weapons, and not on the Exalted Weapon itself).
Exalted Blade is a unique Stance exclusive to Exalted Blade that can only be acquired and used by activating Excalibur's fourth ability, Exalted Blade. This Stance overrides the Stance on any currently equipped melee weapon for as long as Exalted Blade remains active.
A "sweep attack" is an arcing melee strike that intends to hit an enemy with the edge of the blade (the length of obround melee hitbox).
A "thrust attack" is a melee strike that intends to hit an enemy with the tip of the blade (the rounded edge of obround melee hitbox).
A "360/spin attack" is a sliding sweep attack that hits targets around the player (not always in a 360° arc, but is usually above 180°).
A "direct slam attack" is a melee strike that hits a single target at the epicenter of a slam attack.
A "radial slam attack" is the area-of-effect component of the melee slam attack. Affected by the Seismic Wave mod.
A "ranged attack" is any melee attack that launches a ranged projectile or can hit targets beyond melee range.
View Full Legend
Average Damage Multiplier per second only applies to single-target DPS calculations.
Note that hits marked as "Radial Slam Attack" will not apply at the epicenter of a single target hit so these will not be accounted for in Avg Dmg Multi/s calculations.
Combo animation lengths are approximate and are only accurate within a few tenths of a second.
Each tile marking in stance preview gifs are 2m apart.
Combos labeled with an asterisk (*) are shared between weapons within the same weapon type.
Due to Exalted Blade's waves being able to unlimitedly punch through up to its maximum range, Exalted Blade is well suited to taking out hordes of enemies, especially if they are huddled together.
Furthermore, Exalted Blade can be used to deal with enemies while in cover without requiring punch through mods.
The innate slide attack blind provides a cheaper alternative to Radial Blind, albeit with greatly reduced duration and range. (Note that the Radial Blind power is cheaper both per meter of range and per second of effect, despite having a higher cost per cast.)
Allows players to blind enemies and quickly deal with them without being delayed by finisher animations.
Combined with Mag's Magnetize or a Void status effect, the sword waves can be redirected to hit the enemies inside multiple times until its maximum range can be reached.
Crouching will allow the use of all Exalted Blade attacks while remaining entirely stationary; this can be extremely useful during boss fights, defense missions, survival, etc.
Bugs
Using this ability during an "Unarmed" bug will result in Exalted Blade having the same stats as your Melee Weapon, and sometimes will perform your Melee Weapon's Unsheathed attacks without the Waves.
If Excalibur enters Bleedout state while Exalted Blade is active, Excalibur will use his melee and sometimes primary weapon rather than his secondary.
Equinox calls forth the serenity of night or calamity of day, surrounding herself in an aura of moonlight's gleam or sunlight's glare with a radius of 10 / 12 / 15 / 18 meters.
Mend & Maim expends 50Energy to activate, then drains 3.5 energy per second while active. Mend & Maim will end when Equinox's energy is depleted, Equinox is incapacitated, Mend & Maim is deactivated by casting Metamorphosis, or by pressing the ability key again (default 4 ).
Night Equinox emits a regenerative aura that grants 10 / 15 / 20 / 25Shield per enemy killed within range to Equinox and her allies inside the aura. Mend accumulates 50% / 55% / 60% / 75% of damage dealt to killed enemies' shield and health while they are within the aura radius. Upon deactivating Mend, all stored hitpoints are evenly distributed to the shields and health of Equinox and her allies within range.
Shields gained from enemies killed can accumulate Overshields.
The total amount of accumulated hitpoints is visible under Mend's icon beside Equinox's shield and health indicators.
Hitpoints restored per ally is calculated with the following expression: HP Restored per Ally = Total Accumulated HP ÷ (Equinox + Number of Allies).
When Equinox and her allies are healed, health restoration is prioritized over shield restoration (i.e., Mend will fully restore health before it can fully restore shields). This becomes apparent should there be an insufficient amount of stored hitpoints to completely heal Equinox and her allies within range when Mend is deactivated.
Allies are only healed up to their maximum shields and health; therefore, any excess accumulated hitpoints are effectively lost.
On Defense Objects, Mend restores up to 500 shields over 5 seconds which does not stack with similar restoration effects.
Day form
Day Equinox emits a lacerating aura that deals 75 / 100 / 125 / 150Slash damage with a 100% status chance and Stagger to all enemies within range. Maim accumulates 50% / 55% / 60% / 75% of damage dealt to killed enemies' shield and health while they are within the aura radius as Slash damage. Upon deactivating Maim, all stored damage is released in a violent burst that affects all enemies within range.
Aura damage is affected by Ability Strength, while the damage conversion percentage is not.
Enemies damaged by the aura are temporarily stunned.
The aura damage, proc, and stun will only apply once to each individual enemy.
The total amount of accumulated damage is visible under Maim's icon beside Equinox's shield and health indicators.
Upon deactivation the total accumulated damage is transformed into an area of effect Slash damage, which bypasses obstacles in the environment, against all enemies currently within the aura. Damage diminishes with distance but is not divided among the enemies.
AoE Damage (for each enemy) = Accumulated Damage × (1 - Distance to the Enemy ÷ Aura Radius)
Damage calculation here is before enemy's damage reduction
Casting Maim while Provoke is active will increase the aura damage.
Affected enemies are visually lashed by energy whips as they receive damage.
Maim can be recast to apply the aura damage, proc, and stun on previously affected enemies; however, recasting requires deactivation which will discharge all stored damage.
Aura range is visibly determined by the glistening wave-like energy on all surfaces around Equinox.
Enemies in range are highlighted in Equinox's energy color at its highest color intensity.
Cast delay of 2 seconds and deactivation delay of 1 second are affected by Casting Speed.
Energy Transfer is a Warframe Augment Mod for Equinox that allows Mend & Maim to remain active when switching forms via Metamorphosis, transforming the stored damage OR health charge into the corresponding opposite.
Mend can easily acquire a sufficient amount of charge to heal any allies and recover shields.
Mend & Maim will only absorb allies' damage on enemy health if a Warframe ability is involved.[citation needed]
While active, Mend & Maim will continue to store damage even in operator mode.
As Maim deals only Slash damage, it is less effective against heavily armored enemies like Grineer.
Maim is, however, quite effective against the Infested as they possess no armor and their health classes, except for Sinew, are vulnerable to Slash damage.
As damage accumulation/health conversion rate is not affected by Ability Strength, Mend & Maim wouldn't require high Ability Strength to be effective, especialy if built for effect upon deactivation.
Note that Mend's shield restored per kill is still affected by Ability Strength.
Gara expends 25Energy to thrust her glass longsword with 5 / 6 / 8 / 10 meters range toward the aiming reticle, dealing 500 / 600 / 700 / 800Puncture damage and knocking back all enemies within 0.75 meters radius from the blade. Holding the ability key instead sweeps the glass longsword from left to right in a 225° arc in front of Gara, dealing 500 / 600 / 700 / 800Slash damage to all enemies within reach and bashing them away in a Ragdoll state in the direction of the sweep.
Shattered Lash has innate punch through, bypassing entities, walls, and obstacles in the environment.
Shattered Lash also bypasses Gara's Mass Vitrify barrier, dealing damage from both the sword and the explosion to enemies struck.
As an example, with a maxed Pressure Point, Shocking Touch and Intensify, a rank-3 Shattered Lash will deal 800 × (1 + 1.2) × (1 + 0.9) × (1 + 0.3) = 4,347.2 damage.
Mods affecting Puncture damage and Slash damage will affect only their corresponding physical damage type for Shattered Lash's thrust or sweep.
Impact damage mods have no effect on Shattered Lash.
Manticore's damage bonus applies to Shattered Lash.
Shattered Lash gains 25% additional damage for each combo multiplier, up to a 3.75x damage multiplier at 12x combo, or 4.0x with Venka Prime equipped at 13x combo.
Shattered Lash is not affected by the equipped melee weapon's stats or its innate effects.
Base damage bonus offered by melee incarnon adaptors is added after combo and strength, but multiplied by damage and element.
Critical Chance, Status Chance and Critical Multiplier all modify Shattered Lash's base values, enabling it to critically hit or proc status which can be further enhanced by mods such as Sacrificial Steel and Melee Prowess.
Casting Shattered Lash while wielding Xoriswill bypass its infinite combo extender, resetting the counter if the effective combo duration has expired.
Casting Shattered Lash while wielding Tenet Livia or Tenet Grigori will also reset the combo counter, due to their pausing of the combo timer when holstered.
Shattered Lash's range is affected by Ability Range, while blade knockback radius and sweep arc are not.
Sweep is not perfectly aligned in a straight line and is similar to a wave-like pattern, allowing Shattered Lash to hit enemies on a slightly higher terrain elevation than Gara past ~90°.
The firing directions and origin points for Thrust and Sweep are detailed as follows:
Thrust's origin and aim direction both snap to the environment as they were at the completion of the cast (the very start of the animation), regardless of Gara's orientation or position afterward.
Sweep's hitbox adheres to Gara's character model, moving with her. Horizontal aim snaps to the aiming reticle at the time of the cast, while vertical angle is always straight in the middle.
Enemies crystallized by Mass Vitrify are not affected by Shattered Lash's ragdoll and knockback effects.
Ability Synergy:
Gara's Passive allows casting abilities to have a 15% chance to Blind enemies within 12 meters for 10 seconds, exposing them to Melee Finisher attacks. Blind chance increases by 20% until the blind triggers.
Casting Shattered Lash on Gara's own Mass Vitrify glass barrier causes it to break and explode outward, dealing damage to enemies outside the barrier.
Damage type of the glass barrier explosion is determined by Shattered Lash's thrust or sweep used to shatter the barrier.
If Splinter Storm is active and is within the explosion radius of the barrier, 50% of the barrier explosion damage is permanently added to Splinter Storm's damage per second until its duration expires.
Shattered Lash's quick cast is a one-handed action that allows Gara to fire and reload weapons, as well as move and perform maneuvers during cast.
Hold cast is a two-handed animation that stops Gara's movement and other actions during cast.
Can be cast while in midair.
While ability is silent, it does not activate stealth multiplier.
The glass longsword is visually summoned from Gara's left palm and does not possess a grip. Glass shards will constantly break away and fall from the blade as a visual effect, while the longsword fades into and out of existence for the duration of the thrust or sweep.
The longsword and its particle effects are affected by Gara's chosen Warframe energy color.
Shattered Lash can damage enemies across the Rift Plane.
Tap 1 for quick cast to thrust the glass sword where you aim, puncturing through all enemies in a line to inflict Puncture damage, knockdown and knockback. Thrust allows Gara to keep on the move, use Maneuvers, as well as fire and reload weapons.
Hold the button for hold cast to sweep the sword, slashing all enemies in an arc to inflict Slash damage, body ragdoll and knockback. However, sweep locks Gara in place during cast.
Sweep is animation-locked and cannot be aimed upward or downward. However, because the sweep is in a wave-like pattern, it can hit enemies on a lower or higher terrain elevation than Gara depending on the troughs and crests of the wave. You can familiarize yourself with this pattern in Captura mode using the advance time function.
If enemies are standing on a higher elevation, use Aim Glide (default hold RMB while in midair) and time your sweep to hit them with your blade.
Modify your melee weapon with base damage, elemental damage, and Puncture and Slash damage to maximize potential damage for Shattered Lash. Depending on your preferred attack method (thrust or sweep) and enemies you will face, you can specialize in Puncture or Slash damage mods to take advantage of damage type bonuses against different factions.
Base damage, elemental damage, and physical damage from melee Riven Mods do affect Shattered Lash, further amplifying its damage potential.
Use Splinter Storm on an enemy target to amplify Shattered Lash's damage on it.
Cast Spectrorage on a cluster of enemies or in the enemy's path to cause them to gather inside the carousel, then use Shattered Lash to thrust at specific targets in a line or sweep the entire group away.
Crystallize enemies using Mass Vitrify then attack them with Shattered Lash for increased damage.
Damage multipliers from Mass Vitrify and Splinter Storm can stack to produce even higher damage output for Shattered Lash.
Create a Mass Vitrify barrier and strike it down with Shattered Lash, destroying it in an explosion of glass fragments that damage enemies on the outside of the barrier. Thrust or sweep determines the physical damage type the explosion damage will adopt, allowing you to adjust its damage potential against different factions.
Gara's armor splinters into a maelstrom of shattered glass that slices enemies and impairs their weapons. Allies who contact the cloud are fortified against damage.
Gara expends 50Energy to shatter her glass armor into a storm of razor-sharp fragments that encircles herself, an ally, or an enemy target on the aiming reticle within 15 / 20 / 25 / 30 meters, lasting for 10 / 14 / 18 / 22 seconds. The shard storm has a radius of 1 / 1.5 / 2 / 2.5 meters, within which enemies and Objects are dealt 100 / 150 / 200 / 250 damage per second and constantly pushed away from the center. When surrounded by the Splinter Storm, Gara and her allies also receive 25% / 30% / 50% / 70%Damage Reduction, while her enemies receive 15% / 20% / 25% / 35%Damage Vulnerability.
Damage per second is distributed between 20%Impact, 40%Puncture, and 40%Slash.
Damage reduction is capped at 90%, achievable with 129% Ability Strength.
Damage vulnerability affects Splinter Storm's damage per second, causing the affected enemy target to receive increased damage from the Splinter Storm around it.
On Defense Objects, the damage reduction is capped at 50%.
Despite being a Warframe power, Splinter Storm seems to be considered as objects and cannot damage enemies cross the Rift Plane.
Splinter Storm casted in material plane will not be able to harm enemies in the Rift, even when the affected target later cross into the Rift, and vice versa.
Enemies debuffed with Splinter Storm become immune to pushback and pull effects, including those of Splinter Storm, Ferrox and Tether Grenades.
Ability Synergy:
Gara's Passive allows casting abilities to have a 15% chance to Blind enemies within 12 meters for 10 seconds, exposing them to Melee Finisher attacks. Blind chance increases by 20% until the blind triggers.
If a Spectrorage mirror shatters inside Splinter Storm's radius, 50% of the mirror's damage is permanently added to Splinter Storm's damage per second until its duration expires.
Absorbed damage can stack from multiple mirrors breaking inside Splinter Storm's radius.
Splinter Storms on any targets can absorb damage from Spectrorage mirrors.
Splinter Storm does not absorb damage from Spectrorage's collapse explosion.
Casting Mass Vitrify will also refresh the duration of Splinter Storm on Gara, as well as any affected allies that contact the molten glass during its expansion.
If Mass Vitrify's barrier is destroyed by Shattered Lash and Splinter Storm is within the explosion radius of the barrier, 50% of the glass fragments' damage is permanently added to Splinter Storm's damage per second until its duration expires.
Absorbed damage is also affected by equipped melee mods including:
Base damage (e.g., Steel Charge), elemental damage, and physical damage mods.
As Mass Vitrify's explosion damage is not comprised of Impact damage, physical damage mods that affect Impact have no effect on absorbed damage for Splinter Storm.
Absorbed damage is calculated after additional damage from mods.
Absorbed damage can stack from repeated Mass Vitrify explosions inside Splinter Storm's radius.
Splinter Storms on Gara herself and allies can absorb damage from Mass Vitrify's explosion, while storms on affected enemies do not.
Casting Splinter Storm stops Gara's movement and actions.
Can be cast on self when not aiming at an ally or enemy target.
Can be cast on multiple targets while active.
Cannot be cast on a target already affected by Splinter Storm.
The newest active instance of Splinter Storm is tracked by the ability icon timer, including the instance on Gara herself.
Splinter Storm buff on ally players appears as an icon with the timer below and percentage of damage reduction at the top-right, displayed beside the Shield and Health indicators on the affected players' HUD.
Glass fragments are affected by Gara's chosen Warframe energy color.
Mending Splinters is a Warframe Augment Mod for Gara's Splinter Storm that causes it to heal friendly targets it's applied to, with the healing being increased for every target (friendly or not) affected by Splinter Storm for a short time.
Aim away from allies and enemies then press 2 to cast Splinter Storm on yourself. If aiming at a target, pressing the ability key will lock onto the target and apply Splinter Storm on it after the casting animation.
Buff your team and the objective with Splinter Storm to drastically increase their durability. Apply on Companions when able to protect them and grant them a pushback aura to defend against melee enemies.
Use Splinter Storm's damage resistance and pushback effect to enhance your team's melee combat effectiveness, allowing any ally to clear paths through crowded hallways and chokepoints blocked by enemies.
Cast on an enemy to increase all damage against that target.
The pushback effect helps single out the enemy among a crowd for a direct line of gunfire.
Because of the pushback effect, melee weapons with short reach such as daggers and most melee ground finisher attacks can miss the intended target as it is moved away from Splinter Storm during the animation. Debuff a desired enemy with Splinter Storm to stop it from being pushed away, as well as enhancing damage against it.
Splinter Storm also damages and breaks Objects in the environment, allowing for easy resource collection such as Iradite on the Plains of Eidolon. However, Explosive Barrels can also detonate if destroyed by the glass shards, therefore care should be taken when such objects are nearby.
Coincidentally, Splinter Storm offers great protection against enemy thrown grenades, causing them to detonate harmlessly against Tenno and applying its explosion damage against nearby enemies.
Cast Mass Vitrify to simultaneously refresh your Splinter Storm to full duration. Any allies that touch the expanding molten glass will also have their Splinter Storms' timers refreshed, reducing overall energy costs for reapplying Splinter Storm on you and your allies and avoiding the prolonged casting animation locks.
Stand next to Spectrorage's mirrors as enemies break them to stack additional damage onto Splinter Storm's damage per second.
This extra damage applies to you, your allies, and any enemies debuffed with Splinter Storm inside Spectrorage's carousel; extra damage remains as long as Splinter Storms remain active on the individual targets.
Destroy Mass Vitrify's glass barrier using Shattered Lash, allowing you and your allies' Splinter Storms in range of the glass explosion to stack additional damage onto Splinter Storm's damage per second.
This extra damage applies to you and your allies only, and benefits from melee mods that apply to Shattered Lash, granting high damage amounts per explosion; extra damage remains as long as Splinter Storms remain active on the individual targets.
When the Splinter Storm damage counter above the ability icons disappear, it signals that no more Splinter Storms are active from you. Keep close attention to avoid accidentally exposing you and your team to more incoming enemy damage than potentially able to be resisted.
Splinter Storm will not be dispelled by Violence's Silence, so players can take advantage of it for The Steel Path missions.
Trap enemies in a carousel of mirrors, forcing them to attack visions of their true selves. Destroyed mirrors damage their attackers, as does the collapse of the carousel.
Gara expends 75Energy to summon a perpetually spinning carousel of 4 / 6 / 8 / 12 spectral mirrors at the targeted location within 100 meters. Enemies within 4 meters from the mirrors are enticed to move inside the carousel and attack a chosen mirror upon seeing their own reflections. Each mirror will break upon receiving 500 / 600 / 700 / 800 damage and release it as spectral energy back to the attacker. When 2 / 3 / 4 / 6 mirrors are broken, the carousel collapses in an explosion inflicting 800 / 1,000 / 1,200 / 1,500 damage to all enemies inside the ring. Spectrorage lasts for 10 / 14 / 18 / 22 seconds or until all mirrors break from collapse.
Damage is distributed evenly between Impact, Puncture, and Slash.
Mirror damage is only applied against the enemy that breaks the mirror. Collapse damage applies to all enemies inside Spectrorage and diminishes with distance from the center.
The carousel expands or shrinks with the total amount of mirrors spawned on cast, and the distance between the mirror line and the center is equal to the charm radius.
The carousel rotates clockwise constantly, which causes enemies targeting specific mirrors to turn and follow them.
Mirrors have a higher Threat Level than players. Enemies within the carousel will ignore players as long as there are intact mirrors remaining. This appears to affect Acolytes and can make them stop attacking or using abilities.
Mirrors do not have collision and will phase through objects, walls, players, and AI.
Mirrors can path up and down terrain where elevation difference exists.
Ability Synergy:
Gara's Passive allows casting abilities to have a 15% chance to Blind enemies within 12 meters for 10 seconds, exposing them to Melee Finisher attacks. Blind chance increases by 20% until the blind triggers.
If a Spectrorage mirror shatters inside Splinter Storm's radius, 50% of the mirror's damage is permanently added to Splinter Storm's damage per second until its duration expires.
Absorbed damage can stack from multiple mirrors breaking inside Splinter Storm's radius.
Splinter Storms on any targets can absorb damage from Spectrorage mirrors.
Splinter Storm does not absorb damage from Spectrorage's collapse explosion.
Casting Spectrorage stops Gara's movement and other actions.
Can be recast while active. Only 1 carousel of mirrors may remain active per player.
Can be cast while in midair.
Cannot be cast without a valid horizontal surface within cast range as well as directly on or below the aiming reticle.
Spectral mirrors appear as collections of floating glass fragments that emanate energy toward the center of the carousel.
Upon breaking, the mirrors release their energy while they remain floating in motion.
Mirrors and their energy color are affected by Gara's chosen Warframe energy color.
Subsuming Gara to the Helminth will offer Spectrorage and its augments to be used by other Warframes.
Garuda expends 100Energy to channel her sanguine blood beneath herself as her talons quiver in anticipation, as a whirlwind of flying talons spanning a 2 meter radius encircles her. Enemies pierced by Garuda's talons will receive 150 / 200 / 250 / 300Slash damage and be pushed away from Garuda.
Channeling the talons expands a focus ring indicating the ranged area of effect of the ability. Initial field of view angle is 25 degrees, which can expand up to 95 degrees when fully charged; the range of ability can expand up to 60 meters based on the charge time. Upon release, Garuda unleashes 8 flying talons as homing projectiles, piercing through all enemies who are within the focus ring and in line of sight.
Tapping the ability will automatically unleash the talons once fully charged. Holding the ability will sustain the whirlwind around Garuda until released, allowing her to aim carefully to maximize the talons' potential.
Each enemy will always be pierced at least once by the projectiles. However, they can also be pierced multiple times in a single skill use.
For an example, using Seeking Talon on a single enemy will damage said enemy 8 times in quick succession.
Garuda is Invulnerable while casting the ability until it is fully charged.
Enemies damaged by the flying talons are marked with Garuda's symbol for 10 seconds. Attacking marked enemies with weapons and abilities grants a 75% chance to cause a SlashStatus Effect.
Marked enemies will still receive status effects from other sources in addition to the Slash proc (if a weapon's status chance triggers and hits an enemy affected by Seeking Talons, the weapon's status will still be applied, the Slash proc is then added, resulting in the enemy receiving 2 status effects at the same time).
Status chance is capped at 100%, achievable with 134% Ability Strength.
All sources of damage are capable of inflicting Slash Status Effect. This includes, but not limited to: weapons, damage from abilities, special damaging effects from mods (Concealed Explosives, Thunderbolt, Thermagnetic Shells, etc.) and Syndicate procs.
Weapons do not need to have innate Slash damage in order to inflict Slash Status Effect.
Marking of enemies will include special enemies such as Stalker.
Slash statuses applied due to the mark are considered to be forced status procs and cannot stack with other sources of forced Slash statuses such as Hunter Munitions or Internal Bleeding. However forced Slash statuses can stack with a weapon's innate status chance.
Duration of the mark cannot be refreshed if the ability is recast while the mark is active.
Garuda cannot perform parkour Maneuvers (except for rolling and sliding) or general interactions while channeling this ability. However, she can still move.
Can be cast while airborne, causing Garuda to hover for a few seconds.
Garuda will leap a short distance upward upon release, causing the targeting ring to shift.
Blending Talons is an Warframe Augment Mod for Garuda's Seeking Talons that grants it the ability to create an area of effect explosion around Garuda as well as giving her Garuda Talons (Prime) a passive that grants it additional combo count upon hitting enemies affected by Slash procs.
This ability has a long casting and recovery animation. However, this can be bypassed by casting Seeking Talons while airborne.
Holding aimglide while releasing Seeking Talons will allow Garuda to hover after leaping and cancel the falling part of her animation. This does not work when used on the ground.
While aimgliding, Garuda can continue staying airborne by recasting Seeking Talons again or charge and throw her Dread Mirror's Dread Heart.
Each cast while airborne raises Garuda to be higher off the ground. Ground slams can be used to return back to ground level quickly to maintain mobility.
Using melee immediately after releasing Seeking Talons while airborne can also be used to cancel the recovery animation. The recovery animation for this will be longer than if holding an aimglide, but is more useful for congested tilesets.
A side effect of being above enemies while casting this ability is that it is able to hit headshots, making use of its increased damage multipliers, as well as Sharpshooter's Bounty and any Decree that activates on headshot in Duviri.
As Seeking Talons bypass the need to have enemies within vision, bringing a companion equipped with a mod that detects enemies in the radar map (such as Animal Instinct) will help Garuda in finding the most number of enemies that can be hit without having to actually see them.
Due to the forced Slash proc caused by Seeking Talons, it synergizes particularly well with weapons that have high damage burst potential such as the Kuva Zarr or Tenet Envoy to unleash heavy True damage per hit.
The forced Slash proc is also effective against Sentient enemies, as True damage bypasses their adaptive damage resistance.
Equipping Blending Talons gives Garuda the potential to mark her symbol on more enemies than her standard charged up ability by deliberately running in the midst of the crowd and using short-tap Seeking Talons.
Using Dread Mirror's Blood Ball into enemies hit by Seeking Talons will essentially do a very high scaling slash nuke, scaling further with a Primer.
Maximization
This calculator feature is sunsetted on the wiki. It may not see further updates, but will be present on articles for the time being since some people still find use for them. See User blog:Cephalon Scientia/Sunsetting of Maximization Calculators for more details.
Misc:
Self status cleanse on cast Invulnerable during dash ? / ? / ? / 40 m/s speed 1 s wave duration Ragdoll on contact Corrosive status on initial hit and variable stacks in contact 50% recast energy discount
Hydroid expends 50energy to cleanse himself of all negative Status Effects while transforming into liquid and surging forward as a wave of water. While traveling in waveform, Hydroid becomes completely Invulnerable to damage, as his speed increases to ? / ? / ? / 40 meters per second over a duration of 1 second; the wave may be steered during its travel by changing the view direction, and Hydroid may halt his surge early by jumping (default Spacebar ). Enemies within 3 / 4 / 5 / 6 meters of the wave are Ragdolled and pulled along by the riptide, while dealt 100 / 200 / 250 / 300Corrosive damage when caught by the wave and when the wave breaks at the end of the duration, and are inflicted with a variable number of Corrosive Status Effects based on how long they are carried by the wave.
Tidal Surge's pull on enemies attempts to collect them in front of Hydroid's wave. At the end of the surge, pulled enemies are left clumped together at the location where the wave ended.
Hydroid jumping out of Tidal Surge will carry forth its momentum as he travels through the air.
Can be recast while active to remain in waveform and renew the surge for continuous travel toward a new direction. Tidal Surge's energy cost is discounted by 50% if cast again while Hydroid is surging.
Ability Synergy:
Hydroid's Passive allows the first Corrosive stack to remove 50% armor and is able to fully remove all armor at 10 stacks.
Tidal Impunity is a HydroidWarframe Augment Mod for Tidal Surge that allows Hydroid and all allies contacted by the ability to temporarily gain immunity to Status Effects, as well as removing already active ones. Also passively reduces Tidal Surge's base energy cost to 15.
It can be used to reach or pass certain areas of the map.
Bugs
Sometimes when Hydroid emerges from the wave, his "fin" will be gone.
On PS4, if Hydroid is in the middle of a Tidal Surge when all players reach the extraction point, he will be permanently stuck in his dashing pose and simply clip into the drop ship during the "Mission Complete" mini-scene that plays during the loot screen.
Inaros expends 25energy and begins to spin rapidly and move at 12 m/s as a storm of dust and sand, violently pulling in all enemies within a 4 / 5 / 6 / 7.5 meters radius and dealing 200 / 300 / 400 / 500Slash damage per second with a ?% status chance for ? / ? / ? / 4 seconds or upon manually deactivating the ability. While trapped within the storm, enemies are gradually flung wildly in a Ragdoll state following and hovering above Inaros; each trapped enemy heals 50Health to Inaros. While channeling the storm, Inaros becomes Invulnerable but is unable to attack with weapons or cast other abilities or perform Parkour Maneuvers.
Move speed is affected by Movement Speed speed modifiers. Movement Speed bonuses scale off of 10 m/s instead of 12 m/s.
Sandstorm's radius is an invisible cylinder with roughly the height of Inaros himself. Enemies on a terrain elevation higher or lower than this cylinder will not be affected by this ability.
When Inaros performs a Melee quick attack (default E ) during Sandstorm or upon duration end, enemies trapped in the storm are vacuumed toward Inaros and deposited on the ground around him, suffering Knockdown for 4 seconds and becoming vulnerable to Melee Ground Finishers.
Casting and deactivating Sandstorm are full-body animations that allow uninterrupted directional movement controls, but restrict parkour Maneuvers and other actions.
Elemental Sandstorm is a Warframe Augment Mod for Inaros that causes Sandstorm to inflict status procs based on equipped damage types and mods on melee weapons currently wielded. Also passively increases Sandstorm's Ability Range by 50%.
Command Venari to focus on a target. Hold to cycle between Attack, Protect, and Heal postures. If Venari is killed, use this ability to revive her instantly.
Misc:
120 s (mark duration) 45 s (respawn time) 2.5 s (snare duration) 5 (hits per snare) 3 s (Attack & Protect cooldowns) < 90% HP (missing health threshold) 10 m (Heal aura radius) 65 s (Venari self-heal mark duration)
Khora commands her loyal Kavat companion Venari to prioritize a target on the aiming reticle for 25energy, leaving Venari's mark above the target for 120 seconds. Once commanded, Venari chases the marked target if nearby or teleports to it if far away, while refreshing the special effect for her battle posture if it is on cooldown. When Venari reaches the target, she will perform different tasks depending on her battle posture.
The target is marked by a floating battle posture icon above their head.
Venari's mark cannot be recast on the same target while still active.
Venari's mark lasts until removed via duration end, Khora marking a different target, switching battle posture, or the target is killed.
Marked targets are prioritized by Venari over enemies afflicted by Slash with Hunter Command equipped.
When a target is marked, Venari audibly snarls in response.
While Venari is alive, Khora passively gains a 1.05x / 1.1x / 1.12x / 1.15x movement speed multiplier. This stacks multiplicatively with speed mods like Rush. When Venari is killed, she will respawn beside Khora after 45 seconds or instantly by casting this ability using 50 energy.
Speed multiplier stacks multiplicatively with mods such as Rush.
Revive energy cost is reduced proportionately based on the remaining time until Venari respawns (e.g. 1 second remaining on timer = 1 energy used to revive Venari.)
Respawn time is not affected by mods.
Respawn time is displayed on the ability icon when Venari is killed.
When respawned, Venari visually leaps down from above landing next to Khora.
All postures are available by default when Venari is unlocked at Warframe rank 5.
Holding the ability key (default 3 ) cycles to Venari's next battle posture for no energy cost, and also deactivates any current Mark:
Khora commands Venari to adopt her Attack posture, causing her to ferociously assault nearby enemies and allowing her to use Snare. During Snare, Venari chains her chosen target in place for 2.5 seconds, as she damages the target with 5 hits over the course of the animation; each hit inflicts 350Slash damage with a guaranteed Status Effect proc. Snare has a cooldown of 3 seconds, which can be bypassed by Khora manually marking a target.
Snare damage is affected by by Maul, Venom Teeth and other elemental damage mods.
Snare is capable of Status Effect procs with every hit in addition to the forced Slash proc. It inherits Venari's Status Chance and damage spread shown on the Arsenal as normal.
Snare has 0% critical chance and is not affected by Bite or Hunter Synergy.
Venari's Attack mark can only be cast on an enemy target.
Venari's Attack mark will remain on the target until it expires, allowing Venari to focus on killing the target with multiple Snare attacks.
Snare is not affected by Swipe's multiple targeting and range extension.
Casting Snare is a full-body animation that causes Venari to maneuver around the target, before reappearing near the target once finished.
Venari is still vulnerable to damage while performing her special attack animation.
During Snare, the target is visually held in place by living chains that attach to nearby surfaces.
Khora commands Venari to adopt her Protect posture, causing her to defend Khora or herself from the nearest enemy and allowing her to use Tail Whip. During Tail Whip, Venari spins in place to inflict Knockdown and Disarmed on a single enemy. Tail Whip has a cooldown of 3 seconds, which can be bypassed by Khora manually marking a target.
Tail Whip will affect the target even if it moves away from Venari during her spin animation.
Does not knockdown nor disarm enemies innately wielding melee weapons.
Venari's Protect mark can only be cast on an enemy target.
Venari's Protect mark is removed once Tail Whip is performed on the target.
Casting Tail Whip is a full-body animation that stops Venari in place.
Khora commands Venari to adopt her Heal posture, imbuing her with healing energy and allowing her to use Revitalize. When the current Health of any ally player in the squad or Venari herself reaches below 90% of maximum health, Venari snarls and radiates a healing aura with a 10 meters radius; during Revitalize, Venari instinctively seeks out and follows the player with the lowest amount of current health, granting the target and any nearby injured allies 50 health regen per second while they remain in the aura.
Venari's Heal mark can only be cast on an ally target.
Venari's Heal mark is removed once Khora marks another target, the target is killed, or Khora switches battle posture.
Venari will immediately activate Revitalize then follow the marked target, if Khora marks a target or herself by casting 3 without a target on the aiming reticle. A quick and reliable way of marking Khora herself is to aim straight up briefly then casting the ability.
Venari will closely follow its target and Revitalize will not deactivate until the mark is removed. While following a target, Venari also will not attack nearby enemies unless she is equipped with supplemental attack mods like Sharpened Claws or Pounce.
Khora can mark Venari to activate Revitalize, causing Venari to stand still at her current position for 65 seconds or until the mark is removed.
Growing Power increases healing per second when Venari activates Revitalize during its effect; the bonus healing per second persists until Revitalize is deactivated.
Activating Revitalize is a full-body animation that stops Venari in place, while deactivating Revitalize does not require an animation.
While the healing aura is active, Venari and the affected allies glow in Khora's chosen energy color.
The healing aura is strong enough to keep Khora alive indefinitely within a Survival mission after the life support runs out, however since enemies stop spawning at this state it has limited usefulness.
The healing aura is strong enough to keep Khora alive indefinitely within a Vampire type Nightmare Mode mission without having to kill any enemies for health regeneration.
Battle posture cannot be switched while Venari is dead, instead the respawn function overrides any input on the ability key.
While Venari is in a neutral state with no active Marks she is far less likely to get stuck in terrain, frequently teleporting in beside you if you have gotten ahead of her.
Casting speed on all animations related to this ability, on both Khora and Venari, is not affected by mods such as Natural Talent and Speed Drift.
Venari does not benefit from the set bonus of Hunter Mods.
Set Mods equipped on Venari do not count towards the number of mods equipped for the set bonus.
Fetch equipped on Venari does not stack with Vacuum or Fetch equipped on companions.
Casting Venari's mark and summoning Venari do not play any animations on Khora, while changing posture is an upper-body animation that allows movement and parkour Maneuvers.
Khora's metallic adornments and Venari's tail change appearance depending on the selected posture: Attack (long spikes), Protect (small stubs and hammer tail), and Heal (curved blades).
While Venari is dead, Khora's metallic adornments are hidden from view and will reappear once Venari respawns.
The following visual effects are affected by Khora's chosen Warframe energy color:
Venari's eye and regalia colors, mark icon color, as well as her death and respawn/teleport landing impact.
Khora's battle posture switching.
Attack posture Snare trails and Heal posture Revitalize glow.
Venari Bodyguard is a Warframe Augment Mod for Khora's Venari that makes Venari die in Khora's place at the cost of an increased spawn timer, but every enemy killed decreases the spawn timer.
Khora's passive speed multiplier affects her regular movement speed, which also enhances sprint speed. Combine with high Ability Strength and sprint speed mods such as Rush and Armored Agility to gain vastly increased mobility.
Keep moving and do parkour maneuvers while switching battle postures to evade incoming enemy attacks.
By default, Venari will attack enemies and perform her battle posture effects on her own. Place a mark on your target to direct Venari's attention where you desire.
Equip Hunter Recovery on Venari and place an Attack mark on a distant enemy. Venari will teleport to the target and immediately use Snare to attack it, quickly healing Khora in the process.
Use Protect mark to knockdown and disarm dangerous threats such as Napalm and Tech.
Heal mark allows versatile options to grant health regen in an area:
Use on an ally or Khora herself to have Venari follow suit.
Use on Venari to order her to stay put.
Use on Khora if Venari is far away to recall her back to your side.
Use on an ally in the distance to teleport Venari to the fray.
Venari's Heal posture is able to heal static objectives such as Cryopods, Excavators, and Kuva Harvesters. Place a Heal mark on the objective to have Venari stand guard over it providing healing to it and nearby teammates. It can also be used to heal moving objectives like defectors and hostages.
Cast Ensnare to group up enemies for Venari to attack them for double damage.
Bugs
Slash procs do not change Venari's target with Hunter Command equipped, even when no enemies are marked.
Venari's UI will be completely hidden if Venari is dead and the player uses Transference to return to the Warframe.
Venari's respawn function can rarely not trigger when Venari is killed, requiring Khora to spend a revive on herself to bring Venari back.
Venari randomly stops moving when her heal aura is activated. This bug occurs for targets she automatically chooses to heal, as well as targets marked by Khora. Switching to Attack or Protect postures will reset her AI to normal.
Placing a Heal mark on Khora or an ally sometimes causes Venari to toggle the healing aura on and off repeatedly as she edges toward the marked target.
Venari is not going to collect items with Fetch mod. (only works well playing solo mode)
Locked lockers unlocked by Venari via the Scavenge mod still appear as locked (red) despite being unlocked, and can still be opened.
Sense Danger can sometimes make enemy markers appear outside of the minimap in the UI if Venari uses it and Khora moves away from the enemies.
If during a Sortie the energy level is insufficient to cast this ability, then it will be rendered inactive completely. The side effect is that if Venari dies it will not revive itself during the mission.
Client only: If Venari dies and the ability is cast to revive her, the passive movement speed may be applied with unmodded Strength.
Nova expends 25energy to create 3 / 4 / 5 / 6 antimatter particles that orbit her and automatically launch themselves one by one every 1 second at enemies within 7 / 8 / 10 / 12 meters inflicting 80 / 100 / 120 / 150Slash damage. Each particle persists on Nova indefinitely until launched, granting her 5%Damage Reduction as they orbit her.
Damage reduction is capped at 90%, up to 18 particles.
While active, a counter becomes visible on the ability icon that displays the number of available particles.
Null Star cannot be recast until all particles have been used.
Subsuming Nova to the Helminth will offer Null Star and its augments to be used by other Warframes.
If Garuda subsumes Null Star or Nova subsumes Blood Altar, then the particles will not target enemies currently impaled by Blood Altar.
Neutron Star is a Warframe Augment Mod for Nova that allows all active Null Star particles to be detonated by pressing the ability key (1 ), seeking out enemies and dealing area-of-effect damage with a guaranteed Heat proc. Neutron Star's seek radius is doubled than that of Null Star's.
Because each particle grants 5% damage reduction, the maximum amount of damage reduction currently achievable is 90%. A total of 18 particles is needed to reach this value. This is achievable with at least 300% modded Ability Duration for a max rank Null Star.
When you are full on energy and come across extra energy spheres laying on the floor, you can cast a "free" Null Star and instantly go back to full energy. This allows you to easily keep stars active for each encounter.
Stars will launch themselves at unaware enemies, alerting them if they survive. This makes this ability sub-optimal for stealth oriented missions.
For offensive purposes, it can deal a good amount of damage to a single target by itself, dealing a total of 1200 damage after all six particles have launched (or more, if you are using Continuity and Constitution). Keep in mind that each particle will stun on hit, allowing you to continually stagger a target while you attack them.
Defensively, it is wise to use it before reviving an ally or accessing a terminal, as you are very vulnerable when doing either. Activating Null Star beforehand can stun or kill any enemies nearby that decide to attack you, preventing you from taking a lot of unnecessary damage.
On higher enemy ranks Nova may wish to use the skill in the same manner as Rhino's Iron Skin and recast it every time it is depleted as this will prevent her from being blindsided by enemies that are stuck in corners or behind obstacles. This is particularly important in Grineer tilesets because infantry will often jam themselves into corners on either side of the round doorways and open fire as soon as the player passes by.
To focus on keeping Null Star particles for damage reduction, it might be beneficial to have Ability Range lower than 100%. Lower range will prevent particles from seeking enemies at a distance.
Null Star particles will seek deactivated Bursa in range. It is advisable to stay away to prevent wasting the particles.
The Molecular Fission augment will allow Molecular Prime to restore up to two charges of Null Star per enemy killed while under its effects.
Bugs
If you are spamming melee attacks while you cast or right after you cast Null Star, it will render you unable to perform any melee attack for a short duration even though your cast animation is already finished.
(TAP) SHRAPNEL VORTEX
Creates a slashing, staggering swirl of shrapnel.
(HOLD) SHIELD SATELLITES
Protea reconfigures 3 Grenades to work as overcharging shield generators, protecting her, her allies and companions. When Shields break a Satellite is destroyed to extend the period of invulnerability.
Tap the ability key to scatter 3 grenades horizontally offset from the reticle by -45°, 0°, and +45° in the Shrapnel Vortex configuration. Each grenade will bounce off of surfaces and objects until they land on a horizontal surface, where it will release a vortex of flying shrapnel for 13 seconds. Each shrapnel vortex has a 2 / 3 / 4 / 5 meter radius, inflicts 200 / 250 / 350 / 500Slash damage per second with a 33% status chance, and a 100% chance to stagger enemies slightly or strongly on each tick.
Shrapnel Vortexes do not require line of sight to damage and stun enemies within range.
Shrapnel grenade uses a custom model that resembles the shape and pattern of a baseball. When deployed, the grenade spins rapidly in place while emitting a glow of energy particles.
Shrapnel Vortex visually creates a sphere consisting of multiple trails of energy particles that encircle the grenade at high speed.
Shield Satellite
Hold down the ability key to scatter 4 grenades horizontally offset from the reticle by -45°, -25°, +25°, and +45° in the Shield Satellite configuration. Each grenade will bounce off of surfaces and objects until they land on a horizontal surface, where it will release a floating shield satellite with a lifetime of 13 seconds. The satellite will attach to the first nearest ally without an attached satellite that comes within 2 / 3 / 4 / 5 meters of it and instantly restore 200 / 300 / 400 / 500shield points to them. While attached, it constantly provides 25 / 30 / 40 / 50 shield points per second for the ally, capping at their Overshields limit. If the ally's shield gate is triggered while it is attached, the satellite will grant 2x minimum shield gate invincibility duration and immediately terminate.
Satellites do not require line of sight to be picked up by allies in range.
Each satellite's pickup radius will briefly appear when first deployed. While standing outside of the pickup radius, active satellites appear surrounded by an energy sphere to guide allies toward them.
Shield points per second is constant throughout a satellite's lifetime, allowing shields and overshields to regenerate immediately following damage.
Shield satellite uses a custom model that resembles a spherical device with visible mechanical parts. When deployed on the ground, the satellite floats and weaves around the air several meters above while an energy stream anchors it to the surface.
Shield satellites visually orbit their target in a steady clockwise motion, directly facing it while funneling an energy stream to reinforce shields, represented by a translucent cluster of connected hexagons.
Ability Synergy:
Shrapnel vortexes contribute damage to Temporal Anchor's recorded damage pool for the implosion on rewind.
Can be recast while active to deploy multiple instances of shrapnel vortexes and shield satellites.
Casting Grenade Fan is a full-body animation that allows movement with enforced height displacement.
Tips & Tricks
Grenades travel along separate angles and in an arc. Aim at the ground to quickly deploy them in close proximity, or aim high to throw and scatter them over a long range, far apart from each other.
Protea will always jump before throwing her grenades, even while she is airborne. Take into account the height difference when casting to land your grenades where you intend.
Jump into the air and use Aim Glide while casting Grenade Fan repeatedly. This allows Protea to reorient herself by moving the reticle between throws to create lines of Shrapnel Vortexes facing different directions.
Shrapnel Vortexes stun and push enemies away by staggering them on hit. Throw close together to quickly stack damage, procs, and stuns.
Shield Satellites persist on allies even after Overshield cap is reached. Throw multiple times to provide autonomous cover for your team, that replaces destroyed satellites to protect allies as their shield gates are triggered by enemy damage.
Shield gating does not provide any protection for shields itself, and consequently cannot protect shield satellites. Thus, heavy fire can cause a single ally (ex. Protea herself) to acquire and lose a series of shield satellites very quickly.
Activate Temporal Anchor and throw multiple Shrapnel Vortexes at groups of enemies. Direct damage from the vortexes, including damage over time from the Slash status effects, are all recorded to fuel the temporal implosion.
Energy points spent on casting Grenade Fan will be restored by Temporal Anchor's rewind.
Grenade Fan is the least expensive ability in Protea's kit, making it ideal to power up her passive Ability Strength bonus on every fourth cast.
Shield Satellites persist on allies who transition into Archwing (either in open world areas or exiting a Railjack), extending their survivability.
Exude might and valor. Rise into the air and throw a barrage of Axios Javelins. The javelins deal damage to nearby enemies wherever they land. Direct hits to enemies deal greater damage.
Styanax expends 100energy as he rises into the air 3 meters high from the ground, summoning an army of shadow warriors aligned in a horizontal concave curve around him. Styanax and his ethereal shadows continuously hurl a volley of 30 Axios Javelins, thrown at a fire rate of 12 javelins per second over the course of 2.5 seconds toward the reticle location. Each javelin inflicts 1,000 / 1,100 / 1,300 / 1,500Slash damage on direct hit, then explodes on impact with a surface for 1,000 / 1,100 / 1,300 / 1,500Blast damage with a guaranteed Bleed proc in a 6 meter sight detection radius.
Styanax can float horizontally and reorient his reticle aim during this ability.
Movement speed while floating is affected by Sprint Speed.
Styanax is considered airborne during Final Stand, allowing airborne conditional mods such as Aviator to trigger.
If Styanax floats against a wall with an opening below it, he will automatically descend.
If cast in midair, Styanax does not rise higher than his current elevation.
The volley of javelins and throws per second determine Styanax's total airtime. Number of ethereal clones is affected by the volley count.
Casting Final Stand is a full-body animation that vertically displaces Styanax if cast from the ground. Movement is allowed during the ability animation but interrupts other actions.
Other abilities cannot be cast during Final Stand.
Final Stand cannot be recast in midair, requiring Styanax to land in order to reuse the ability.
Valkyr expends 25energy to fire a grappling hook that covers a range of 25 / 40 / 60 / 75 meters. If the hook hits terrain, Valkyr will be pulled towards the hook's location. If an enemy is hooked, they will be Ragdolled and pulled towards Valkyr's location while dealt 300 / 400 / 500 / 600Slash damage.
Pull strength is affected by the distance Rip Line is cast, as well as the verticality of the angle.
The more vertical the pull of Rip Line is, the stronger it will be, making it far more effective at vertical traversal than horizontal traversal.
Rip Line can pull Valkyr across chasms and long gaps; however, Valkyr is not pulled the full distance to the hook's location.
If Rip Line is successfully cast within a window of 1 second after the previous cast, its damage will be multiplied by 200%, and its energy cost will be reduced by 50%. Any successful cast thereafter will multiply Rip Line's damage by 400% and reduce its energy cost by 75%.
Energy cost reduction is applied to Rip Line's modified activation cost. As an example, with a maxed Streamline the next successful cast will consume 25 × 0.7 × 0.5 = 8.75 energy, and any successful cast thereafter will consume 25 × 0.7 × 0.25 = 4.375 energy.
Combo window cannot be decreased below 0.5 seconds.
The duration of the combo window and the respective damage multiplier for the next successful cast are displayed underneath the HUD's targeting reticle.
If no casts are performed within the combo window, the damage and energy cost will reset.
Despite having a noticeable visual and audio effect, Rip Line is silent.
Rip Line is a one-handed ability when cast onto terrain and can be used while performing various maneuvers and actions without interruption. However, when casting on enemies (while grounded) will cause interruption.
Rip Line has a slight delay between activation and pulling either an enemy or Valkyr, as the grappling hook has a minute travel time.
Cast delay of ~0.9 seconds is affected by Casting Speed.
Rip Line when used targeting Nullifiers will pass through the shield. When moving through the shield, momentum is preserved and Rip Line will not be cancelled.
Swing Line is a Warframe Augment Mod for Valkyr that enables the ability to, after an initial cast of Rip Line, grant successive uses of Rip Line without using energy if cast while airborne and inside the combo window. It also passively increases Parkour Velocity.
This is another alternative ability for players to take advantage of heights quickly, similarly to Wormhole or Tail Wind, pulling Valkyr to elevated areas which are not accessible with traditional movement.
While being pulled, Valkyr can perform a divekick by crouching (default Ctrl ). If Valkyr is too close to the ground, crouching will cause her to slide instead.
As Rip Line is silent, it can be used as a mean of disposing enemies without alerting nearby units during stealth playthroughs.
Rip Line will consistently mutilate enemies killed by the hook, as with heavily Slash-focused weapons. The pieces of their dismembered corpse will also be flung in Valkyr's general direction.
Can be very helpful when used in tandem with a DesecratingNekros, as each corpse will yield its own loot.
Can potentially impede stealth play, as enemies may become alerted at the sight of either corpse. Targeting selectively and thinking ahead should help avoid such situations.
Pulled enemies that were not killed immediately are laid prone, setting them up for Ground Finishers.
It is possible to Rip Line onto a rocket fired from an Ogris.
Very effective during Capture missions as it can bring the target near Valkyr or her teammates.
Actively moving forward (default W ) before and while being pulled will increase your overall travel distance. Movement speed bonuses such as Volt's Speed or Zephyr's Jet Stream may increase this further. [Further testing required]
Sprinting and Maglev make no noticeable impact on speed or distance, however.
Very effective in PvP, as it allows the user to either quickly travel around an arena or pull and knock-down the opponent, rendering them an easy target.
Very rarely, attempting to pull an enemy with Rip Line will neither damage nor pull the them. Additionally, the line itself will remain tethered between Valkyr and the enemy until it is killed. (See picture)
Rip Line remaining tethered to an enemy
When used on a sloped part of ground, occasionally Rip Line will slowly pull Valkyr forwards then launch her upwards into the air.
Continuous use of Rip Line in a short period of time may cause Valkyr to be pulled out of the map on Grineer Asteroid tilesets.
Casting Rip Line while going up Corpus Gas City elevators causes her to fall through them, leaving her trapped within the shaft.
Despite Rip Line being fully silent, killing unalerted enemies will not trigger Stealth Kill Affinity and cancels the stealth kill counter.
Overcome with rage, Valkyr unleashes a pair of energy talons, the Valkyr Talons, as her melee Exalted Weapon. Normal attacks deal 100 / 125 / 200 / 250 damage within 2 meters and all of Valkyr's attacks heal her for 1% / 2% / 4% / 5% of the damage dealt.
Damage is distributed evenly between Impact, Puncture, and Slash.
As an example, with a maxed Pressure Point, Shocking Touch and Intensify, the normal attacks of a rank-3 Hysteria will deal Base Damage × (1 + Damage Mods) × (1 + Elemental Mods) × (1 + Strength Mods) = 250 × (1 + 1.2) × (1 + 0.9) × (1 + 0.3) = 1,358.5 damage.
The mods that can be equipped on and affect Valkyr Talons include:
While officially Set Mod bonuses do not affect Exalted Weapons (with the exception of the Sacrificial Mod Set), the Gladiator Mod Set can still apply if equipped on Melee and not on the Exalted Weapon itself.
Hysteria's innate lifesteal is calculated from the total damage of Valkyr's melee attacks after resistances are applied. Hysteria's lifesteal is also additive when combined with other sources of lifesteal
For example, a maxed Life Strike and a rank-3 Hysteria will yield Base Lifesteal + Lifesteal Mods =5% + 20% = 25% lifesteal on heavy hits.
Certain attacks will still push Valkyr away, and shock waves will cause her to bounce into the air. However, these attacks will not force Valkyr to the ground.
Statuses that were already active when Hysteria was cast will not be removed. However, Valkyr will be immune to their damage regardless.
Valkyr emits an aura with a radius of 5 meters around her while Hysteria is active, and 30% of the total damage she ignores is stored. If any enemies within this aura have Line of Sight of Valkyr when Hysteria is deactivated, Valkyr will be dealt 25% of all stored damage as Impact damage.
The aura will continue to grow up to 20 meters and each kill reduces it by 1 meter. The aura cannot be decreased below 5 meters.
Stored damage is calculated from the total damage Valkyr ignores before resistances are applied.
The amount of stored damage can be monitored at the top right of the HUD under Hysteria's ability icon.
Stored damage dealt bypasses shield gating and can kill instantly if too large.
Stored damage is reset upon swapping weapons.
Highlighted enemies become unmarked if Valkyr moves out of range, negating the damage taken when Hysteria expires.
Since enemies need line-of-sight, invisibility prevents the damage.
After activation, a percentage counter will appear on the ability icon. The percentage increases from 0% to 100% over the course of 40 seconds.
Hysteria costs 25energy to activate, then consumes 2.5 energy per second at 0% while active. The cost will increase by an additional 2.5 until it caps out at 15 energy per second at 100%. Hysteria will remain active until either Valkyr's energy is depleted, or the ability is deactivated by casting it again (default 4 ).
Hysteria's energy drain is not converted into shields by Augur Mods.
Hysteria is affected by and can trigger Warframe arcanes, Exodia Might , and Melee Crescendo (even though the benefit from exodia might is minimal and it does not share the same combo counter as the melee weapon thus not benefiting directly from Melee Crescendo).
While Hysteria is active, Valkyr can cast other abilities and use primary and secondary weapons. Switching weapons will disable Hysteria's effects, including making her vulnerable to damage again; it will also pause the energy cost increase but will continue to drain energy at the current rate.
Hysteria comes installed with its own unique stance. Additional combos will be unlocked as Hysteria increases in rank.
Hysteria is a unique Stance exclusive to Valkyr Talons that can only be acquired and used by activating Valkyr's fourth ability, Hysteria. This Stance overrides the Stance on any currently equipped melee weapon for as long as Hysteria remains active.
A "sweep attack" is an arcing melee strike that intends to hit an enemy with the edge of the blade (the length of obround melee hitbox).
A "thrust attack" is a melee strike that intends to hit an enemy with the tip of the blade (the rounded edge of obround melee hitbox).
A "360/spin attack" is a sliding sweep attack that hits targets around the player (not always in a 360° arc, but is usually above 180°).
A "direct slam attack" is a melee strike that hits a single target at the epicenter of a slam attack.
A "radial slam attack" is the area-of-effect component of the melee slam attack. Affected by the Seismic Wave mod.
A "ranged attack" is any melee attack that launches a ranged projectile or can hit targets beyond melee range.
View Full Legend
Average Damage Multiplier per second only applies to single-target DPS calculations.
Note that hits marked as "Radial Slam Attack" will not apply at the epicenter of a single target hit so these will not be accounted for in Avg Dmg Multi/s calculations.
Combo animation lengths are approximate and are only accurate within a few tenths of a second.
Each tile marking in stance preview gifs are 2m apart.
Combos labeled with an asterisk (*) are shared between weapons within the same weapon type.
Enraged is a Warframe Augment Mod for Valkyr's Hysteria that increases its damage and critical chance but fixes its duration to 15 seconds and adds a matching cooldown. The base Energy cost is also increased to 50, while the Energy drain over time is removed.
There may be a dark red hue for the duration of Hysteria, making it difficult to see enemies. This is especially problematic if Infested Parasites are nearby.
Turning 'Color Correction' off in Options > Display can alleviate this issue.
Her invulnerability can be taken advantage of in reviving teammates in exchange for consuming energy and not attacking enemies with her powerful claws.
This can also be used to escape powerful opponents at the middle point of this ability. Allowing greater hit and run tactics.
It's preferable to use Steel Charge over Growing Power when modding for pure damage as the former adds more damage to Hysteria than the latter.
It's recommended to activate Melee Auto-targeting System in the options as Valkyr's awkward attack animations may miss a lot.
Players who suffer low FPS (Frames per second) may want to avoid attack speed boosts, such as Warcry, while using Hysteria. High attack speeds can result in a loss of DPS as melee attacks are "semi-automatic".
Heavy Attacks in Hysteria open enemies to Finishers, allowing you to reliably use the damage boost without spending energy on her Paralysis ability.
This finisher also knocks enemies down, allowing for a successive ground finisher for a quick burst of high damage.
Bugs
Using Hysteria the moment you are downed by enemies will cause you to bug. Sometimes, you will only be able to use your actual melee weapon, but it will swing as though it is your claws; Other times you will be able to use your other weapons, and all while being invincible. You must wait until the effect ends for the bug to clear.
Attacks outside the vulnerability radius of Hysteria are still counted to the damage received in the Hysteria status, however these additional points do no effect at the end of the duration.
If only a melee weapon is equipped in the player's loadout, casting Hysteria while holding either a Codex or Synthesis Scanner will cause Hysteria's attacks to instead use the equipped melee's quick-attacks, while also rendering both combos and blocking unusable.
(TAP) Dynar shrouds Voruna with invisibility and accelerates her speed. Invisibility ends when Voruna attacks. For a short time, melee attacks have increased Critical Damage and Status Chance and inflict Bleed. Melee kill an enemy during this time to extend the buff.
(HOLD) Dynar guards Voruna, increasing her Parkour Velocity.
Dynar enshrouds his mistress in the night's veil to endow her with stealth, speed, and lethality. Shroud of Dynar expends 25energy to render Voruna and her Companion both Invisible and accelerates her movement speed by +25% / +50% / +75% / +100% for 8 / 10 / 12 / 14 seconds, ending immediately upon ability expiration or when she performs a ranged weapon attack (default LMB ), or after the first melee animation completes when she performs a melee weapon attack (default E ).
Performing interactions such as picking up objects, Hacking, or reviving from Bleedout does not break invisibility.
Attack-related contextual actions (default X ), such as melee Finisher attacks and Parazon Mercy, will break invisibility instantly when the animation begins.
Invisibility duration timer is displayed on the ability icon.
While active, her melee weapon gains the following statistic buffs: +0.5x / +1.0x / +1.5x / +2.0x flat Critical Damage, Critical Chance set to a flat 100%, Status Chance set to a flat 25% / 50% / 75% / 100%, and guaranteed Slash status effect per hit.
Melee weapons modded with above 100% critical chance and/or status chance are not affected by Shroud of Dynar's absolute chance bonuses.
Guaranteed Slash status effect from Shroud of Dynar does not apply to non-melee strikes from melee weapons, such as explosions (Wolf Sledge), projectiles (Nepheri), and Zenistar's special attack.
Leaving invisibility will extend the melee buffs for 3 seconds. While Shroud of Dynar is active, melee kill 1 enemy to extend the remaining buff duration to a maximum of 5 / 6 / 7 / 8 seconds.
Duration extension can only be triggered once per cast; any subsequent melee kills will not extend the ability further.
Max duration on melee buff can be immediately reached with a lethal melee hit on an enemy during the invisibility phase.
Melee buff total duration is calculated with the following expression:
At ability rank 3 with a maxed Continuity equipped, Shroud of Dynar lasts for 3 secs + [(8 secs - 3 secs) × 1.3] = 9.5 seconds
In-game Ability menu stat displays the minimum duration up to the max modded duration.
Buff duration timer is displayed as an ability buff icon beside Voruna's hitpoints indicator.
Hold down the ability button (default 1 ) to command Dynar to guard Voruna, changing her passive to a permanent +55% Parkour Velocity bonus for no energy cost.
While Shroud of Dynar's invisibility phase or melee buff phase is active, Ulfrun's Descent's Slash damage benefits from the absolute critical chance and the flat critical multiplier bonus.
Cannot be recast during invisibility. Can be recast while melee buffs are active to end them immediately then become invisible.
Dynar visually idles upon Voruna's left shoulder. His distinct physical feature is the eyepatch covering his left first eye.
Voruna visually leaps and claws downward, cloaking herself in shadowy tendrils that envelop her body. Shadows dance around her feet while she kicks up a trail of dust clouds as she moves, while Dynar audibly growls and snarls.
Tips & Tricks
Activate Dynar's passive to make Voruna highly mobile when extracting from a mission. To further increase her survivability in the process, activate Shroud of Dynar while running through enemies to escape detection.
Shroud of Dynar is also a good way of surviving being overwhelmed by too many enemies by suddenly going invisible and interrupting their attacks, giving Voruna breathing space to plan for a counterattack.
Modding for high Ability Duration and combining Infested Mobility gives Voruna the mobility to quickly speed through missions undetected.
(TAP) Raksh's fangs tear into your enemies. 5 random Status Effects are applied at 10 Stacks each on an enemy. On target's death, spread the Status Effects to other nearby enemies.
(HOLD) Raksh guards Voruna with Status Effect resistance.
Raksh snarls in frenzy, pouncing beside his mistress as they inflict a grievously infectious wound on their prey. Voruna expends 50energy to rabidly lunge forward at an enemy target over 30 meters, becoming Invulnerable during her dash then biting and slashing the victim upon contact. The enemy receives 100 / 150 / 200 / 250Slash damage, alongside a randomized set of 5 different types of Status Effects, with each type stacked to 10 procs. Upon death while still afflicted by the chosen status effects, the enemy spreads them to all nearby enemies within a 4 / 5 / 6 / 7 meter radius at full status duration.
Eligible status effects inflicted by Fangs of Raksh include:
Fangs of Raksh does not require precise aim to cast, the ability targets the nearest enemy in direct line-of-sight and within the aiming reticle circle.
If Voruna's dash is interrupted by terrain and obstacles, the ability will still apply its effects onto the enemy target.
Voruna attempts to dash and position herself facing the target in melee range. When cast while using Maneuvers such as Bullet Jump and Aim Glide, she can overshoot and land behind the target.
Only the original five randomized status effects and total 50 stacks will spread from the target to other enemies. Only the original enemy target spreads status effects on death.
Status spread bypasses terrain and does not require line-of-sight from original target to other enemies nearby.
Fangs of Raksh does not spread its status effects if they expire before the target dies.
Aside from Radiation which lasts 12 seconds and Corrosive which lasts 8 seconds, most other status effects last only 6 seconds.
After casting this ability on the original target, the same types of status effects procced from different sources (e.g. Weapons, Companions, etc) can artificially extend Fangs of Raksh's kill window to spread the remaining active chosen status effects.
On spread, status damage calculation for damage-over-time status effects (Slash, Electricity, Heat, Toxin, and Gas) is based on the averaged amount of damage dealt by Fangs of Raksh's chosen status effect types on the target prior to its death. Damage contributed by different sources (not from this ability) are also included in this calculation, as long as the other sources inflicted at least one status proc chosen by this ability.
Subsequent casts of this ability on the same enemy target can yield the same types of status effects from a previous cast.
Hold down the ability button (default 2 ) to command Raksh to guard Voruna, changing her passive to a permanent Status Effect resistance for no energy cost.
Raksh's passive only prevents new status effects from proccing on Voruna, but does not cleanse currently active status effects when invoked.
Ability Synergy:
Voruna blinks out then back into invisibility when casting Fangs of Raksh during Shroud of Dynar.
Enemies with 5 or more status effects when killed extends Lycath's Hunt's duration.
Enemies with status effects receive increased damage from Ulfrun's Descent.
Can be repeatedly recast on the same enemy target.
Casting Fangs of Raksh is a full-body animation that displaces Voruna toward the direction of her target and interrupts other actions.
Raksh visually idles upon Voruna's right shoulder. His distinct physical feature is the mouth straps wrapped around his lower jaw.
Voruna visually leaps at high speed to her victim. Upon landing, she swipes her claws forward as her helmet and Raksh lean out to bite. A stylized ability icon of Fangs of Raksh decal appears on the ground below the target, fizzling with Void energy until fading away seconds later.
Archon Flow does not synergize well, on the other hand, due to its requirement for Cold-based kills and not just its status proc.
Do bear in mind, however, that the Archon mods will only trigger once. For example, if Fangs of Raksh applies its 10 stacks of toxin, you will only obtain a single stack of corrosive from Archon Continuity.
Activating Raksh's passive greatly increases Voruna's survivability in long missions as he makes her practically immune to new status effects - including self-stagger and self-knockback from explosive weapons.
Bugs
Casting this ability twice or more on the same target will only spread the status effects of first instance when the target dies.
(TAP) Voruna drops to all fours and prepares 5 brutal charges that lock onto enemies. Ulfrun, the most powerful wolf, leads the attack as Voruna dashes toward her target. The pack deals increased damage to targets and nearby enemies that are inflicted by Status Effects. Lethal attacks double the damage of Voruna’s remaining charges.
(HOLD) Ulfrun guards Voruna. If Voruna falls during this time, Ulfrun dies in her place.
Weapons holstered 5 (number of charges) ∞ (charge duration) 3 s (passive invulnerability) 100% shields and health restored 60 s (passive cooldown) =100% absolute critical chance from Shroud of Dynar 20% critical chance 1.5x critical damage multiplier 100% bonus damage from status effect Slash status on target Knockdown on target +200% damage bonus on kill +5% critical chance bonus on kill +0.1 critical damage multiplier bonus on kill Stagger in area
Ulfrun savagely bares his twin fangs as his mistress stalks their prey, poised to pounce from the shadows. Voruna expends 100energy and assumes a predatory posture, holstering away her held weapons and laying down on all fours while stationary. Once activated, Ulfrun's Descent grants 5 charges that last indefinitely until used or dispelled, which Voruna can expend by aiming the reticle at an intended enemy target and pressing the fire weapon key (default LMB ) or quick melee attack key (default E ). While active, cancel the ability early and regain weapons access by pressing the ability key again (default 4 ), refunding 20 energy per unused charge back to Voruna.
The remaining charges of the ability are indicated by lit-up claw marks below the stylized aiming reticle.
Ulfrun's Descent does not require precise aim to cast, each charge targets the nearest enemy in direct line-of-sight and within the aiming reticle circle.
Ulfrun's Descent does not refund energy if Voruna enters an ability-nullifying field or falls into an out-of-bounds zone.
Hold down the ability button (default 4 ) to command Ulfrun to guard Voruna, changing her passive for no energy cost to a single charge of Invulnerability that prevents Voruna from entering Bleedout state from the next lethal hit, rendering her invulnerable for 3 seconds and restoring 100% of her shields and health. Ulfrun's passive undergoes a 60 seconds cooldown once triggered or swapped out.
Ability Synergy:
During Shroud of Dynar, Voruna remains invisible when casting or cancelling Ulfrun's Descent, but blinks out then back into invisibility when lunging. While Shroud of Dynar's invisibility phase or melee buff phase is active, this ability's Critical Chance is set to 100%, and the flat critical multiplier bonus amplifies its Slash damage.
Fangs of Raksh stacks and spreads 5 different types of status effects on enemies to strengthen Ulfrun's Descent.
Ulfrun's Descent's direct lunge and its Slash status effect are considered a melee attack to proc Lycath's Hunt's Health Orb drops. Radial Slash damage does not count.
Voruna and her wolf pack's claws and fangs utilize unique statistics and ability synergy to inflict damage to their prey:
All of Ulfrun's Descent Slash damage is affected by an innate 20%critical chance, 1.5xcritical multiplier, and inflicts 100% bonus damage against enemies afflicted with at least one Status Effect.
Each charge lunges Voruna toward her victim over 30 meters, inflicting 2,000 / 3,000 / 4,000 / 5,000Slash damage with guaranteed status and Knockdown. Each successful direct kill by Voruna's lunge increases the damage by +200%, critical chance by 5%, and critical multiplier by +0.1 for all subsequent lunges.
Damage multiplier from successful kills is displayed below the stylized aiming reticle.
Damage multiplier is capped at +900% damage.
The primary target of the charge receives double damage if any status effects are present on them at the time of collision. This multiplier only applies once.
Critical Chance increase is capped at +22.5%, for a total Critical Chance possible of 42.5%.
Critical Damage increase is capped at +0.45x, for a total Critical Damage possible of 1.95x.
Kills from status effects does not strengthen subsequent lunges.
If Voruna's lunge is interrupted by terrain and obstacles, the ability will still apply its effects onto the enemy target.
Voruna attempts to lunge and position herself facing the target in melee range. When cast while using Maneuvers such as Bullet Jump and Aim Glide, she can overshoot and land behind the target.
On each lunge, Voruna's target and other enemies within a 6 / 7 / 9 / 10 meter radius around her target receive Stagger status once, then 250 / 500 / 750 / 1,000Slash damage per second for 4 seconds.
Area damage per second bypasses obstacles in the environment and does not require line-of-sight to mark enemies.
Area damage can critical hit and is affected by the critical chance and critical damage increases from kills.
Area damage is affected by the double damage multiplier from having a status.
Requires a status effect on enemies being damaged by the area damage; status effects on the initial target will not increase area damage against enemies with no status effect.
Area damage does not apply a Slash status despite inflicting damage over time.
Area damage is not affected by the damage multiplier from successful kills.
Ulfrun's Descent does not benefit from melee damage bonuses such as Steel Charge.
Ulfrun's Descent does not count for Nightwave melee challenge kills.
Damage Formulas
Ulfrun's Descent's direct lunge damage is calculated with the following expressions:
1. Total Slash DMG = (Base Slash DMG × Ability Strength) × [Base Crit DMG + (Crit DMG Bonus On Kill × Number of Direct Kills) + (Shroud of Dynar Crit DMG × Ability Strength)] × [1 + (DMG bonus on Direct Kill × Number of Direct Kills)] × Status DMG Bonus
At ability rank 3 with a maxed Intensify equipped, Shroud of Dynar active, 4 successful direct kills, and a status effect active on the target, Voruna will deal (5,000 × 1.3) × [1.5 + (0.1 × 4) + (2 × 1.3)] × [1 + (2 × 4)] × 2 = 526,500Slash damage on her fifth charge before damage type resistances.
Next, the Slash status effect on the primary target will deal 526,500 × 0.35 = 184,275True damage per tick for 6 seconds, totaling 6 seconds × 184,275 = 1,105,650True damage from the status effect.
Casting and deactivating Ulfrun's Descent are conditional animations based on Voruna's current state:
While Voruna is stationary, full-body animations that interrupt grounded movement and other actions.
While Voruna is moving, Ulfrun's Descent does not play animations aside from weapon holstering.
Ulfrun visually idles upon Voruna's right upper thigh. His distinct physical features are the twin saber teeth on his upper jaw.
Voruna visually holsters away her weapons and lays down on all fours in a unique idle animation, as a persistent shroud of shadows emanate from her body and envelop the borders of the player's screen. Once she lunges, Voruna slashes her target with her claws, then emits a shadowy fog highlighting the radius around her as shadowy tendrils emit from all enemies marked for damage per second.
Voruna is incapable of wall latching while Ulfrun's Descent is active.
Voruna cannot cast Helminth abilities during Ulfrun's Descent.
Bring weapons that can inflict a large number of status procs on a group of enemies to maximize the punching power of Ulfrun's Descent in case Fangs of Raksh is unavailable, such as Cedo and its glaive alt-fire, Kompressa, atmospheric Larkspur, or even Kuva Nukor with its unique Microwave proc.
Infusing Yareli's Aquablades can trigger the increased damage of Ulfrun's Descent as it will inflict Slash status procs before you strike a target with Ulfrun's Descent.
Bugs
After a Mercy kill, Voruna's primary weapon will be brought out. While she still cannot fire it, holding your aim button will cause you to enter your weapon's aiming mode. Most noticeable with sniper rifles, as their unique scopes will be used.
Yareli expends 75energy to twirl out a swirling whirlwind of 3 razor-sharp Aquablades that form a protective ring around her for 25 / 30 / 35 / 45 seconds. Aquablades rapidly revolve clockwise around Yareli, striking all enemies within a radius of 5 meters in an interval of 3 consecutive hits within 0.5 seconds; enemies that receive all three hits are immune to further hits from Aquablades for 0.5 seconds. Each hit inflicts 350 / 450 / 600 / 750Slash damage with a 100%Status Chance and Stagger.
At max ability rank, if an enemy receives a trio of hits by Aquablades, it receives a total of 2,250Slash damage with 3Slash procs on individual timers dealing a total of 4,725Cinematic damage over the course of 6 seconds.
Aquablades do not require line-of-sight between Yareli and enemies in range. The ring of blades phases through all terrain obstacles.
Aquablades' ring of blades affects enemies within its radius except the epicenter where Yareli stands, leaving roughly a small 0.5 to 1 meter gap. The ability area-of-effect is an invisible donut-shaped cylinder roughly the same height as Yareli herself.
Aquablades damage and break destructible Objects such as crates and resource caches.
Ability Synergy:
Sea Snares prevent snared enemies struck by Aquablades from being staggered away, allowing the blades to strike rapidly stacking multiple Slash status effects.
Yareli casts Aquablades without stopping her movement while aboard Merulina.
Aquablades can damage and bleed enemies drawn near Yareli by Riptide.
In Landscapes, deploying and riding an Archwing or a K-Drive while Aquablades is active will retain the spinning blades and will keep dealing Slash damage and stunning enemies.
This is also true when casting Aquablades before getting off a Railjack to fly via Archwing, giving an additional damaging source while engaging enemy craft in melee.
Cannot be recast while active.
Casting Aquablades is a full-body animation that stops Yareli's grounded movement and other actions.
Aquablades is dispelled only if Yareli herself enters an ability nullifying sphere from special enemies, such as the Nullifier Crewman. Aquablades that physically enter the sphere are unaffected.
Yareli visually clasps both her hands together toward the left, then slides her right arm away in a swift slicing motion, as her left leg lifts briefly for balance. Void-laced water and bubbles splash outward as the blades fade into existence inside a liquid current that forms around Yareli.
Aquablades visually resemble three glaive rings stylized with a wave-like design, each suspending in the outer orbit a thin slice of dense water shaped like sawblades. The blades surge and cycle through a circular liquid current laced with Void energy.
Aquablades and their Void energy are affected by Yareli's chosen Appearance colors.
While active, a continuous water surging sound effect with intermittent soft feminine humming tune plays on loop.
Enemies successfully struck by Aquablades emit a splash of liquid globs and a water cutting sound effect for each hit.
Subsuming Yareli to the Helminth will offer Aquablades and its augments to be used by other Warframes.
Surging Blades is a Warframe Augment Mod for Yareli's Aquablades that allows her to recast the ability while active to throw a single piercing blade dealing damage and a guaranteed Slash status effect in a small radius. The bubble's damage accumulates when any Aquablade directly hits an enemy.
Aquablades is a good option to infuse into Warframes using Narrow Minded to greatly prolong self-buffs (such as with Saryn's Toxic Lash or Gara's Splinter Storm) and preferring a melee-centric play style, both because the blades can keep enemies staggered and thus open to Finishers, and because the blades' effective range is unaffected by the Ability Range penalty.
Infusing Aquablades into Titania also allows her to make short work of low level enemies as she simply flies by them in Razorwing mode.
Activate Aquablades before riding an Archwing or a K-Drive to make the riding Warframe deadly against enemies that get too close.
When using Surging Blades, Duration-based builds allow the player to stack much more damage on Aquablades in its entire extended duration.
Yareli benefits even further from this build, as riding Merulina allows her to spam thrown blades at no energy cost, racking up damage for free in the process. She can even forego of Efficiency builds and instead build on Ability Strength (such as by equipping Blind Rage) to further amplify her blades.
From the ground, charge and release to launch Zephyr into an airborne hover. From the air, tap to dash forward, or aim down to dive bomb enemies below.
Zephyr generates a powerful gust of wind for propulsion, expending 25energy while grounded or 12.5 energy while airborne, to soar toward the aiming reticle at a speed of 30 meters per second for 1 second. While in flight, Zephyr rides an air current with a 1.5 / 1.6 / 1.8 / 2 meters radius, which inflicts ? / ? / ? / 750Slash damage and Knockdown to all enemies it contacts.
If cast from the ground, aiming at any direction propels Zephyr forward, while aiming straight down causes Zephyr to skyrocket upward.
If cast while airborne, aiming at any direction propels Zephyr forward, while aiming straight down or within a 45 degree angle toward the ground causes Zephyr to perform a Dive Bomb technique.
Zephyr maintains a portion of the momentum generated by Tail Wind once the dash ends.
If Zephyr slams into an obstacle such as a wall during her dash, she can immediately break away from the surface by performing a wall jump (default Spacebar ).
At the end of each Tail Wind dash, Aim Glide will be reset. To repeatedly aim glide without landing, Zephyr must first stop aiming then aim down sights (default hold RMB while in midair) to reactivate this maneuver after each successive dash.
Zephyr executes different aerial combat techniques with Tail Wind depending on the activation conditions:
While Zephyr is airborne, casting Tail Wind directly downward or within a 45 degree angle toward the ground, causes Zephyr to nose dive to the location at an initial speed of 1 / 2 / 3 / 5 meters per second; during the dive, Zephyr will continue to accelerate until impact. On impact, Zephyr creates an explosion in a 4 / 5 / 6 / 7 meters radius around the landing point that inflicts ? / ? / ? / 4,500 base Impact damage amplified by height of the dive and Knockdown.
Total explosion damage depends on the height at which Tail Wind is activated:
Total explosion damage is calculated by multiplying the base damage by 0.2 × Activation Height (e.g., activating Tail Wind at 15 meters will yield 0.2 × 15 × 4500 = 13,500 damage at max rank).
Activating Dive Bomb at a height less than 4 meters will only inflict base damage.
Damage bypasses obstacles in the environment and does not decrease with distance.
Dive Bomb will only activate Heavy Impact if the required height is achieved.
Performing a dive bomb during a Bullet Jump causes Zephyr to softly rebound away from the landing point and back into the air.
Hover Glide
While Zephyr is airborne, holding down the ability key then releasing it (default 1 ) causes Zephyr to expend 12.5 energy then drain 5 energy per second to immediately arrest her momentum then sustain her altitude in a continuous hover. While hovering in the air, Zephyr may attack with, switch and reload her weapons, as well as cast her abilities; as she hovers, Zephyr may also glide along the horizontal plane using the movement keys (default WASD ) at a reduced movement speed, accelerate by using Sprint (default hold LShift ), and slide toward the directional input (default WASD + hold LCtrl ) to strafe quickly.
Hover Glide's energy drain is not converted into shields by Augur Mods.
Hover Glide will automatically deactivate when Zephyr's energy pool fully depletes, upon touching a horizontal surface, performing a Tail Wind dash, dodge roll (default tap LShift ), jump (default Spacebar ), bullet jump (default LCtrl + Spacebar ), quick melee attack or melee slam attack (default E ).
Cannot be activated while Zephyr is grounded. If already active, holding down the ability key results in a Tail Wind dash.
Activating Tail Wind multiple times allows Zephyr to propel herself farther into the air, effectively simulating flight. There is a slight cooldown between activation.
Can be used to pass through Laser Barriers unharmed in most cases.
Casting Tail Wind interrupts reloading.
Air current visual effects are affected by Zephyr's chosen Warframe energy color.
Target Fixation is a Warframe Augment Mod for Zephyr that increases Tail Wind's damage for every enemy it hits, and applies a 2-second grace period when touching the ground before the buff is lost. It also resets double jump and bullet jump.
Propelling from the ground is inefficient, it's recommended to jump and dash vertically for more distance.
Aim glide can be used to significantly increase the distance traveled, as all momentum is conserved for the duration of the aim glide.
Bugs
After second activation of this ability gravity increases to normal until Zephyr lands (confirmed as bug in Community Hot Topics).
Occasionally, when "Tail-winding" closely to an Extraction point on Solo, Zephyr's body will be frozen in Tail Wind state, as she supposedly locks herself into the Extraction pod with all her limbs properly placed.
Create deadly tornadoes that seek out and engulf enemies. Tornadoes deal the elemental damage type they absorb the most. Shoot enemies engulfed in Tornadoes to do additional damage.
Zephyr expends 100energy to form a maximum of 2 / 2 / 3 / 3 tornadoes at the location on the aiming reticle over infinite range; tornadoes will prioritize forming on top of enemies within a spawning area of 15 / 17 / 20 / 25 meters around the location and around Zephyr herself. Tapping the ability key creates tornadoes that wander the battlefield, being drawn to enemy presence. Holding down the ability key (default 4 ) creates stationary tornadoes centered at the location on the aiming reticle. All tornadoes expire after 10 / 12 / 15 / 20 seconds.
Zephyr and her allies can attack each tornado to distribute 100% total damage (including Critical Hits) and Status Effects from weapons and abilities to all enemies trapped within a tornado. Critical damage dealt to enemies trapped within a tornado is multiplied by 2x.
Critical multiplier is applied after installed weapon mods.
Tornado's visual effects are modified by each elemental damage type.
Magnetic damage type and default physical damage tornado share the same visual effects.
Can be recast while active to replace old tornadoes.
Tornadoes exhibit numerous unique properties and mechanics as summoned allied AI units.
Each tornado is invulnerable to damage, intangible, weightless, 9 meters tall and moves at a speed of 2 meters per second. Enemies within a radius of 10 meters from a tornado are pulled along its path, hovering in a Ragdoll state and orbiting the whirlwind. Each tornado inflicts 50 / 75 / 100 / 160 damage per quarter second to all enemies within its grasp.
Damage per tick is distributed between Impact, Puncture, and Slash physical damage types with a high chance to proc status from all damage types. Damage diminishes with distance from the center of the tornado.
Tornadoes phase through all entities, walls and objects in the environment.
Tornadoes float and do not require a surface to travel between locations; however, if hovering in midair, tornadoes will descend toward the ground to follow AI pathing to reach enemies.
If using wandering Tornadoes, Zephyr can direct the nearest tornado from her aiming reticle toward a location by holding down the zoom key (default RMB ), causing the affected tornado to move at a speed of 5 meters per second toward its new destination while the key is held.
The tornado nearest to the location on Zephyr's aiming reticle will be controlled, meaning that moving the reticle while controlling one tornado will switch control to another if that tornado is the nearest.
Stationary tornadoes will not be moved by Zephyr's aim.
Affected enemies spiral up to the top of a tornado while spinning in a skydiving posture, trapped by the funnel until it expires, the enemies die, or external forces cause them to eject away from the tornado's pull.
Corpses of slain enemies are released from tornadoes' grasp.
If enemies are in range of multiple tornadoes' pull radii, they will cluster up in the aerial space between the tornadoes.
Enemies immune to the ragdoll effect (such as units with Overguard) will instead be Slowed, as well as taking damage from shot Tornados like normal.
Each tornado's damage type can be modified by many damage sources, including ranged weapons, melee weapons, and abilities, even damage from Bullet Jump from Tenno, as well as damage from enemy units. (e.g., striking a tornado with an unmodified Dark Sword will change it to Radiation, or a Volatile Runner that explodes near a tornado will change it to Blast.)
Each tornado keeps track of the total damage it absorbed; a tornado will only account for the highest elemental damage number on a weapon or ability when determining which elemental type it will adapt to, as well as the total amount of damage it absorbed.
As such, shooting a tornado multiple times using a different weapon with a different highest elemental damage number, causes the tornado to change its damage type when the stored total damage from one source is exceeded by another.
For example, hitting a tornado with a primary weapon that deals 500 Corrosive and 450 Blast damage stores 500 total damage and changes the tornado's damage type to Corrosive. Hitting the same tornado with a secondary weapon that deals 250 Radiation damage three times stores 750 total damage, exceeding the previous amount and changes the tornado's damage type to Radiation.
Once a tornado adapts to an elemental damage type, it cannot revert to its three physical damage types by absorbing damage.
If the damage source deals multiple elemental damage types, then a tornado will be charged with the damage type with the highest damage number.
If the damage source has equal damage numbers between all its elemental damage types, then priority will be given by alphabetical order of the damage types' names.
A tornado will not deal combined elemental damage by absorbing two base elemental damage types (e.g., a tornado will not inflict Blast damage by shooting it with Cold damage and Heat damage from different sources).
Funnel Clouds is a Warframe Augment Mod for Zephyr that increases the number of active Tornadoes while decreasing their size and removes their ability to pick up enemies.
Due to high proc rate, Tornado can be used to apply status effects to masses of enemies.
Viral can be used to increase damage done to mobs by 100% to 325% regardless of level.
Each of 3 spawned tornadoes can have different elements.
Tornadoes will fling enemies trapped within them in random directions after a period of suspending them midair if there is nothing impeding upward thrust (i.e., ceiling). Otherwise, they will stay in the tornado for the full duration.
This can greatly lower the damage and CC it is capable of if the enemies are ejected early, making it much more powerful and effective in lower roofed tilesets as opposed to open areas Zephyr thrives in for mobility.
Bugs
On some occasions, a bug may prevent you from casting Tornado if there are no enemies in range.
If another Zephyr is in the squad and casts Tornado, then their duration will appear for you as well, although it does not prevent you from casting it yourself.
Multiple bugs prevent Tornado from working correctly when not hosting.
Both Condition Overload and the Cedo's passive will not increase the damage dealt to enemies by Tornado.
A Tornado will become unable to distribute weapon damage after receiving 500,000 damage, and will be completely destroyed after receiving this much damage with the Funnel Clouds augment.
Some mods add additional effects when an Slash occurs or dealing Slash damage. Hunter Mod Set Bonus: Companions deal Extra Damage against enemies affected by Slash status.
Slash Status now does not bypass Shields and instead deals damage over time to Shields. Slash Status still bypasses Armor.
Each Slash Status has its own duration, but now we only show a maximum of 10 damage numbers in the HUD, damage is unaffected, but reducing how many damage events we show helps with performance

 Buzz Kill has no effect on Slash Proc Damage.
")
")
")
")
")
")
")
")
")
")
")
")
")
")
")
")
")
")
")
")
")
")
")
")
")
")
")
")
")
")
")
")
")
")
")
")
")
")
")
")
")
")
")
")
")
")
")
")
")
")
")
")
")
")
")
")
")
")
")
")
")
")
")
")
")
")
")


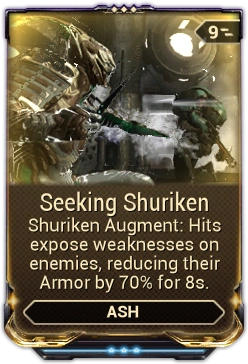

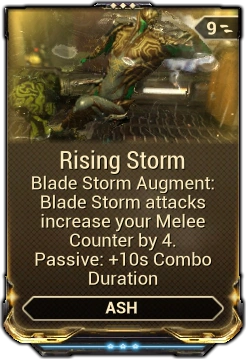


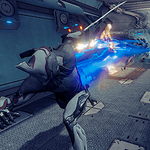

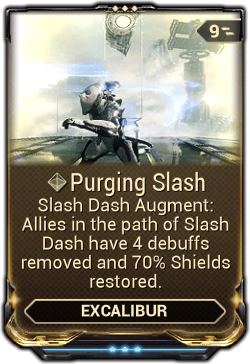
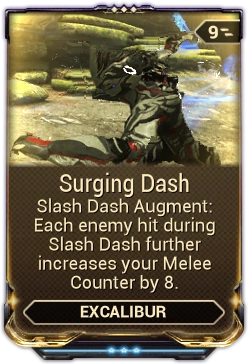
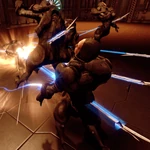


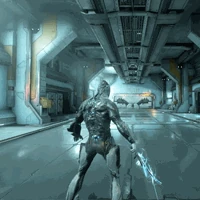
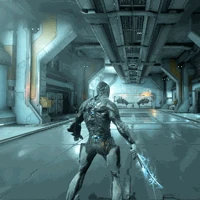
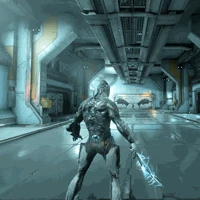

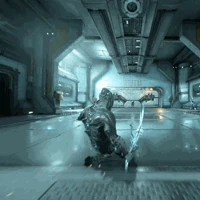
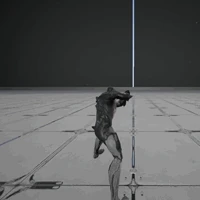
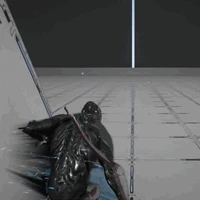

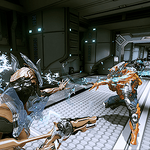

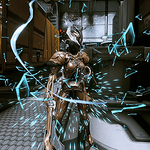


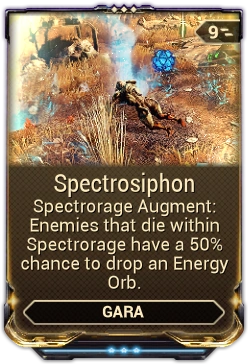

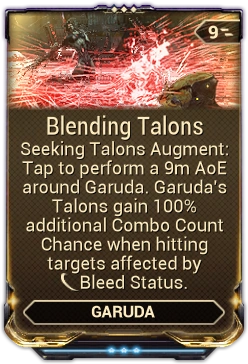


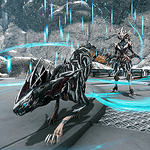


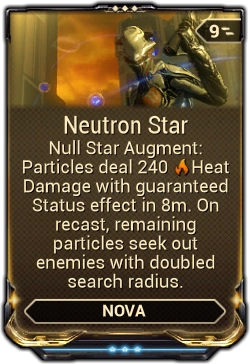


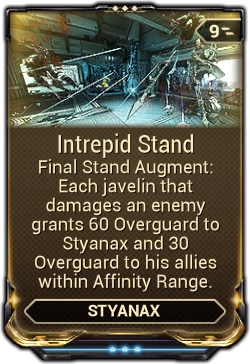

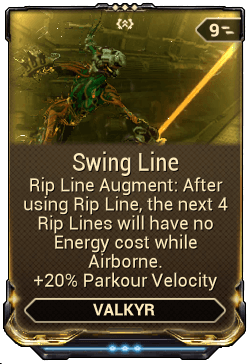


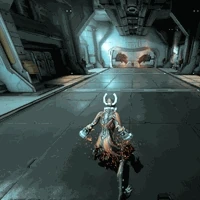


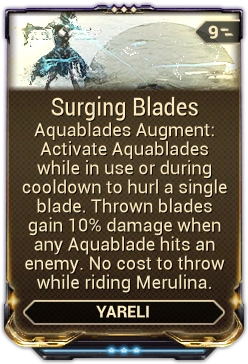

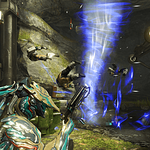

")
")
")
")
")
 (29 KB)")