
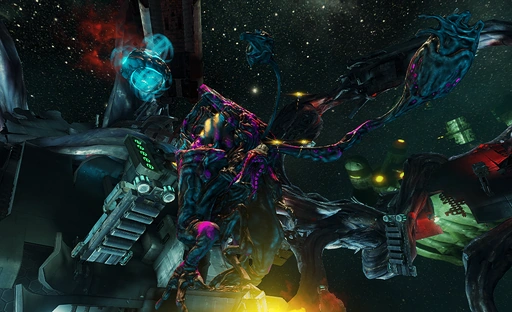
The Jordas Verdict was the second Trial mission available in WARFRAME, added in Update 17.9.1 (2015-10-29) This Trial was significantly more difficult and complex than the rest of the available mission types, featuring unique mechanics, special mission modifiers and obstacles not found in any other missions.
Its blueprint used to be available for purchase in the Market for ![]() 100,000. This Mission could be completed with a minimum of four Tenno for an additional challenge.
100,000. This Mission could be completed with a minimum of four Tenno for an additional challenge.
This Trial was officially removed in Update 22.14 (2018-03-01) and the credits spent for the blueprints were refunded.
Access[]

Screen of The Jordas Verdict as seen from the Market.
Players could access The Jordas Verdict by crafting keys from their respective blueprints. The associated keys were one-time use and were consumed if players succeeded, failed or aborted the mission.
| Manufacturing Requirements | |||||
|---|---|---|---|---|---|
5,000 |
2,000 |
12,000 |
2 |
Time: 6 hrs | |
| Rush: | |||||
Mission Overview[]
Stage 1: Infiltration[]
Stage 1.1: Archwing Infiltration[]
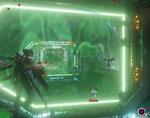
The first stage transports the players into the archwing tileset of the Infested Ship. The objective is to fight against the horde of Infested and figure out a way to infiltrate the super-massive, macroscopic derelict, interconnected by Infested tissues.

Infested Spore and its spawn point, along with a pair of buttons to release it.
From mission start head forward to find the spore spawner. Shoot the circular yellow pads to briefly turn them green. When all in a set turn green they will activate and release an Infested Spore. The spore can be freely moved by player collision and or melee attacks, of which either method won't damage it. Using Archwing weapons and abilities will damage the spore as well as enemy fire. It is therefore highly recommended to assign a team member to control the spore and allow the rest of the squad to neutralize the enemy. Protect the spore and escort it to the objective to remove the blockage. After clearing two blockages you will reach the tunnel section.
A pad turning grey when the door opens.
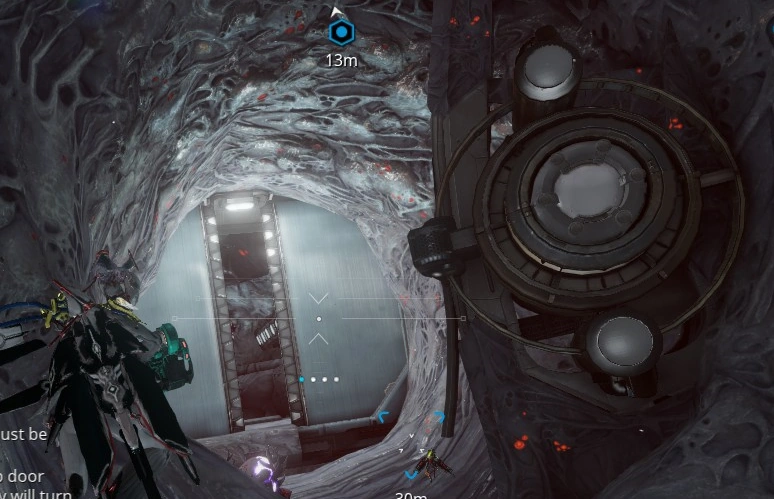
The tunnel forms a large circular trench which you can fly back to the entrance upon reaching the end of the loop. Within the tunnels are several blast doors, each controlled by a number of buttons in the area leading up to them. The squad will have to spread out to keep the pads active simultaneously, and when successful, the pads will turn gray and the blast door will be opened. Upon reaching the end of the tunnel, there will be one last blockage that needs to be destroyed. As the trench is too small for the Infested Spore to fit through, opening the final blast door will lead back to the entrance, creating a shortcut for the giant mass to pass through. Note that this part is timed, as such, taking too long in the tunnels will eventually gas the players out, resetting all the doors and the transporting the squad back to the tunnel entrance.

First and second walls from behind, showing the buttons (on the right).
This last section involves a long straight path with hazards for the spore such as mine launchers and especially energy walls. Energy walls can be flown though harmlessly and can be shot through, but it will instantly destroy the Infested Spore on contact. To deactivate the barriers, shoot the pairs of pads just inside each barriers simultaneously. Beware that the barrier will reactivate in three seconds, and as such, timed deactivation will be a crucial factor to this section. When the final blockage is cleared, the squad will reach the end of the first section and they will be transferred to the next stage.
Stage 1.2: Decrypting Ship Database[]
This section transports the players into the Infested Ship tileset. From the initial transition point, the Lotus will warn the players of the corrosive gas filling the ship, remarking it as the Corpus' failed attempt to fight the Infestation back. When players are exposed to this gas, their armor integrity will constantly degrade at the rate of one percent every second. And when the player(s) armor is fully depleted (zero percent), the spores will be able to infect the Warframe resulting in audible ghostly whispers and a partially spore-covered HUD; if left exposed to the spores long enough, the players will eventually take heavy ![]() Toxin damage.
Toxin damage.

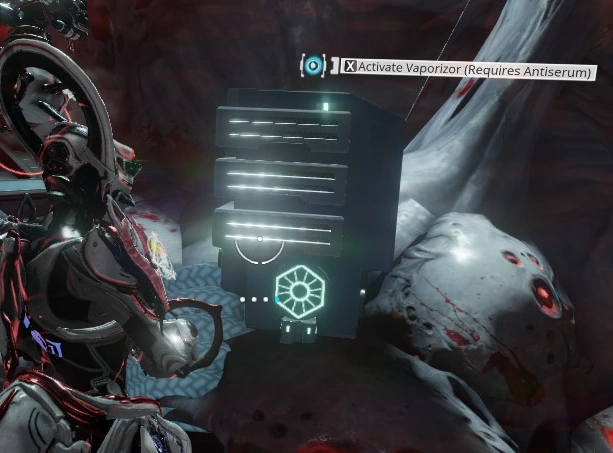
An antiserum vaporizer.
In order to prevent this, players are required to have Antiserum Injector in their inventory in order to pick up Antiserum Batteries, dropping from enemies, which can be used to fight the spores and the gas back. If the squad do not possess Antiserum Injectors, they will have to kill the enemies under the compromised condition to gather the materials needed (Antiserum Fragments in the form of a green orb) to craft the injector. As progressing is also impossible without the gear, there will be an extraction point provided in the tile set for the squad to extract; this will refund the key and thus there will be no penalty in doing so. If this is the players' first time reaching this point, the Lotus will mail them an inbox message stating that the Antiserum Injector blueprint has been added to their clan dojo's Energy Lab.

An injector battery.
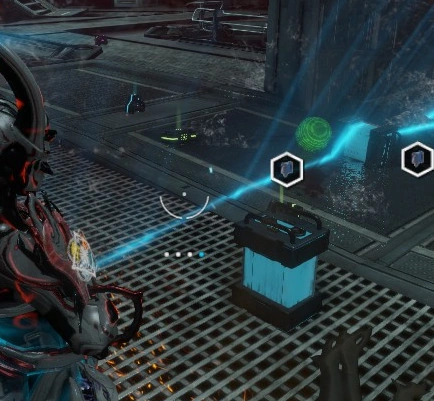
Initially, each player that possesses the Injector can hold up to two antiserum batteries dropped by the enemies. The battery can be used individually (via gear wheel) to restore their armor integrity to 100%. It can also be used on an antiserum vaporizer to create a safe zone in the form of a blue sphere, which protects the players from the spores and the gas. Additionally, the sphere can be expanded by feeding the antiserum vaporizer more batteries; up to three instances of batteries can be inserted at once. In order to increase the batteries drop, a Nekros is advised in the squad.

A crusted panel before and after it is enveloped by a vaporizer bubble.
Now with the stage mechanics covered, the current objective is to infiltrate further into the ship, head further into the derelict to encounter a locked gate on the way. These doors require players to activate a Corpus console which is enveloped with infested tissues, preventing console access. Acquire access by covering it with an antiserum field which can be done by feeding a nearby antiserum vaporizer with batteries until it eradicates the covering crust. Make sure all of the squad understands how this works, as this mechanic will be used extensively as a puzzle in the later stages.

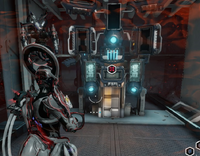
The central console.
The door will lead players to the ship's central console, to which the Lotus remarks that useful information might be found inside and orders the squad to hack the central console. However, it can only be hacked after activating the surrounding three Infested covered computers beforehand. Similar to the console before, these computers can be turned on by bringing a nearby vaporizer to maximum power to envelop the crusts. Once the central console is hacked, the Lotus will begin decrypting an analysis scan to the macroscopic derelict. The hacking percentage is displayed along with an efficiency rating from low, medium and high. Naturally, each computer enveloped with the vaporizer will increase the performance, allowing the decryption to be completed faster. During decryption there will periodically be "surges", announced by the Lotus. Any Tenno not in a safe zone during a surge will see their armor integrity deteriorate rapidly, falling to zero in about five seconds. After the decryption is done, the Lotus will remark that the most effective way to damage the Jordas Golem is to destroy the reactor core. The next door will be opened leading to the extraction and the squad will be transferred to the second stage.
Stage 2: Reactor Sabotage[]
Stage 2.1: Locked Door[]
The next part includes more Blue Batteries, infested panels, and Vaporizers. Vaporizers create an anti-infestation shield that decongests the panels for hacking/use. Upon hacking the panels on one side (left or right) a door will open (and lock if the panel isn't within an operating Vaporizer shield) and two pads are directly inside the door. Standing on both while the initial (left or right) panel is within a Vaporizer shield allows a third door to open and be hacked as well. Performing this on both the left and right sides brings you into a new room beyond this set of locked doors.
The ventilation shaft on the RIGHT SIDE doors proceeds into the next room after both panels are hacked.
Stage 2.2: Elevator[]
This next room has an infested elevator which will move up only if Vaporizer shields are touching it from platforms scattered around and above the elevator in a circular pattern. Keeping the Vaporizer shields touching the elevator causes it to rise to the top, which overloads the reactor.
It is advised to use Vaporizers only on one side of the shaft to minimize the number of batteries needed. Also, it's better to avoid using powers such as Nova's slowing Molecular Prime or Vauban's Bastille, as these will cause less enemies to come near the shaft and will make batteries more difficult to obtain.
Once the elevator starts rising, enemies will spawn from the upper floors as it approaches them.
Stage 3: Golem Assassination Redux[]
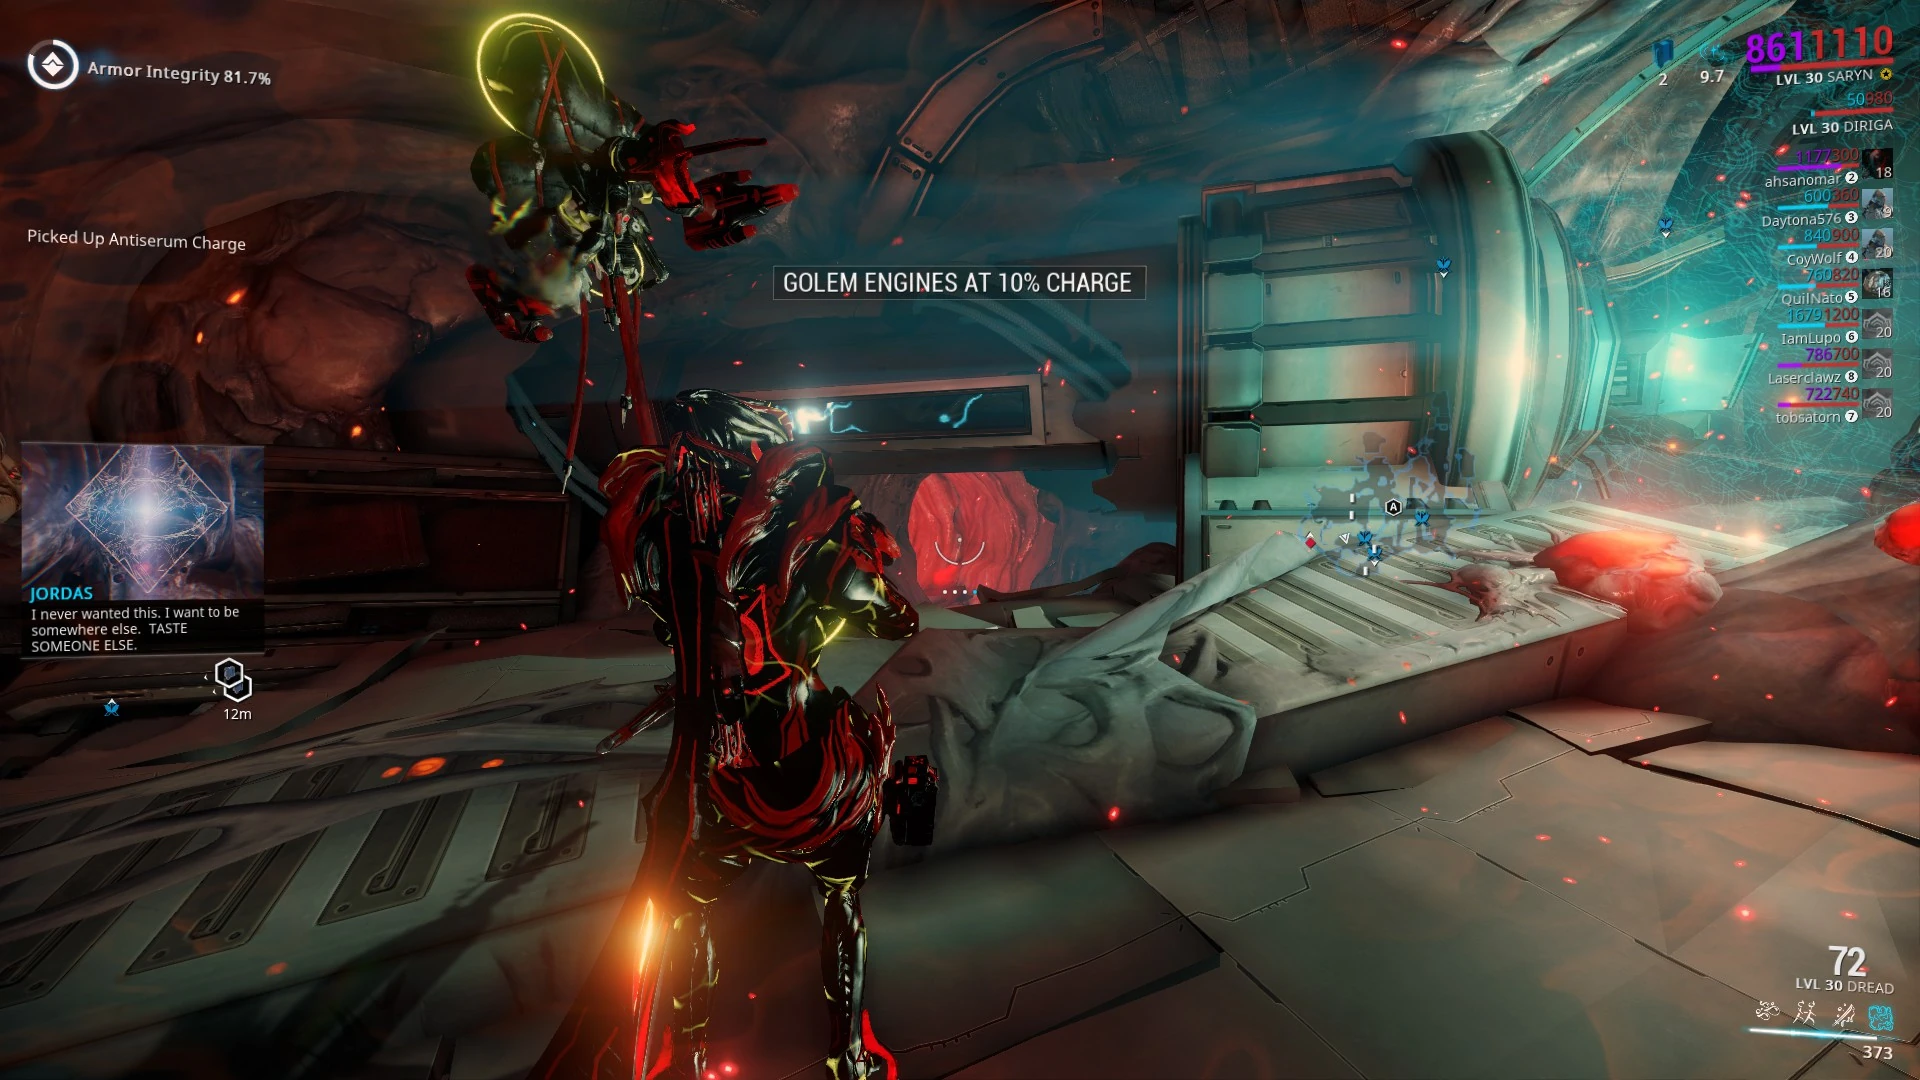
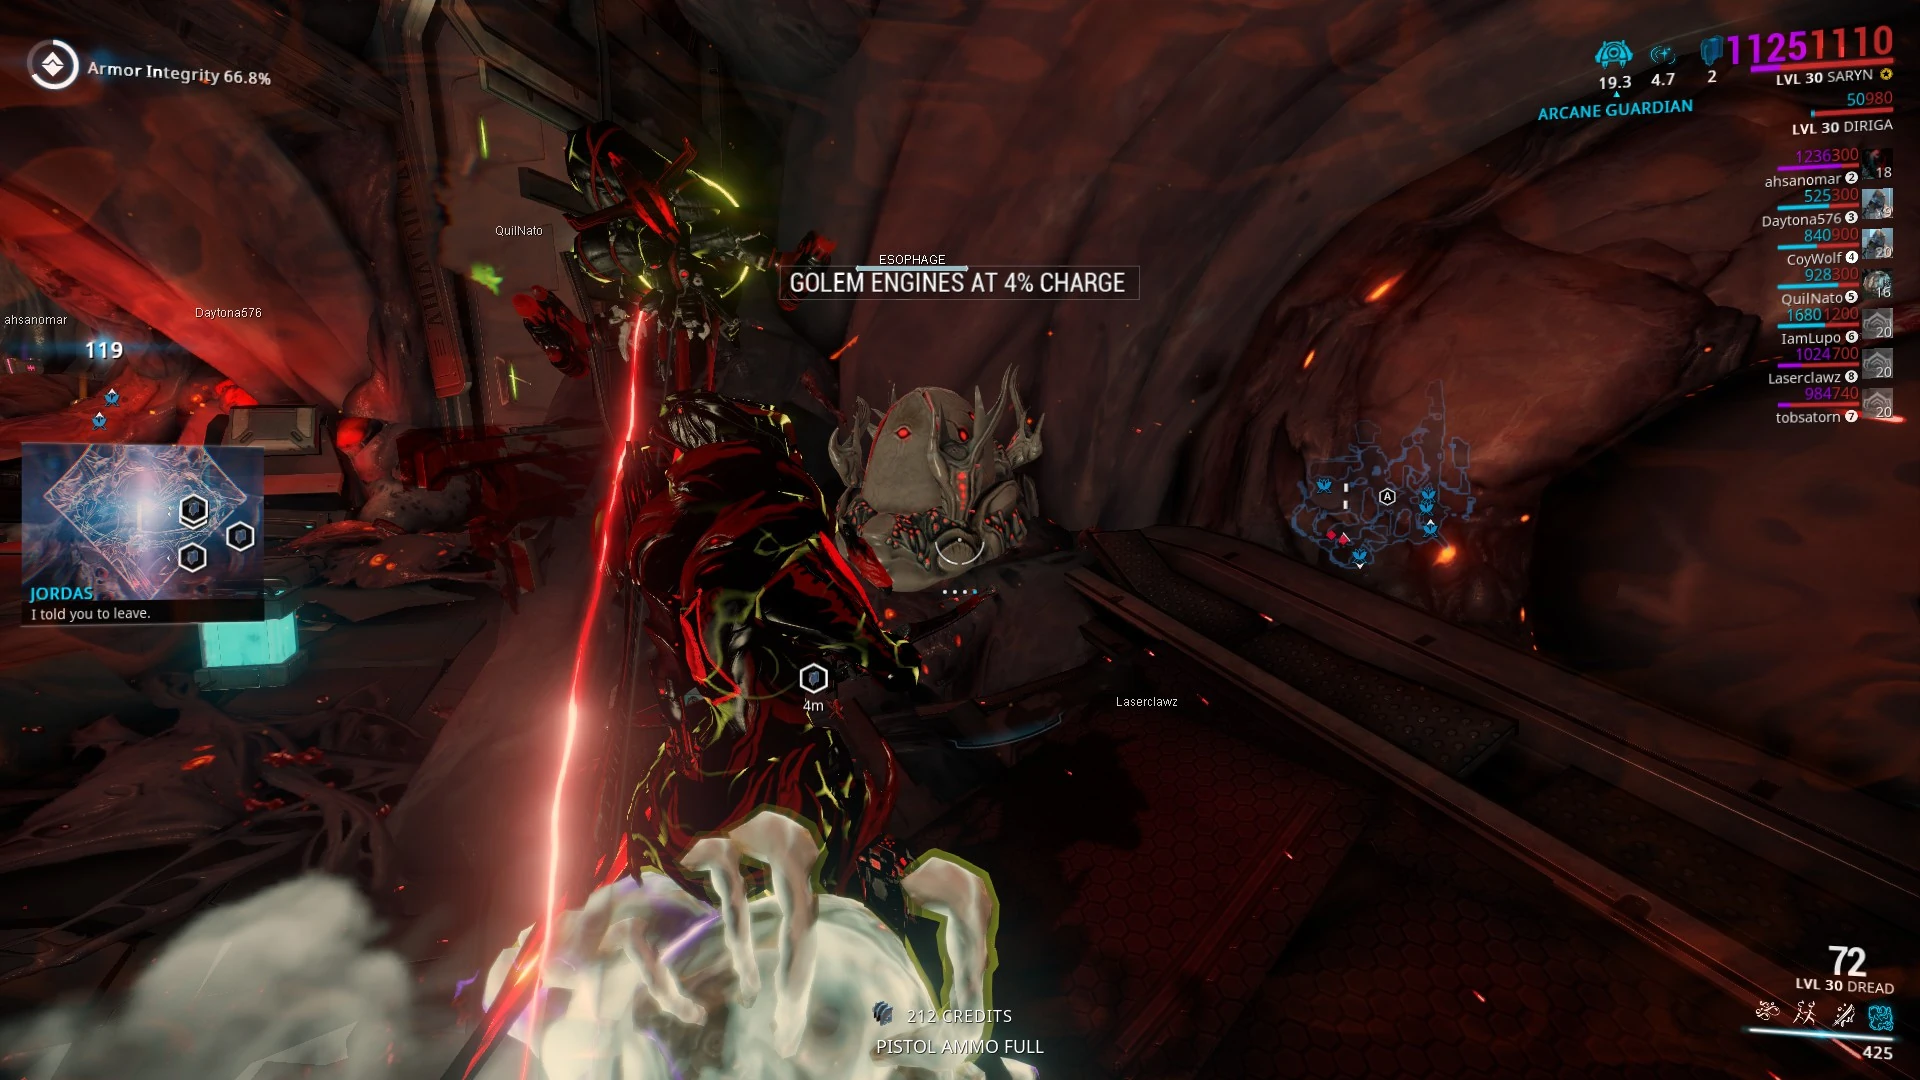
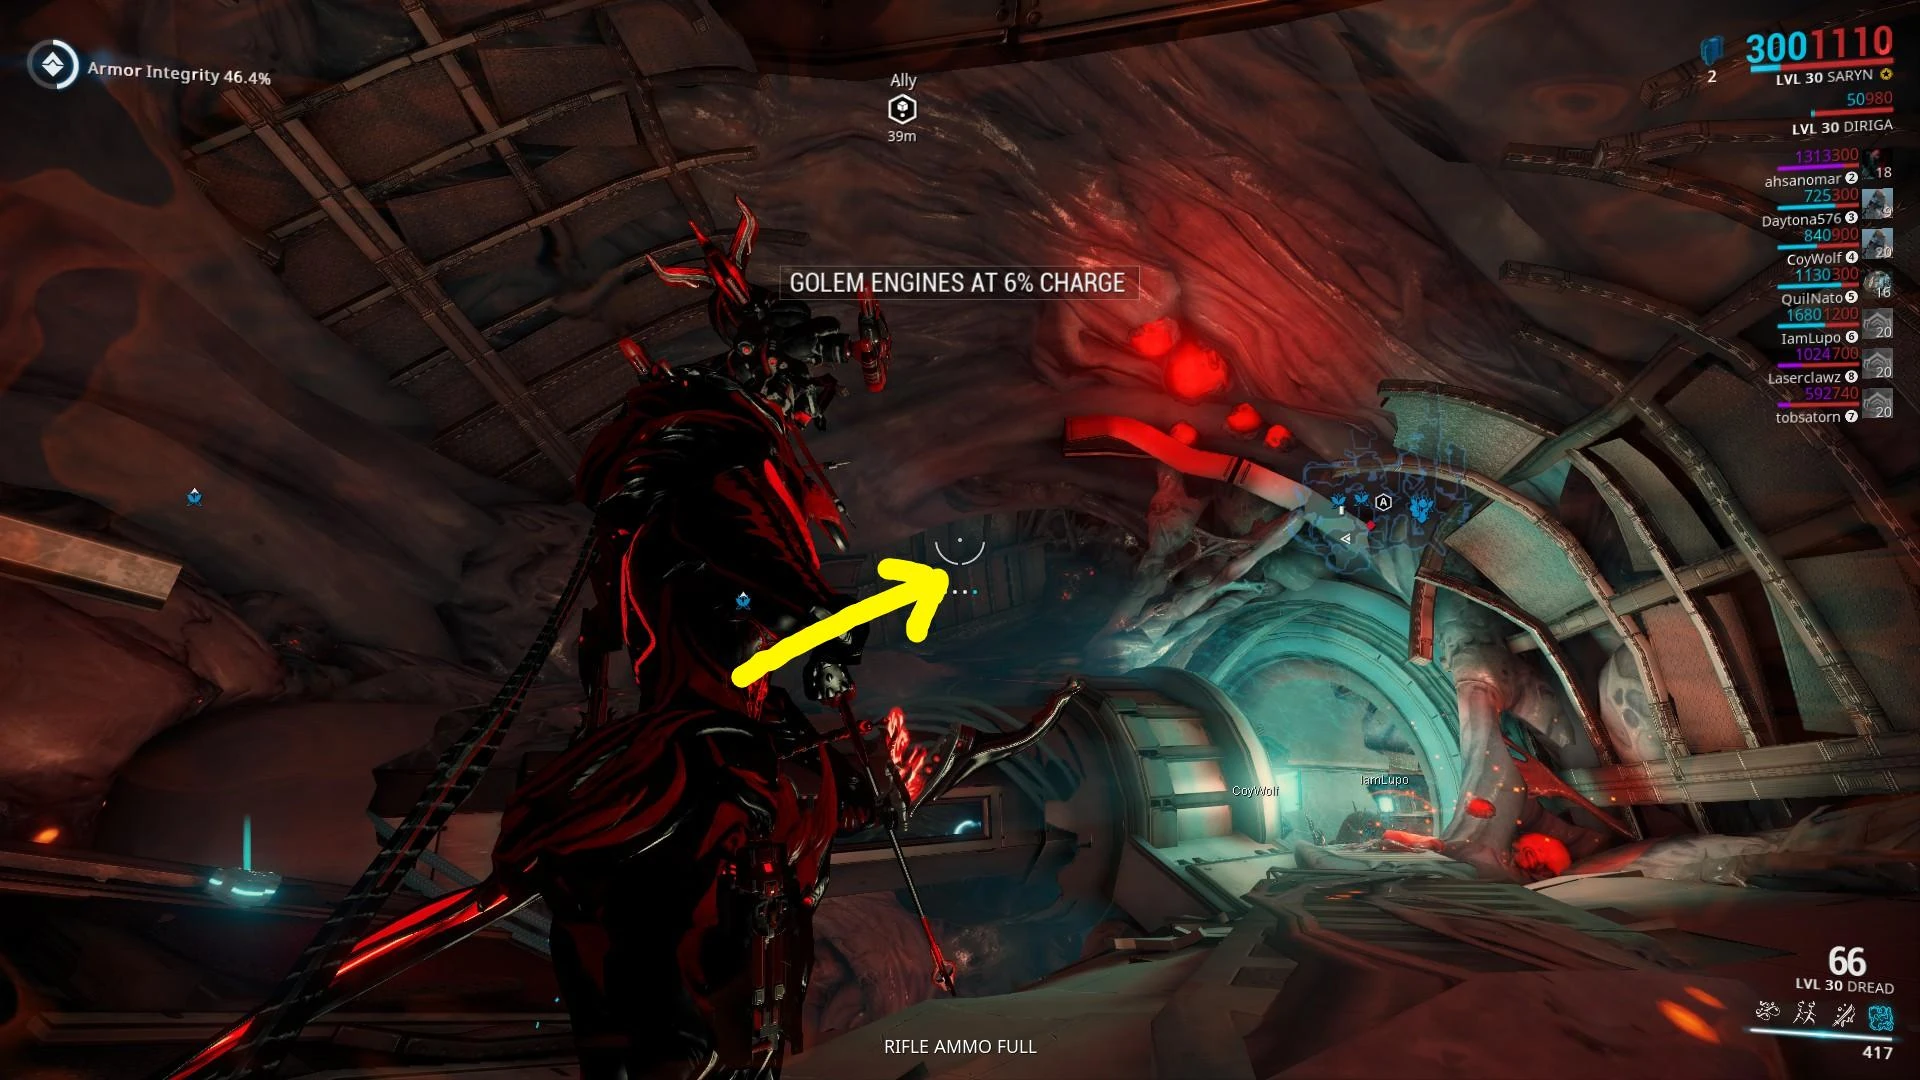
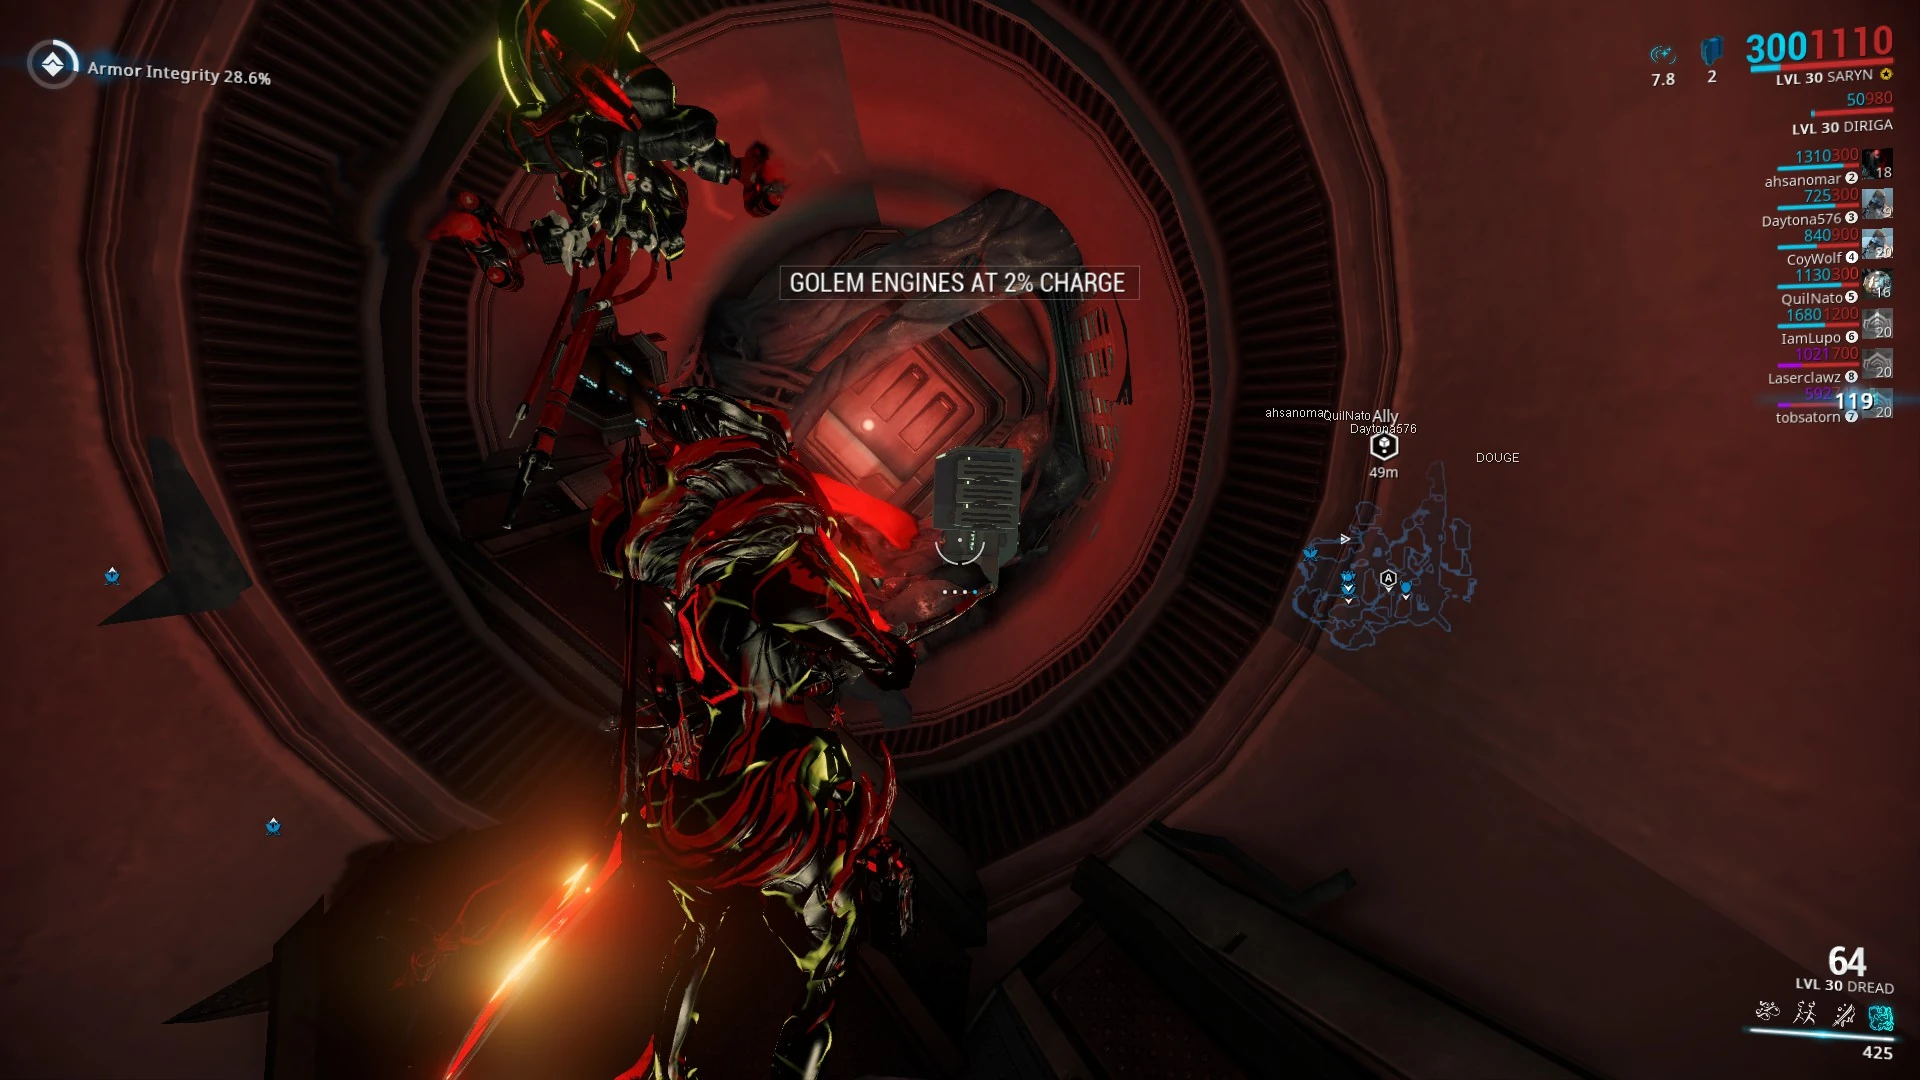
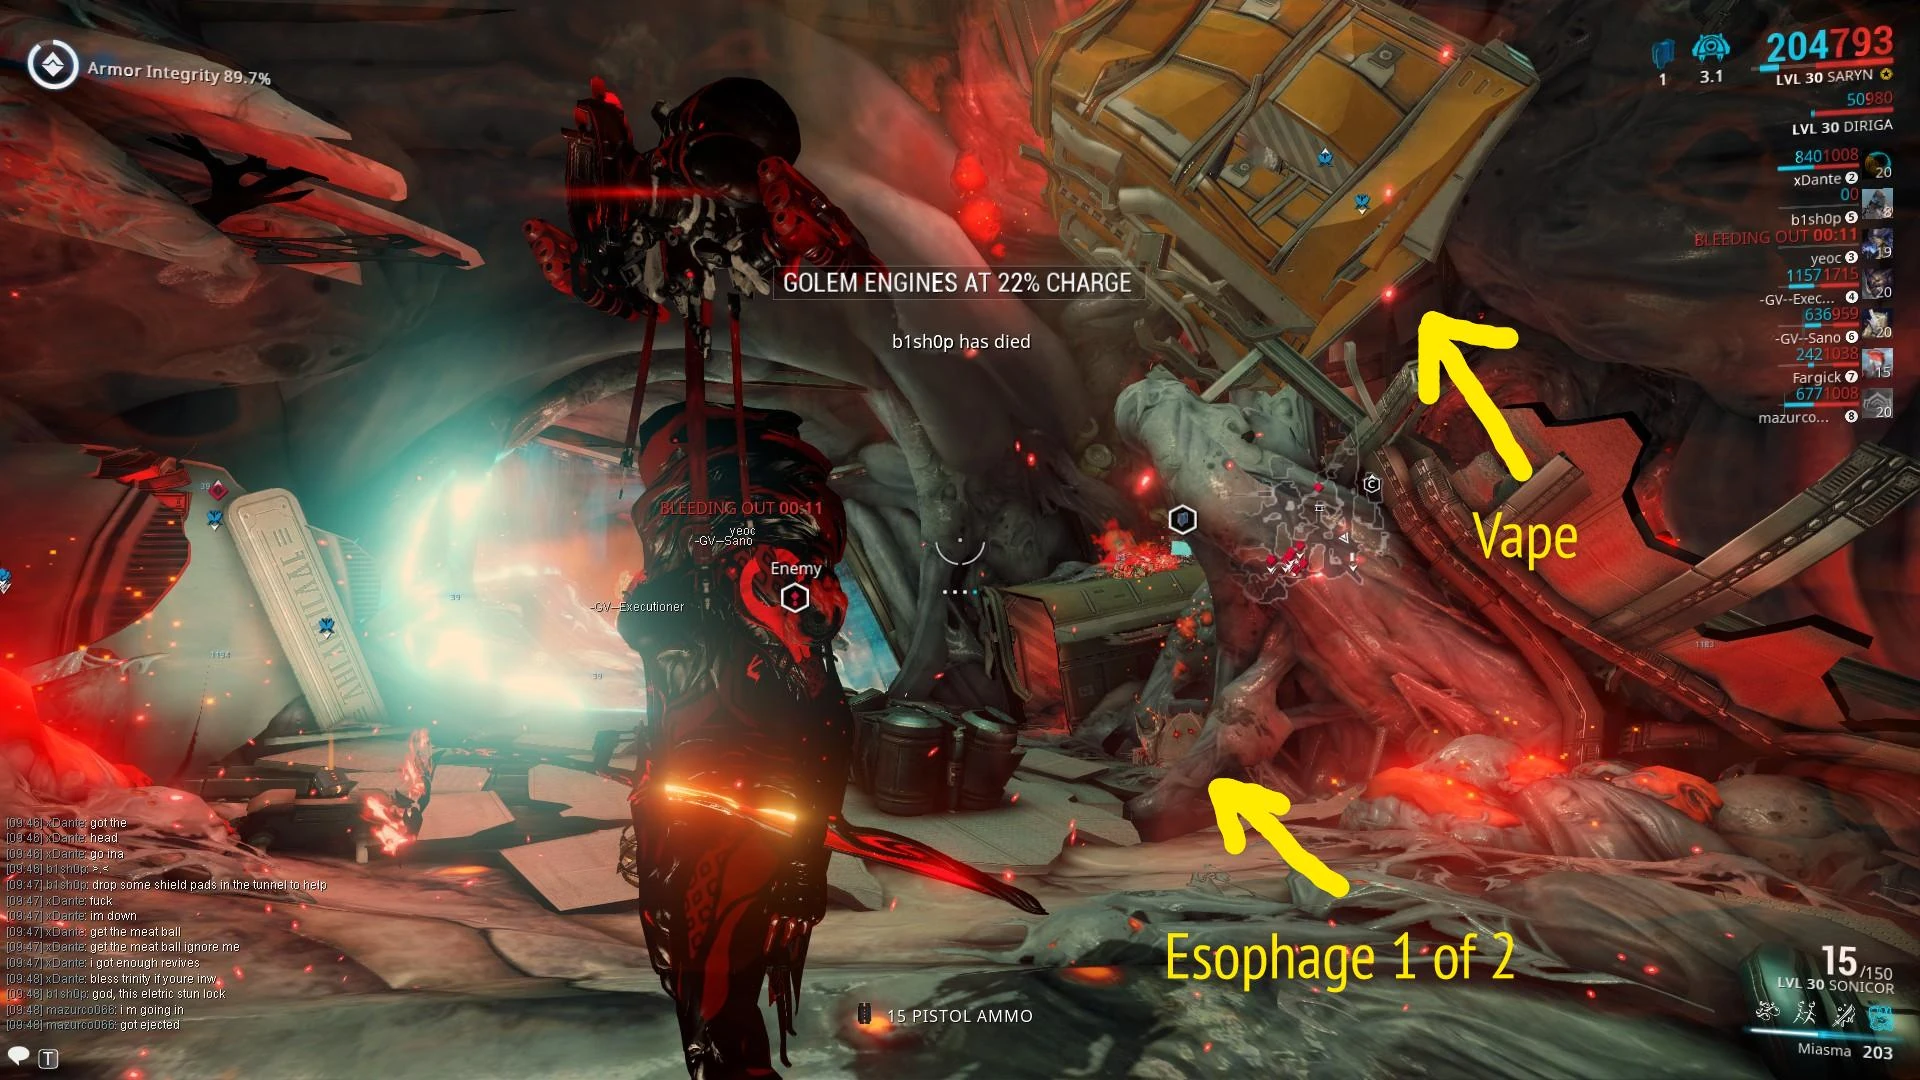
This stage takes place in the same tile used in the Archwing portion of the Jordas Golem Assassinate mission, with a few key differences. The Golem itself, now named the J3 Jordas Golem, will be sitting on a charging station with his engines engaged. During this time you will not be able to damage the Golem at all until you damage its first nerve. In order to begin that process you need to shoot the two buttons on the sides of the head (one left, one right), and while it's open throw a spore inside of the now-open part, on the pink area, preferably from above, to disengage its engines. Once the engines are disengaged allow 6 of your 8 members to go inside of Jordas (bare minimum needed to complete inside parts is 3) through an entrance below Jordas itself while 2 remain outside and continue throwing spores into the head of Jordas to keep the engines from coming back on. Once the engines are deactivated and start recharging, the outside team no longer needs to shoot the buttons on the Golem's sides. Each spore lowers the engine percentage by about 35%
Once through the entrance below Jordas you will find yourself having to go through a maze/trench run through the insides of the Golem. If your Archwing loses all shields, you fail to make it and are teleported back into space. Be quick, but prioritize avoiding collisions. Shield Restores and Amesha's Watchful Swarm will make this much easier. (A player using Amesha should enter last and cast on his teammates flying ahead to protect them) Once you reach the destination you will find yourself in an area where you operate your regular Warframe and now you will begin the final puzzles of this trial. Having both a desecrating Nekros and Energy Vampire Trinity makes this part much easier.
If the outside team fails and the engines recharge, or automatically each time you succeed and a nerve is destroyed, the Golem interior is purged. Run to the portal to leave the interior before the purge countdown expires. Unlike previous penalties for being too slow, this one is fatal and will cost you a revive.
Stage 3.1: First Nerve[]
Hall to first panel.
Hacker needs to get down the hallway to the left of the first vape to get in position for the first panel to hack.
Hall to bottom vaporiser.
At the same time the rest of your inside team should group together and go down the hallway below the big cable and down towards the bottom vape to allow your hacker currently above to proceed with the hack.
Once the first hack is done the hacker now needs to go through the door he just opened and go back through it from the opposite side to hack the second panel (The door covers both entrances so just look back at the door once you pass through it). During this time your team should still be below at the bottom vape and continue charging it.

First esophage.
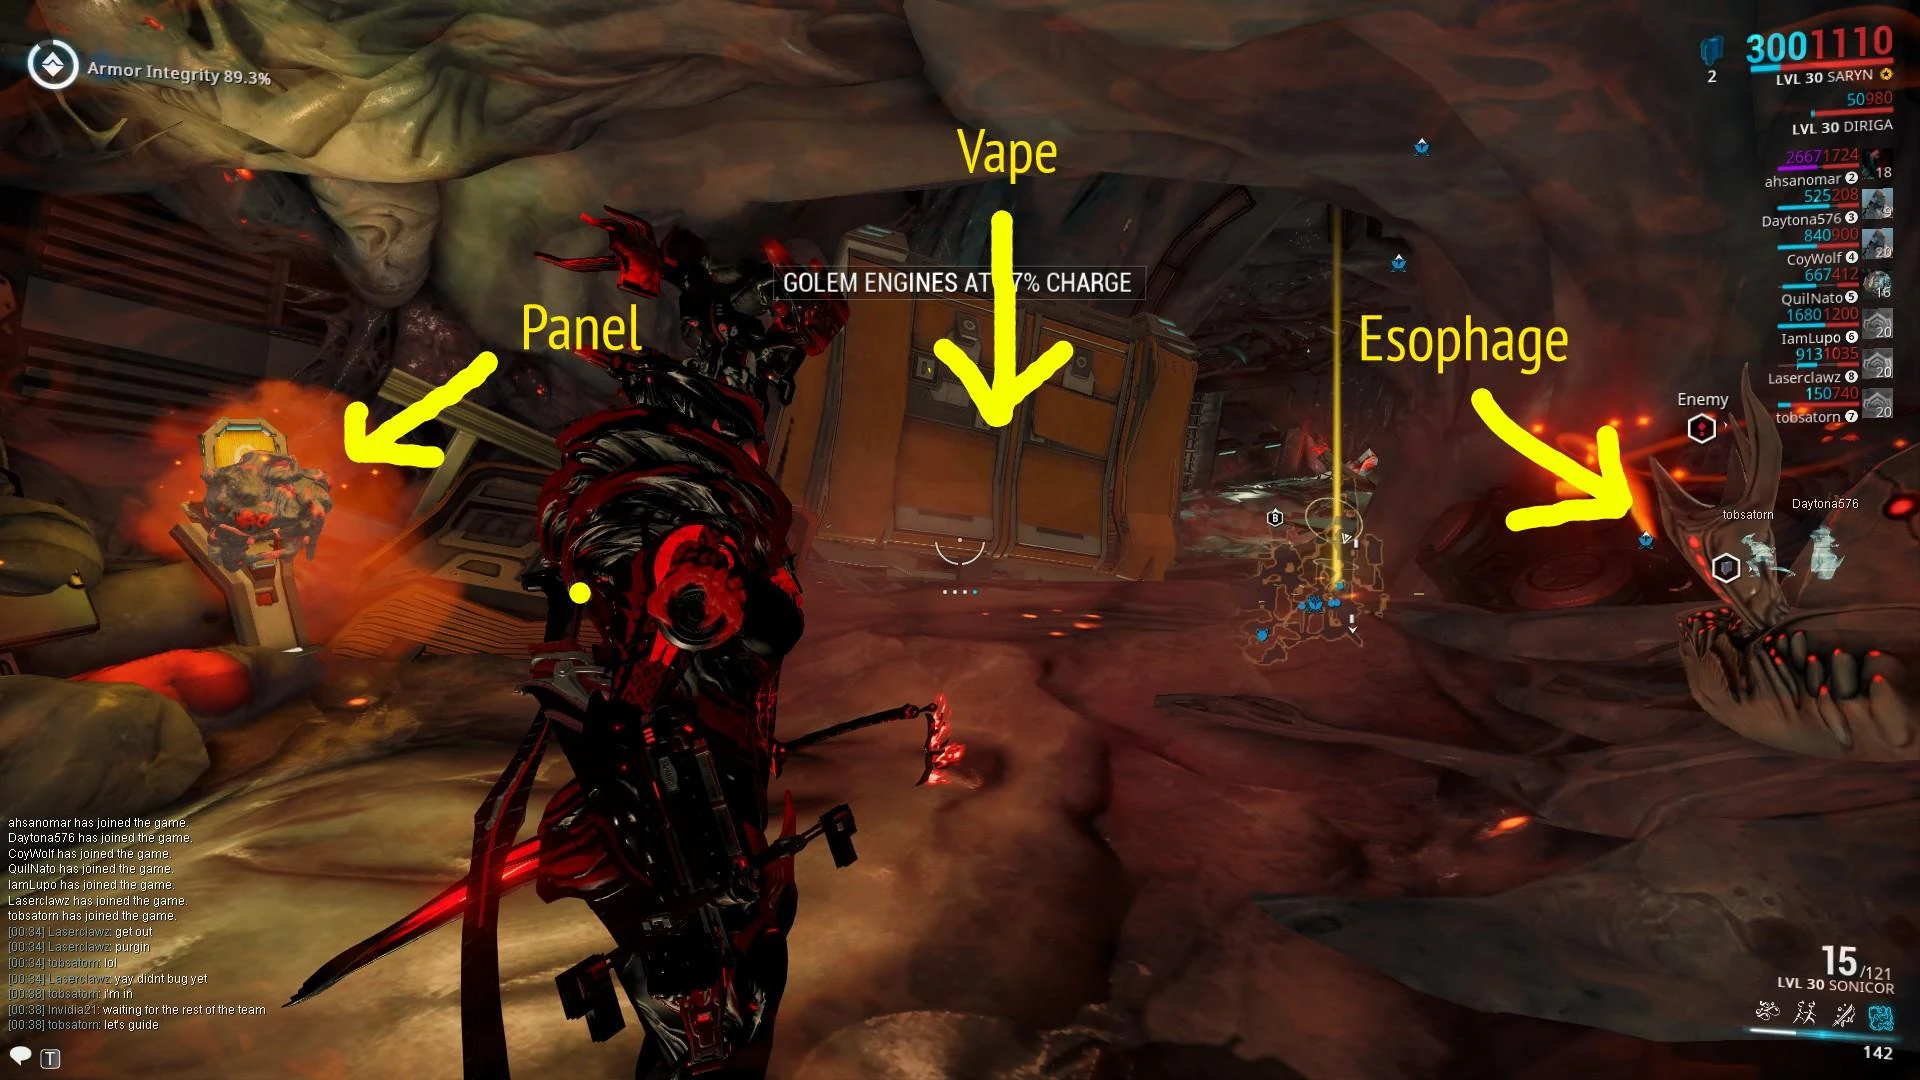
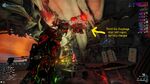
Once the second hack is complete your hacker should go through the door they came in from and take a left towards this esophage. If the vape below is still fully charged you can interact (X ) with the esophage to be taken to the next room.
Next area.
The Hacker that went through the esophage can now shoot the explosive barrel next to the glass (it's to the left of where they emerge from the esophage) allowing the rest of the team to move up to the next area.
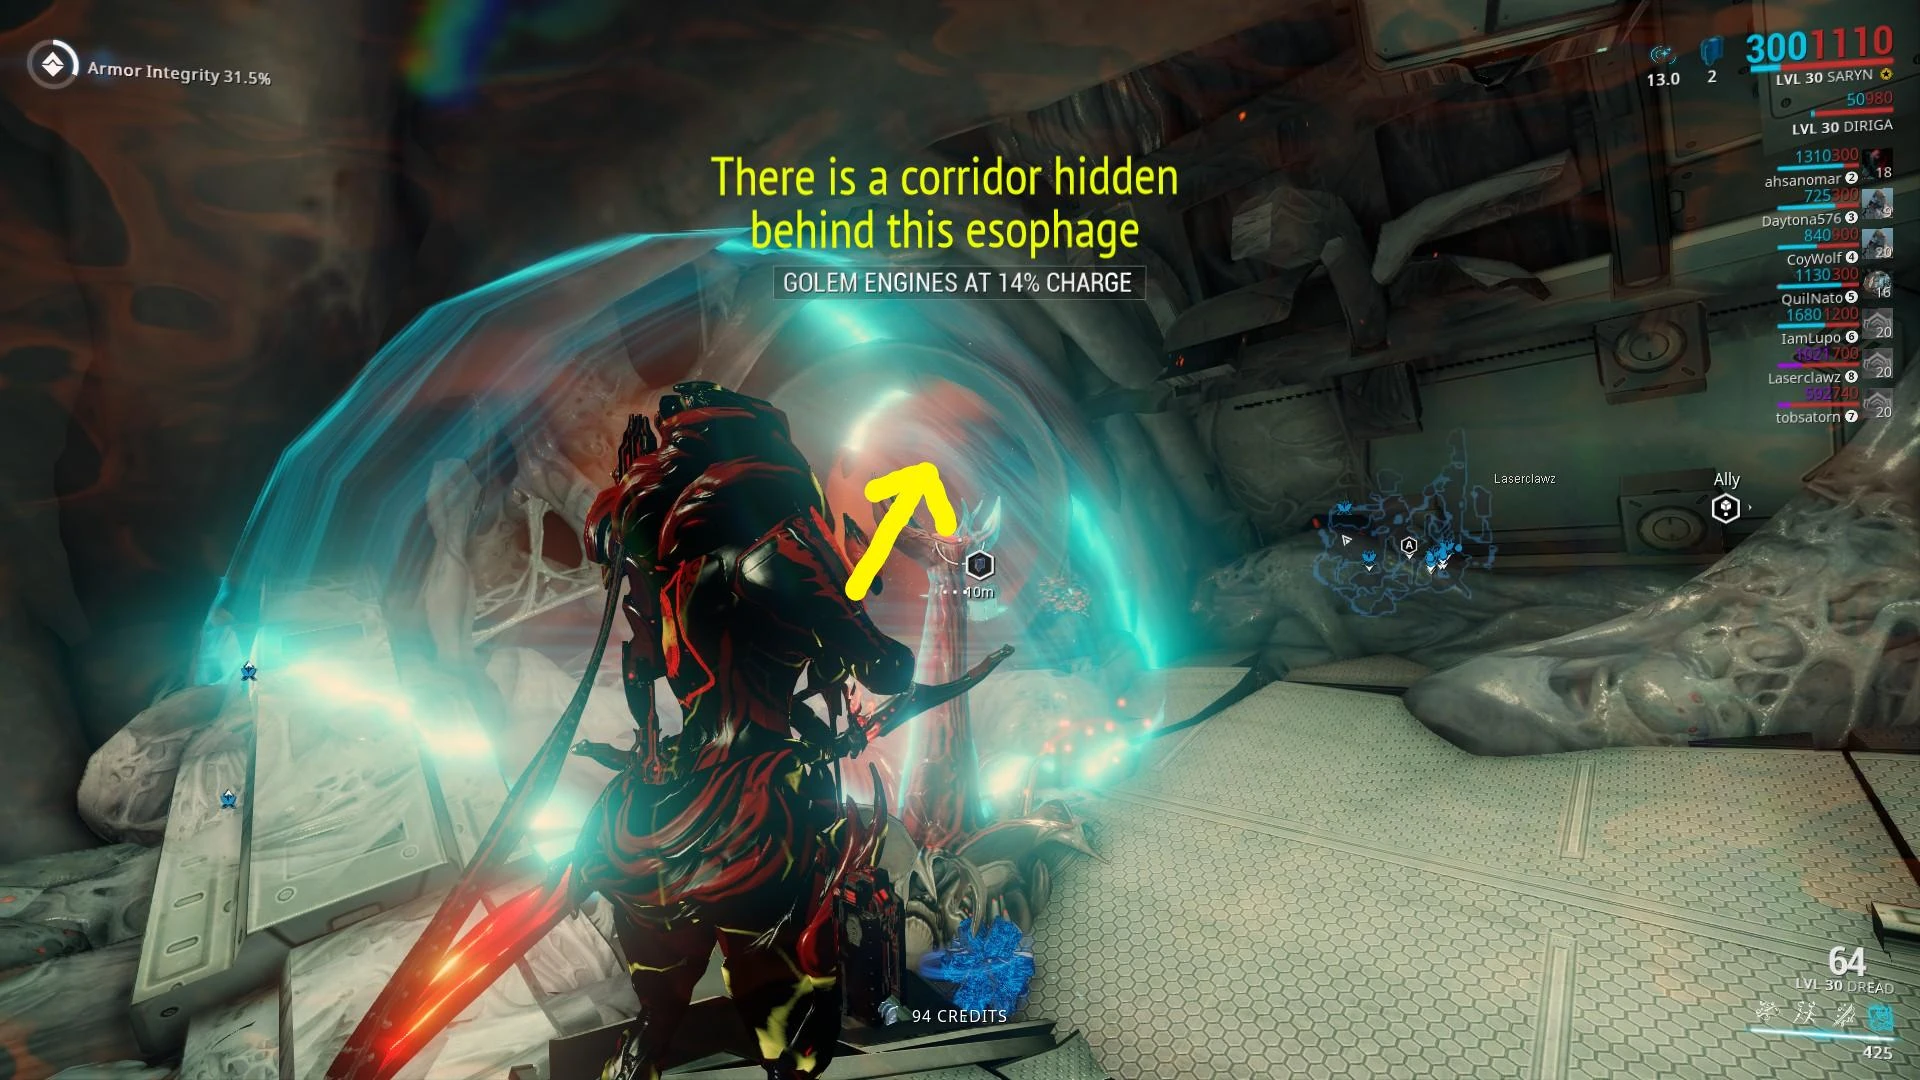

Landmark esophage.
Hidden vaporiser.
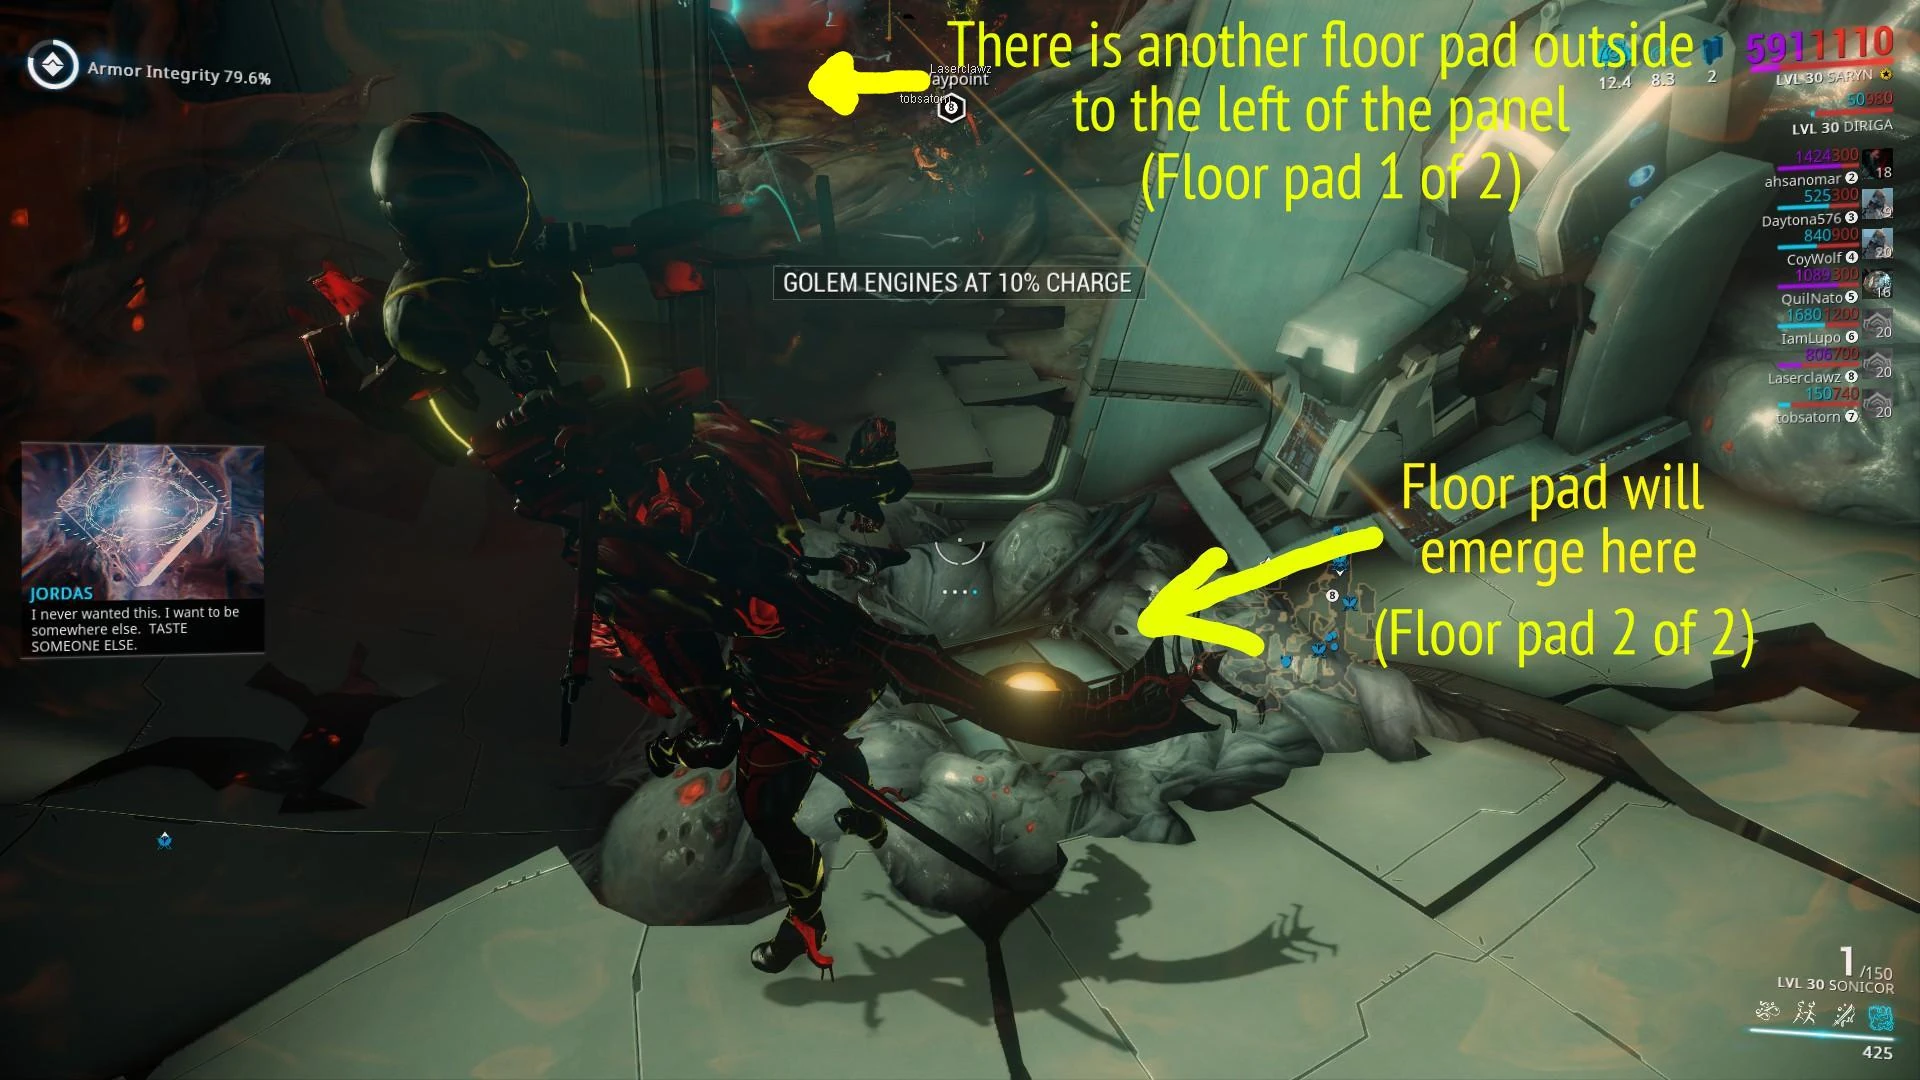
Once in the next area make sure everyone has their Injector charges replenished as you will need it for the following two panels that needs to be hacked. You have to charge the hidden vape that is in a corridor behind the esophage. (to the left of the room when looking towards the panels) This vape allows for the Panel on the left to be hacked and reveal a floor pad behind the door that will be used. Standing on the pads in both rooms while they are active will open the way to the nerve (door is in the left room)
Before you can take down the first nerve, the rest of the team should now go back towards the beginning area towards where you first entered and charge the vape directly outside the nerve. Only when that vape is charged and covering the nerve through the glass will it allow your teammate to damage it. Destroying the nerve will also break the glass, allowing for faster exit.
Warning: You will have only 15 seconds to leave the inside of Jordas as soon as you kill the nerve.
Side note: Person damaging the nerve should really give a heads up before doing it.
Once everyone is back outside Jordas will now move around and you can now attack its backside up to 33% damage taking it down to 2/3rds of its HP. Once you have dealt all that damage to it, Jordas will find himself another charging platform and re-engage its engines and you will have to repeat the process of throwing another spore into its open head. Again, after 6 of your 8 members enter Jordas you will find yourself in another trench run but this time with more obstacles (usually this one is the one that gets most people frustrated because of the incoming stones you have to dodge (or, you know, just shoot them) once you reach midpoint, aren't you glad you brought shield restores?)
Stage 3.2: Second Nerve[]

The hunt for the second nerve begins.
When back inside you will need to get more injector charges if you don't have any left. Then go towards the orange container on the right hand side (from when you first enter, the further one not the one on the left) inside which is a vape you need to charge. Once charged, use the esophage opposite the panel in front of the container (you don't need to hack it yet) to go behind the glass.

A floor pad to step on, inactive until the panel outside is hacked.
Once you emerge you will have to shoot the barrel inside to break the glass to allow a teammate to step on the pad there. After the glass is broken, recharge the vape inside the container, hack the panel from before and have another teammate stand on the nearby pad. Once it is hacked, it will activate the two floor pads.

The floor pads open this hatch.
When these two are simultaneously occupied an horizontal door near the container will open allowing you to bullet jump and parkour into the next room where you need to shoot a barrel next to the glass to break it. Then, charge the vape and hack the panel next to it so the container below will start moving on its rails, up to a door you can hack open, where the entire inside team will need to go.
Once inside you will find a vape next to a panel, further back there will be two floor pads. Between those two floor pads there is a small corridor with a panel and a door. Activate the panel to open it, allowing enemies to come through, supplying your team with fresh Injector charges (any players remaining at the previous area at this point will force enemy spawns to remain on the floor below).

The vaporizer is moved.
Esophage eats vaporizer, eventually takes you to the nerve.
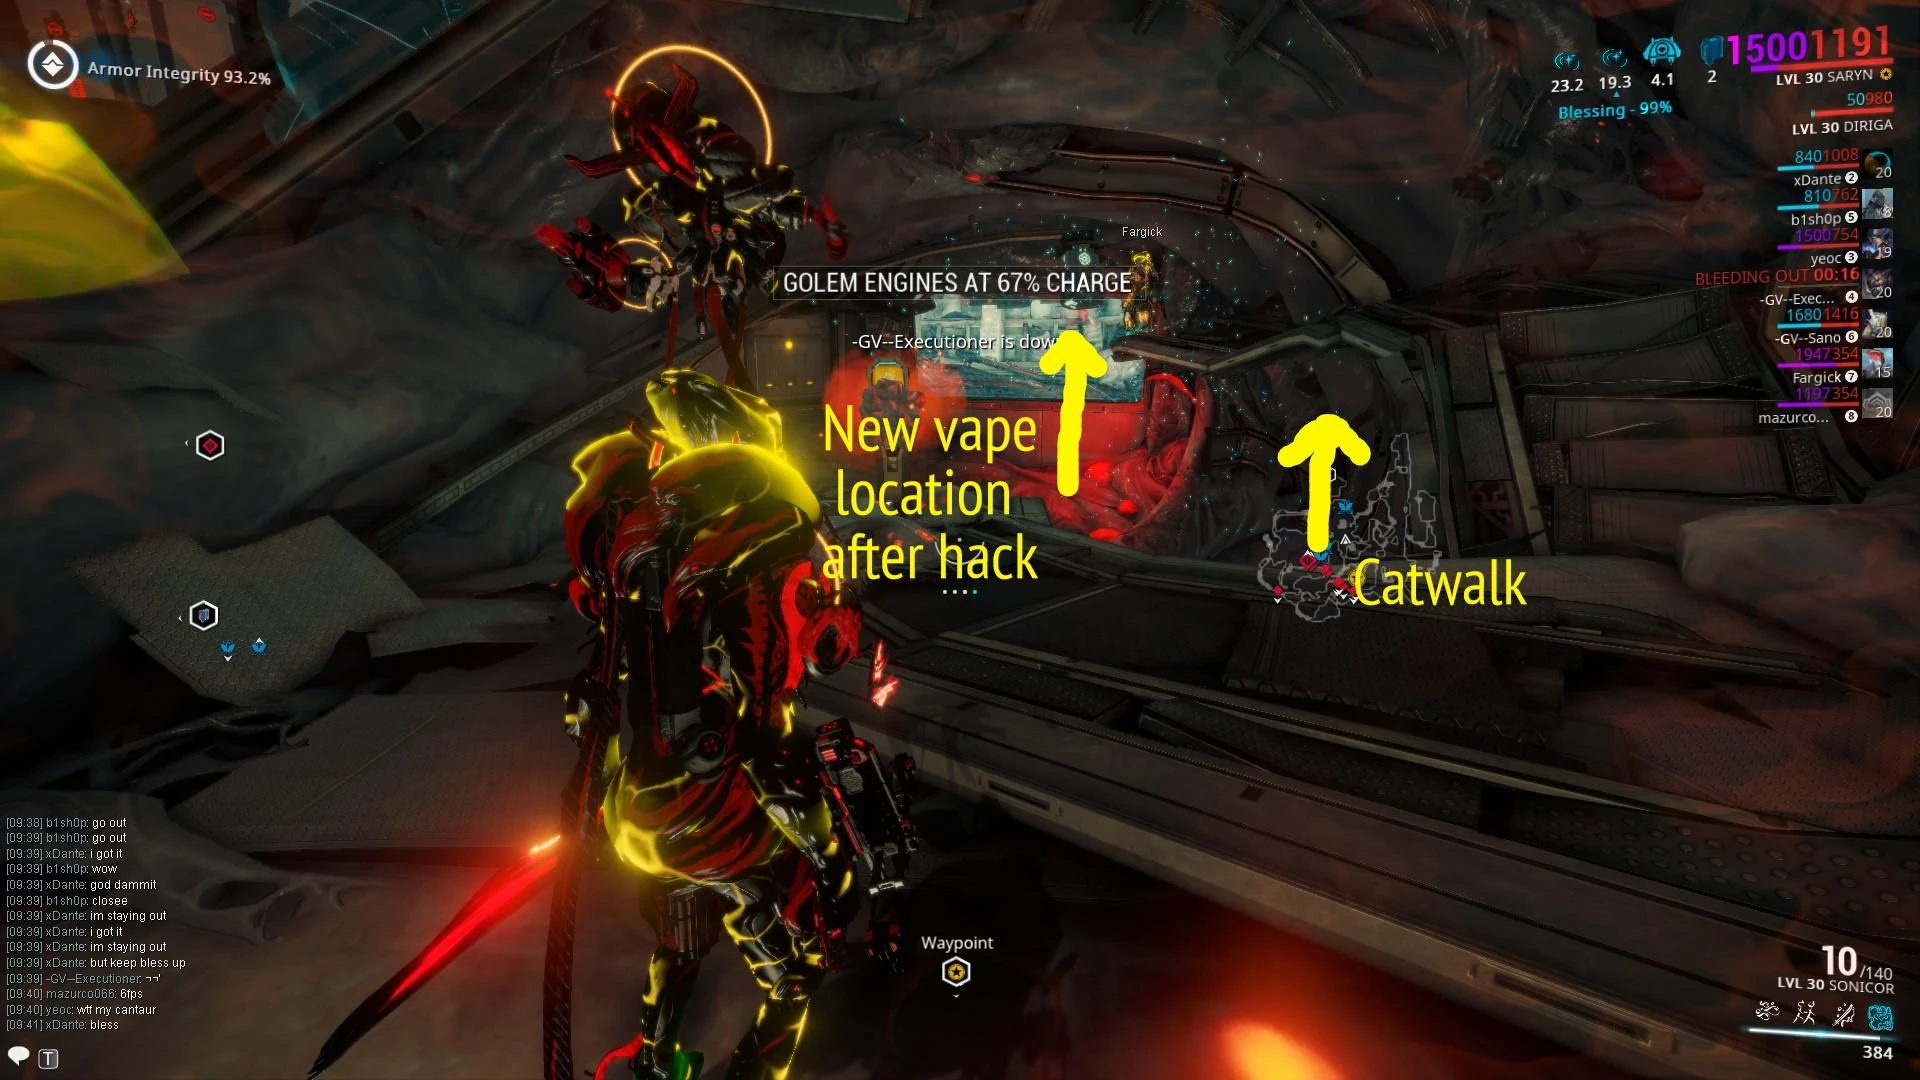
Once that door between the two pads is open and your entire team is up there, have everyone collect two batteries, then charge the vape next to the panel and hack it to send the vape to its new and required location. (do not hack the panel anymore after this) Now, have your teammates step on the two floor pads on the other part of the room. Another vape that you will need to charge will emerge from the ground.
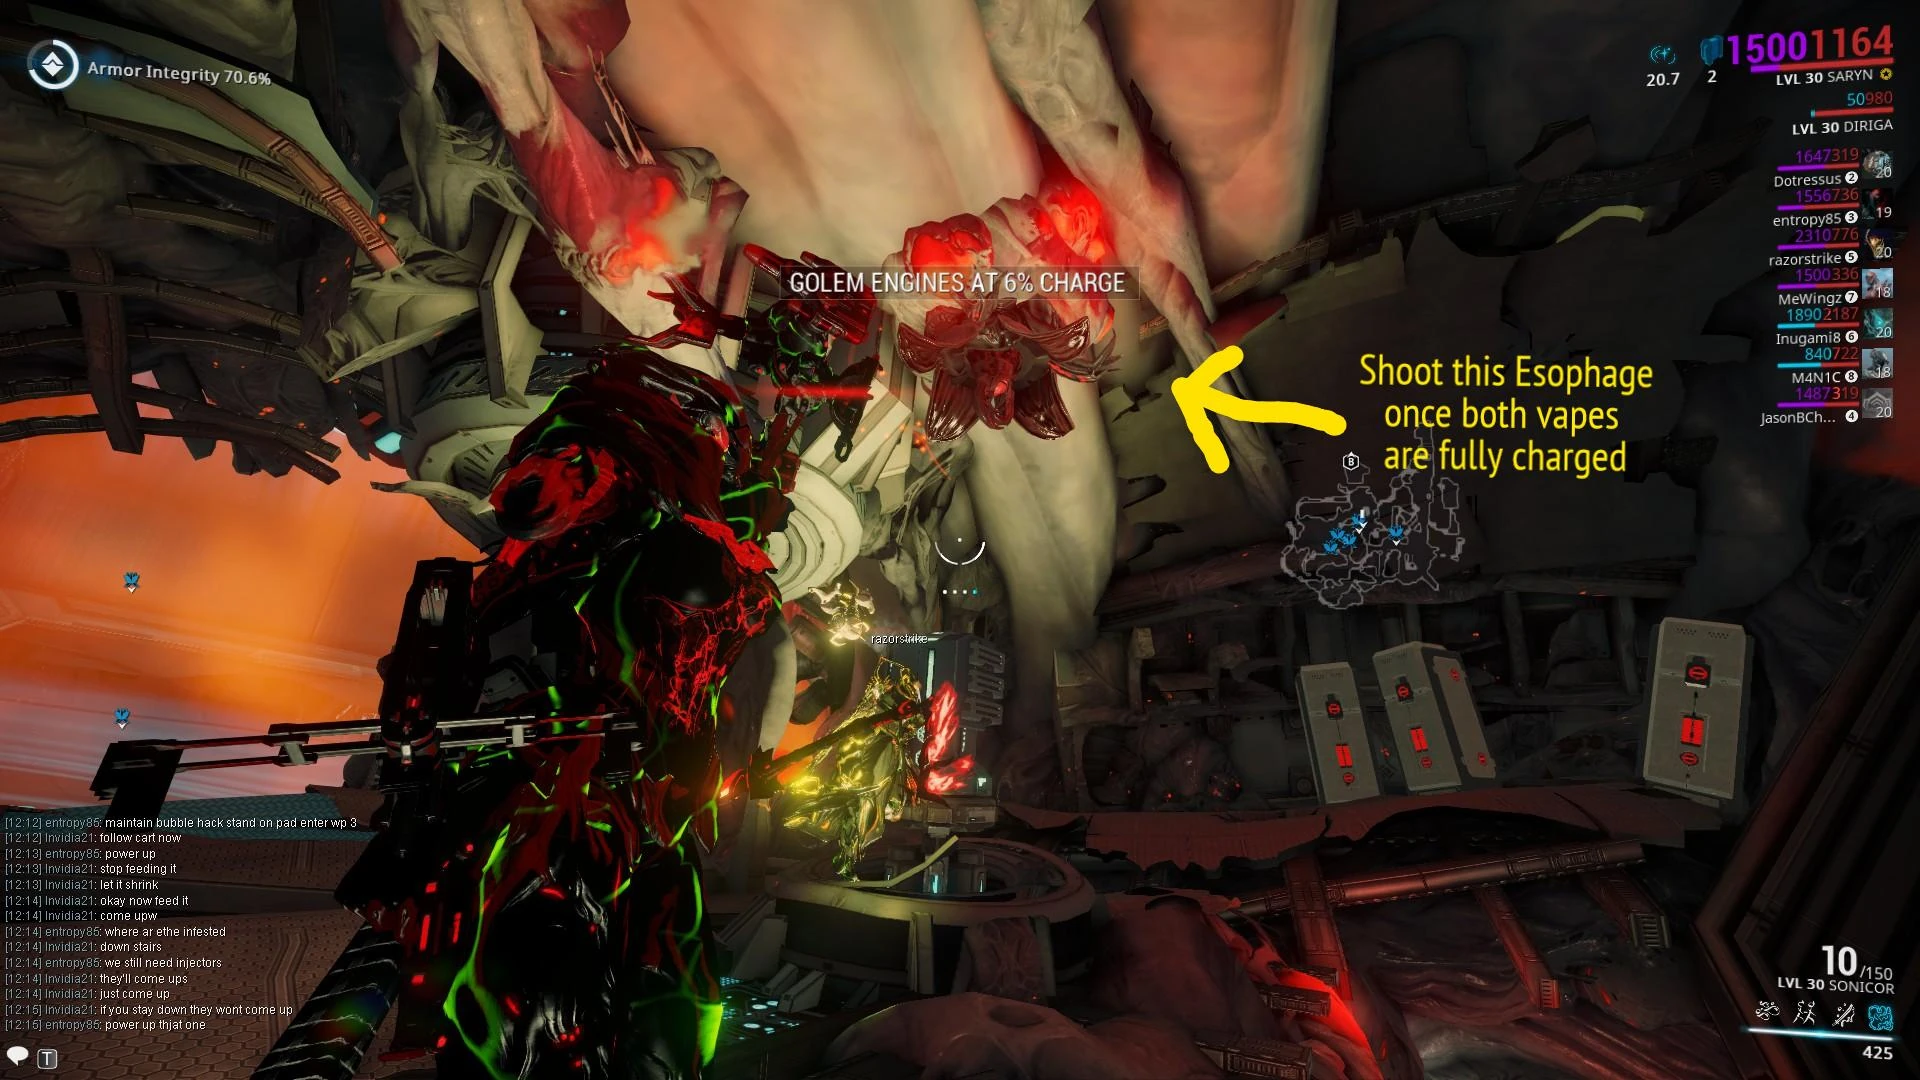
Fully charge the first vape (the one you moved) so it encompasses an esophage on the other side of the glass (you can charge it from the catwalk that is near its new location) Charge the vape that came off the ground and shoot the esophage above so it eats the vape. (stay on the pads to shoot) While the first vape is still charged stand underneath the same esophage and hit X to allow it to take you to the room containing the second nerve.
Inside that room will be a vape you need to charge, if you went inside without any Injector charges you can just access the panel near the door behind you to unlock it and farm some more. Once the vape inside the room is charged, notify the rest of your team and shoot the nerve, then proceed to your nearest exit (well your only exit) before you get instagibbed.
Re-emerging into space you will find Jordas beginning to fly around again, and once again shoot its rear end to damage it until it's down to 1/3rd of its HP. At that point it will move to the final charging station and you will have to throw another spore into its head followed by another trench run.
Stage 3.3: Final Nerve[]

Nerve three begins.
At this point you're getting on to Jordas' last nerve (pun intended, it's also probably getting to your team's last nerve but hang in there!).
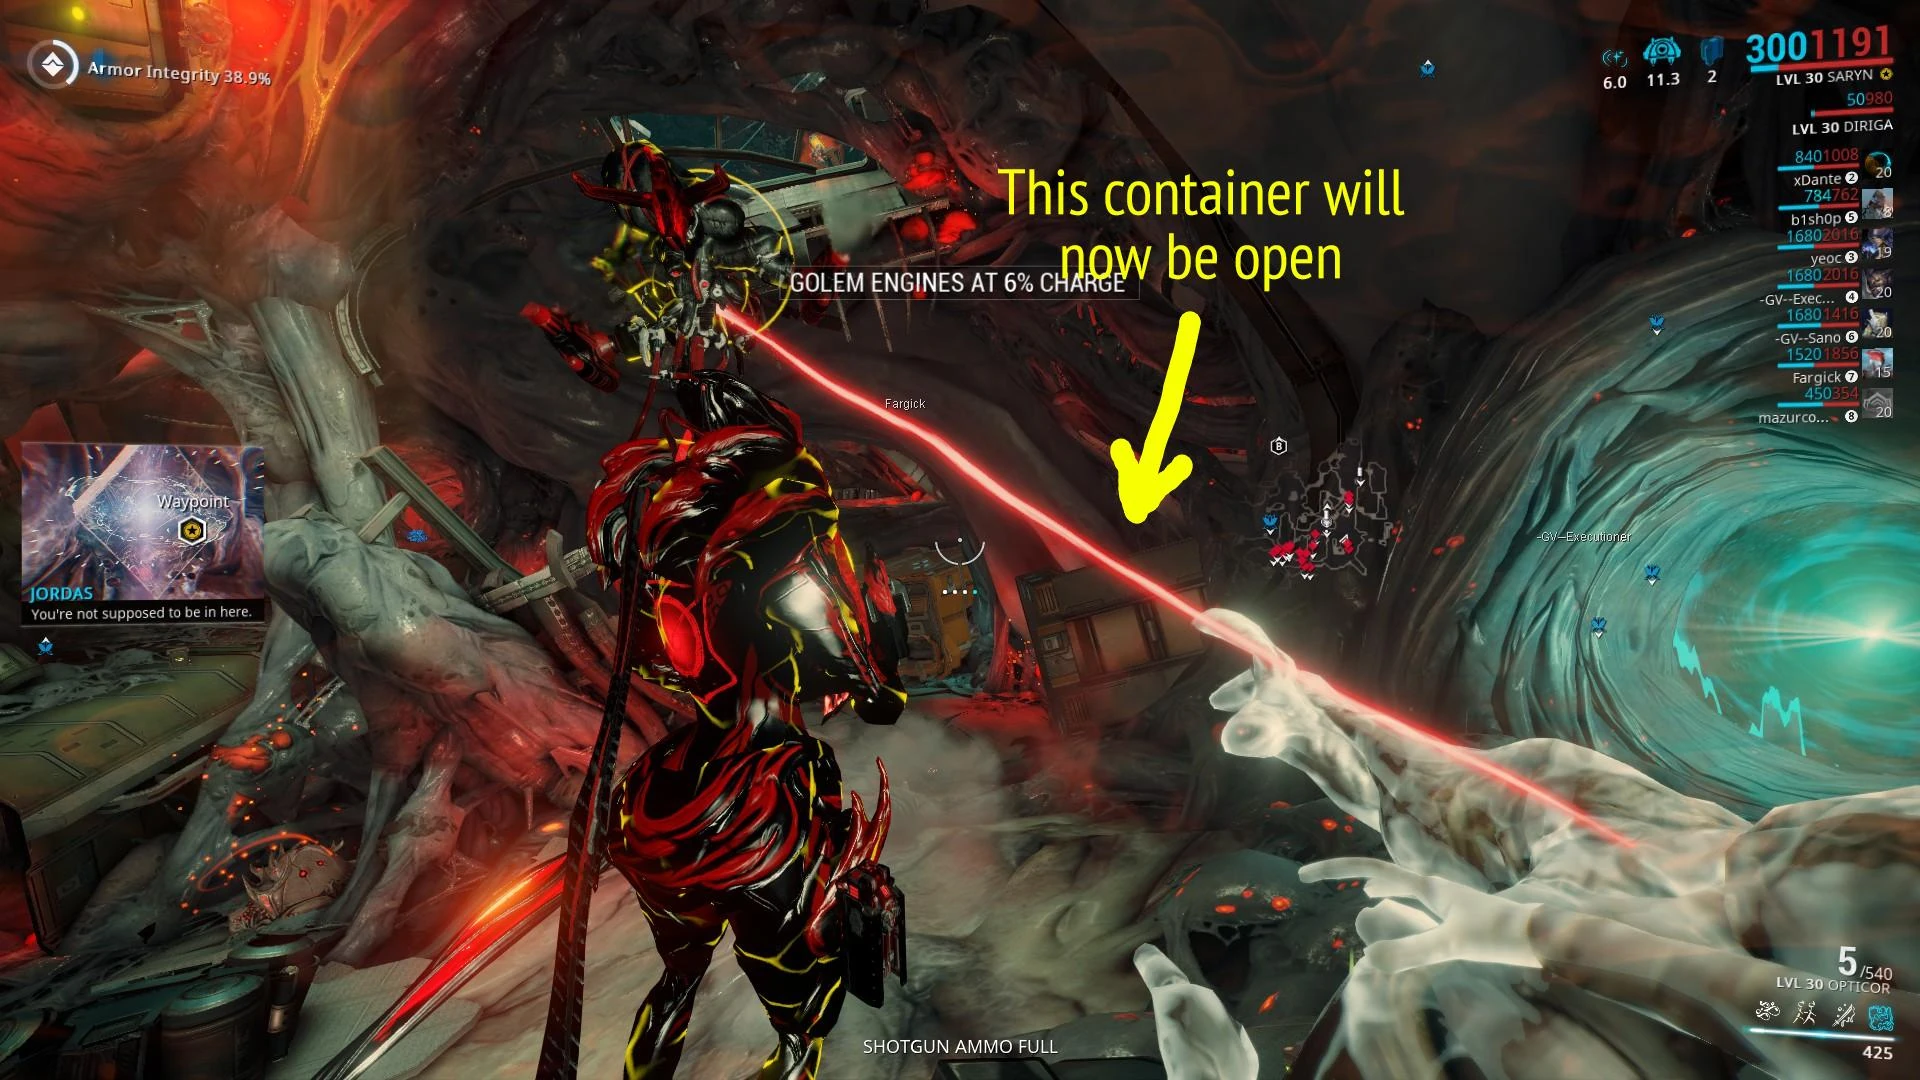
Start by charging the vape in the container you moved earlier. Once it is fully charged you will need to shoot through the grating on the top of the container below the one containing the vape to wake an esophage. The second esophage is on the ground next to the same container. Use it to get to the inside, where you can shoot a barrel in front of you to break the glass, allowing the rest of your team to proceed to the next area down below.
After the glass inside that container is broken go down the shaft that is now accessible and follow the path down until you see an esophage, and a panel behind it. Below the esophage is a vape, charge it and hack the panel to proceed. Once above there is another locked door, besides which, on the left is an opening through which you can see an explosive barrel. Shoot it to make a hole in the container that is directly next to the portal that leads outside to allow a teammate to open the door. (put a waypoint through the opening you shot in to help)
Hidden beginning vaporizer.
Inside that container there is a vape and next to it there will be a panel for the door that was locked. Once it is open you now have quick access to the bottom vape and esophage.
In the room to the left, you will find two floor pads that open a door above to the last nerve's room, but the way is blocked by lasers.
Have 2 teammates stand on the 2 pads. while a 3rd activates a vape on the esophage in the underground tunnel (through the container with a grate on top). Now the teammate standing on the pad closest to the door or anyone else needs to shoot the esophage inside the room blocked by lasers (This activates it). The previously unusable esophage can now be used. Use it to enter the nerve room.
Shoot the barrel inside to open the way by deactivating the lasers. In order to hack the panel next to the nerve, you need to move the container containing a vape to its original position by activating the vape and hacking the panel in the room above the horizontal door from earlier.
Once the container is back down (do not stand on its path as it can glitch you into the ground) charge the vape inside and hack the panel in the nerve room. This will remove a cover from the final vape which you need to charge it in order to destroy the final nerve.
Go back outside before the purge kills you, and (finally) kill the Golem.
Congratulations.
Rewards[]
The rewards for completion of the trial are as follows:
- An Arcane Enhancement.
 329,300 Credits.
- Stage 1 - 9,500 Credits.
- Stage 2 - 9,700 Credits.
- Stage 3 - 310,100 Credits.
- Stage 1 -
- Jordas Sekhara badge - Upon first completion of Trial.
Notes[]
- Players will automatically fail the Trial if there are fewer than four Tenno present in the squad (whether by the players quitting or exhausted revives).
- Players are eligible for another reward after receiving daily login reward.
- Only affects Arcane Enhancement reward, raids can be run repeatedly for credits and rare crates.
- Enemies will not scale down in difficulty with fewer players present in the mission.
Tips[]
- General
- Coordination and teamwork is key. Make use of the leader mechanic and appoint someone as one, preferably those with experience with said particular raid.
- Unlike The Law of Retribution, it is crucial to kill enemies as fast as possible, and as such, using immobilizing crowd control abilities in this Trial (such as Prism or Sound Quake) may sometimes backfire in the later stages. Consider taking other forms of crowd control Warframe that does not fully halt the enemies' movement.
- Nyx's Chaos, Loki's Irradiating Disarm, Oberon's abilities, Sequence and any other Radiation status effect can nullify the Ancient Healer's protection to defeat enemies faster.
- Nova, with her Molecular Prime's damage multiplier is great to have, but high Ability Strength may be counterproductive as it will slow the enemies to a crawl and impede collection of batteries. On the other hand, with decreased Ability Strength from Overextended the Priming speeds up enemies to bring more batteries, with some added risk.
- Alternatively, having ~30% Ability Strength allows Nova to obtain neutral-speed priming. (Rank 2 Overextended, or Rank 5 + Intensify)
- Alternatively, having ~30% Ability Strength allows Nova to obtain neutral-speed priming. (Rank 2
- Nekros's Desecrate and Hydroid's Pilfering Swarm can increase the chance to obtain much-needed antiserums.
- Enemy Radar greatly helps in finding enemies with injector batteries that may get stuck in tunnels (mostly noticeable in the "lift stage").
- Infested Impedance, as it slows down the Infested, can also slow down the process of obtaining batteries. Unless your team isn't confident they can take the Infested on, refrain from using this aura.
- Odonata's Repel can knock around Infested Spores; avoid using this ability when one is present.
- Archwing Infiltration
- You can melee an Archwing pad as opposed to continuously firing at it.
- A classic tip is to assign only one player to move the spore. Having multiple pushers on a single spore will not speed up the process and adds the risk of accidentally pushing it elsewhere.
- It is recommended to spend some time killing the Infested, gathering up antiserum batteries before beginning the encryption to ease up the process.
- Reactor Sabotage
- Remember to use Esophage for quicker access to the elevator.
- It is recommended to spend some time killing the Infested, gathering up antiserum batteries before lifting the elevator to the reactor to ease up the process.
- Only use vapes on one side of the shaft to need less batteries.
- Hold a bit at level before injector with esophage to replenish batteries.
- Golem Assassination Redux
- The outside team should prioritize reviving downed teammates to sending spores at the golem.
- Be quick, but prioritize avoiding collisions when trench running inside J3-Golem. For inexperienced players, taking a strong and stable Archwing such as the Elytron or Odonata may be the best course of choice as it forgives multiple mistakes. Using Itzal for this purpose is not recommended (unless you are an advanced flier) as its flight speed is particularly difficult to control and its durability is among the weakest, requiring a close to perfect run to pass the course. Amesha makes it really easy.
- Wield melee weapons and block throughout the trench run to reduce collision damage and to grant protection towards knockdown effect.
- Shield Restores will make this much easier.
- With Valkyr using Hysteria you can live without needing the vaporizers.
Bugs[]
- When destroying the second nerve, the Esophage may become bugged and refuse to move the Antiserum Vaporizer. This can possibly be avoided by having host be inside for second nerve.
- Related bug: the Vaporizer will only be moved once. If you move it and then are purged before destroying the nerve, it will be back at the initial position forever. The nerve cannot be destroyed and the raid must be aborted.
- When feeding spores to the Jordas Golem, players may become trapped in an endless cycle of knockdowns if they get too close to the Jordas' mouth when it attacks.
- Also, in the third stage of the raid, if you're one of the clients, sometimes, feeding the Jordas Golem with Spores will NOT register.
- Clients will be spit back out of the Esophage just because you're not the host.
Media[]
 (29 KB)")
 (32 KB)")
")
Patch History[]
Update 22.14 (2018-03-01)
- The trial was removed from the game.
Hotfix 19.5.7 (2017-01-06)
- Fixed the on-foot transition cinematic being repeatable multiple times.
- Fixed a script crash in the Trial lobby.
Hotfix 19.5.6 (2017-01-04)
- Fixed a crash in the Jordas Verdict as a result of weapon trails.
- Fixed instances of enemies not spawning.
- Fixed running through space as the Operator after exiting Jordas in Operator mode in The Jordas Verdict.
Hotfix 19.5.4 (2017-01-03)
- Fixed being able to Desecrate friendly Shadows in The Jordas Verdict.
Update: Specters of the Rail 0.0 (2016-07-08)
- Increased the spawn rate of Rare Crates in The Jordas Verdict to match the Law of Retribution.