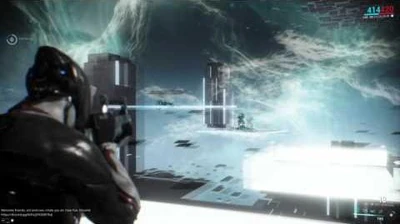
Mastery is a method of tracking a player's relative skill level and how much of the game's content they have experienced. Mastery is earned by leveling up companions/weapons, and Archwings/Warframes using Affinity. Mastery can also be earned by successfully completing a mission on a node that has previously never been played. Mastery Rank can unlock a number of weapons and Warframes, raise the amount of times a player can trade per day, allow you to deploy more Extractors and raise the maximum daily amount of Syndicate standing by Template:Ss. Players can view their Mastery Rank by pausing, scrolling over their avatar, and clicking "Show Profile." Other player's Mastery Rank can be viewed in the same way if they are in the player's squad, or by selecting their name in chat and clicking "Profile."

Tests
In order to be promoted, a player must pass a different test each time he or she wants to rank up. Whether the test is passed or failed, the player will have to wait 24 hours to rank up again or try again. If the player wishes to train for Mastery tests, they can go to the right of Cephalon Simaris' room in any Relay. There, players will be able to play all the tests up to the one directly after their current rank, which will allow them to prepare for their next test accordingly. All tests are completed alone, which will force you out of squads you are in.
Rank 1-10
- Exterminate Test (Primary)
- This test requires players to exterminate three waves of enemies with their primary weapon.
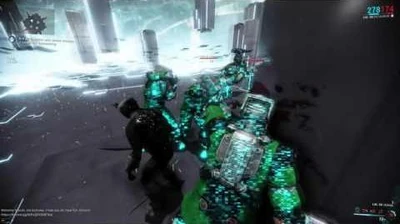
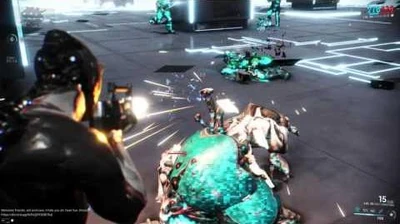
The player starts in the center of a room encircled by six pillars. From here they must eliminate 10, 15 and 20 enemies within 1:00, 2:00 and 3:00 for each wave respectively.
- Exterminate Test (Secondary)
- This test requires players to eliminate three waves of enemies with their secondary weapon.
The player starts in the center of a room encircled by six pillars. From here they must eliminate 8, 12 and 16 enemies within 0:45, 1:00 and 1:15 for each wave respectively.
- Exterminate Test (Melee)
- This test requires players to eliminate three waves of enemies with their melee weapon.
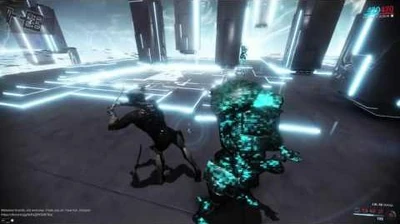
The player starts in the center of a room encircled by six pillars. From here they must eliminate 5, 7 and 9 enemies within 0:45, 1:00 and 1:15 for each wave respectively.
- Survival Test
- This test requires players to evade an unlimited onslaught of high level Infested for a given period of time.
The player starts in the center of a room encircled by six pillars. From here they must survive for 1:30.
- Tips
- Leaving the center will relocate players to starting center instead.
- Stealth skills can be used to complete the test without issue.
- Terminal Hacking Test
- This test requires players to hack two waves of consoles within a time limit of 1:45.
The player starts in the center encircled by terminals. From here they must hack three standard terminals and three complex terminals to pass the test.
- Tips
- Failed hacks do not automatically fail the test, so long as they are completed before time limit ends.
- You may use Ciphers, despite the test's purpose.
- Target Tracking Test
- This test requires players to track targets quickly and accurately.
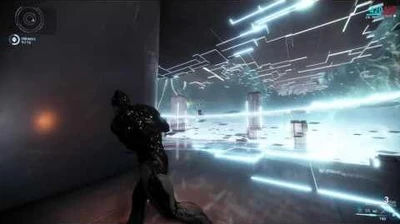
The player starts the test standing on a brightly lit circular platform in a dark room encircled with metallic spheres. The player's camera will be turned toward the first target at the beginning of each round. Upon shooting the first target, lines will connect unlit spheres in succession before stopping at another target, this process will repeat itself until the test has ended.
- Tips
- Upon missing the white sphere, the original white sphere will be voided, reverting into a normal sphere. A new white sphere will appear elsewhere, thus it is better to take your time aiming rather than attempting to rush your aim.
- Any accurate weapon with a large magazine size (to avoid wasted time reloading) will do nicely. Shotguns are also a viable option since the test counts one shot per round, not per pellets.
- Timed Exterminate Test
- This test requires players to eliminate three waves of enemies within 1:00.
The player starts in the center of a white room with pillars circling the center. Grineer, Corpus, and Infested units will spawn in waves and must be dispatched of before time ends.
- Tips
- Remain near the center of the room.
- Enemy Sense or Enemy Radar can help you find all enemies.
- Sentinels can help with eliminating targets.
- Wall Dash Test
- This test requires players to wall run while shooting white orbs which spawn the next path needed to reach a platform within three tries. Each fall from the tileset counts as a try.
The player starts on a single platform with a short downward ramp. Shooting the white orb will spawn more paths. Players will have to perform a horizontal wall run and proceed to shoot another white orb, spawning another wall to the right. Perform another horizontal wall run on it and a third white orb will appear. Shooting this will spawn a vertical wall. Players will now have to do a vertical wall run on this wall and bounce backward onto another platform. Repeat this two more times and you have completed the mission.
- Tips
- Making use of Bullet Jump and Double Jump to can help you travel between platforms and save yourself from falling.
- Shotguns or widespread continuous weapons are recommended as it aims a large area as opposed to accurate rifles.
- Vertically climbing on top of all the platforms is an easy way to pass the test as it will give you an indefinite amount of time to shoot the orbs and proceed.
- Stealth Test
- This test requires players to make use of cover and enemy movements in order to assassinate targets without detection using melee only within three tries. Alerting the enemies will count as a try.
The player start in a grey or orange room equipped with only their melee weapon. Players make their way through three stages with increasing numbers of enemies and increasingly complexity patrol routes. Successful elimination of all enemies in a stage will unlock the next.
- Tips
- Primary and Secondary weapons are restricted, you only have access to your Melee weapon.
- Abilities are disabled.
- It is advised that "dynamic lighting" be turned ON for this mission, otherwise you will not be able to see anything.
- Thrown melee weapons can be used to kill the targets from afar, allowing easier positioning to remain unseen.
- The Redeemer can make this test trivial. Its ranged gunshots are considered silent by the game's stealth mechanics
- Disappearing Platform Test
- This test requires players to eliminate targets at range, while maneuvering on platforms in a 3x3 grid that will permanently disappear after a few seconds of standing on them.
The player will spawn in on a round platform and the test will begin once you enter the grid area. You must kill all enemies spawning periodically atop five elevated platforms which line the far end of the grid. Once the player steps on a platform it will begin flashing increasing in speed until it disappears 8 seconds later.
Players have three chances to complete the test. Falling from the tileset counts as a try.
- Tips
- The number of targets is always 15, or, approximately, 1.6 per platform.
- It is recommended to go on all the edge platforms then use the one in the very middle to make use of all platforms and provide additional time.
- There are invisible walls preventing players from accessing the elevated platforms.
- Using a Continuous Hit-Scan weapon, such as the Quanta can make hitting targets easier.
Rank 11-20
- Time Trial Test
- This test requires players to make their way through an obstacle course while shooting reactor orbs to increase the amount of time they have to finish the course. Reactors orbs add 3.5 seconds of time.
- Tips
- It is advised that the option "dynamic lighting" be turned ON for this mission, to prevent the black wall to visibly camouflage with the background.
- Fast moving frames such as Volt or Loki are very handy for this test as speed can significantly ease completion.
- Using Zephyr's Tail Wind can make it possible to reach the end of the test without the need to go through the entire course. Especially the maze towards the end as she can go over the walls.
- Using Nova's Worm Hole you can skip a part of the test which makes it a lot easier to complete.
- Be sure to bring hitscan weapons as well, as some orbs move. At one point, you will take a hovering platform slowly up, during which moving orbs will appear. It is critical to shoot these as the time it takes for you to reach the top may run your time out.
- When attempting to complete the challenge, it is best to keep moving in the case that you miss an orb. Stopping to shoot the orb can result in you basically using the time you just gained.
- Using Loki's Decoy on the other side of the map (where the test is completed) in combination with Switch Teleport can instantly complete the test.
- Carousel Test
- This test requires players to eliminate enemies while being aware of their surroundings.
Players start on a platform facing a carousel-like structure with two disks connected with a large pillar at their centers. Between the disks are a set of lasers which separate the quadrants of the disks and slowly rotate around the disks, essentially circling the "carousel".
The object of the test is to reach the carousel, eliminate the enemies spawning on the outer disk, all while avoiding the moving lasers.
- Tips
- This test is timed. (As of Update 12.4)
- The lasers move at about walking speed, and position can be judged by the set in front of the player.
- The lasers heavily damage shields, but the player is permitted to use revives available to them if they die.
- A relatively accurate weapon is recommended, as the enemies are at mid to long range.
- Sentinels with Deth Machine Rifle or Stinger can help with eliminating targets.
- With Loki you can place a Decoy and then Switch Teleport to the outer platform. You can also Teleport to an enemy with Ash.
- Players can simply Bullet Jump onto the platform above the lasers, completely ignoring them.
- Advanced Disappearing Platform Test
- This test requires players to eliminate enemies while remaining extremely mobile.
Players start facing a number of platforms surrounded by walls which can be run across. Once the player touches a platform, it begins to flash increasingly rapidly and will disappear after a few seconds. The platforms are arranged with one in each corner, and three stacked vertically in the center.
Players have three tries to eliminate all enemies on surrounding platforms. Each fall counts as a try and returns all previously exhausted platforms.
- Tips
- Plan the order by which you will use the platforms, to avoid getting stuck in a corner.
- Sentinels can be of great help in this test, with proper Sentinel and Weapon choice.
- Utilize Power Wall Climbing to stand on top of walls and shoot enemies easier above disappearing platforms.
- Mesa can use her Peacemaker ability to take this test.
- Advanced Exterminate Test
- This test requires players to eliminate three waves of enemies of levels 15-20.
The player starts on the first level of a tower with multiple cover points and must eliminate targets until they are warped to the next level. There are three waves with Grineer, Infested, and Corpus units respectively.
- Tips
- Be careful of the gaps in the level.
- Companions are disabled, so try to use a well-rounded loadout.
- It appears that there is no time limit.
- Enemy numbers: 10 Grineer, 20 Infested (including both crawlers and ospreys), 12 Corpus.
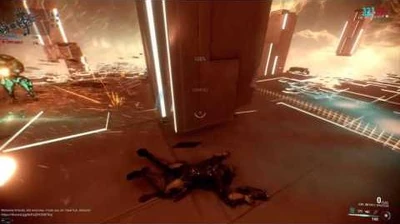
Warframe - Mastery Rank 15 Test
- Interception Test
- This test requires players to capture and hold points in an Interception mission.
- Tips
- Some targets may not be standing on the same Interception point or are being blocked by consoles. Punch Through will be of some use mitigating this issue.

Warframe - Mastery Rank 16 Test
- Defense Test
- This test requires players to defend a Cryopod for 3 waves.
- Tips
- Taking Frost and using Snow Globe will help you complete this test easily.

Warframe - Mastery Rank 17 Test
- Advanced Timed Exterminate Test
- This test requires the player to kill 35 Infested targets within a time limit.
- Tips
- There will be a sphere that upon destruction will grant the player +15 seconds. It can only be harmed with melee.
- Excalibur's Exalted Blade can harm the spheres with his melee strikes, and also with the waves at close range.

Warframe - Mastery Rank 18 Test
- Advanced Defense Test
- This test requires the player to defend a Cryopod for 5 waves.
- Tips
- Taking Frost and using Snow Globe will help you complete this test easily.

Warframe - Mastery Rank 19 Test
- Stealth Rescue Test
- This test requires the player to destroy six orbs without being detected by the patrolling Grineer Lancers, and then escort a rescue target to the extraction point.
- Tips
- The player gets three attempts to complete the test without detection, after which the test will fail.
- Primary and Secondary weapons are restricted, you only have access to your Melee weapon.
- Abilities are disabled.
- Ranged melee weapons like the Glaive or the Redeemer are ideal for taking out enemies from a safe distance.

Warframe - Mastery Rank 20 Test
- Archwing Time Trial Test
- This test requires the player to fly between two platforms in Archwing mode before the timer runs out. There is a series of rings between the two platforms that grant additional time of 2 seconds when flown through. The player starts out with 10 seconds.
- Tips
- Naturally, take Itzal into this mastery test to grant you an upper edge on the challenge with its speed.
Rank 21-30

Warframe - Mastery Rank 21 Test
- Timed Exterminate Test
- This test requires the player to kill 35 enemies before the timer runs out. The player must destroy several orbs with their melee weapon to extend the timer, which spawn in random locations around the map.
- Tips
- The timer starts at 20 seconds, and each orb adds 15 seconds to the timer.
- A total of 8 orbs will spawn, after which the player will be unable to further increase the remaining time.
- Ranged melee weapons, such as the Glaive, the Redeemer, as well as Excalibur's Exalted Blade can be used to destroy the orbs from a distance.
- The map is very vertical, and thus an agile loadout is preferred. Consider bringing a Bullet Jump mod to help travel between platforms.
Mastery Rank 22 is not yet available.
Mastery Rank 23 is not yet available.
Mastery Rank 24 is not yet available.
Mastery Rank 25 is not yet available.
Mastery Rank 26 is not yet available.
Mastery Rank 27 is not yet available.
Mastery Rank 28 is not yet available.
Mastery Rank 29 is not yet available.
Mastery Rank 30 is not yet available.
Mastery Ranks
| Rank Image | Rank Name | Rank Number | Next Rank Requirement | Total XP Required | Test | Note |
|---|---|---|---|---|---|---|
| None | Unranked | 0 | 2,500 | 0 | None | - |

|
Initiate | 1 | 7,500 | 2,500 | Primary Test |
Corpus |

|
Silver Initiate | 2 | 12,500 | 10,000 | Sidearm Test | Grineer Rank 1-3 |

|
Gold Initiate | 3 | 17,500 | 22,500 | Melee Test | Grineer Rank 1-3 |

|
Novice | 4 | 22,500 | 40,000 | Survival Test | Infested Rank 12-15 |

|
Silver Novice | 5 | 27,500 | 62,500 | Terminal Hacking Test | - |

|
Gold Novice | 6 | 32,500 | 90,000 | Target Tracking Test | - |

|
Disciple | 7 | 37,500 | 122,500 | Timed Exterminate Test | All Factions Rank 10-15 |

|
Silver Disciple | 8 | 42,500 | 160,000 | Wall Dash Test | - |

|
Gold Disciple | 9 | 47,500 | 202,500 | Stealth Test | Grineer Rank 1 |

|
Seeker | 10 | 52,500 | 250,000 | Disappearing Platform Test | Grineer Rank 1 |

|
Silver Seeker | 11 | 57,500 | 302,500 | Time Trial Test | - |

|
Gold Seeker | 12 | 62,500 | 360,000 | Carousel Test | Grineer Rank 1 |

|
Hunter | 13 | 67,500 | 422,500 | Advanced Disappearing Platform Test | Grineer Rank 1 |

|
Silver Hunter | 14 | 72,500 | 490,000 | Advanced Exterminate Test | All Factions Rank 20-25 |

|
Gold Hunter | 15 | 77,500 | 562,000 | Interception Test |
Grineer |

|
Eagle | 16 | 82,500 | 640,000 | Defense Test | Corpus 3 Waves |

|
Silver Eagle | 17 | 87,500 | 722,500 | Advanced Timed Exterminate Test | Infested 35 Targets |

|
Gold Eagle | 18 | 92,500 | 810,000 | Advanced Defense Test |
Corpus |

|
Tiger | 19 | 97,500 | 902,500 | Stealth Rescue Test |
Grineer |

|
Silver Tiger | 20 | 102,500 | 1,000,000 | Archwing Time Trial Test | |

|
Gold Tiger | 21 | 107,500 | 1,102,500 | Timed Exterminate Test |
Grineer |

|
Dragon | 22 | 112,500 | 1,210,000 | ? | Currently Unobtainable |

|
Silver Dragon | 23 | 117,500 | 1,322,500 | ? | Currently Unobtainable |

|
Gold Dragon | 24 | 122,500 | 1,440,000 | ? | Currently Unobtainable |

|
Sage | 25 | 127,500 | 1,562,500 | ? | Currently Unobtainable |

|
Silver Sage | 26 | 132,500 | 1,690,000 | ? | Currently Unobtainable |

|
Gold Sage | 27 | 137,500 | 1,822,500 | ? | Currently Unobtainable |

|
Master | 28 | 142,500 | 1,960,000 | ? | Currently Unobtainable |

|
Middle Master | 29 | 147,500 | 2,102,500 | ? | Currently Unobtainable |

|
Grand Master | 30 | - | 2,250,000 | ? | Currently Unobtainable |
Gaining Mastery Points
Below are the ways a Tenno can gain Mastery Points:
- Leveling up Weapons, Sentinel Weapons and Archwing Weapons earn 100 mastery points for each level gained for a total of 3,000.
- Leveling up Warframes, Companions and Archwings earn 200 mastery points for each level gained for a total of 6,000.
- The first completion of a Missions node will earn ~58 mastery points (varying).
Each individual item (such as a weapon or warframe) only grants its Mastery XP once per level. For instance: leveling an item to max level, selling it, then leveling it again will not result in additional Mastery. Releveling an item after Polarization results in the same situation. However, if an item is sold before reaching maximum level, rebought, then leveled to max, Mastery XP will be gained for all levels achieved beyond the original level.
Mastery points are not wasted if a Tenno fails a test. Excess mastery points will automatically fill the mastery bar once passing the test.
As of Hotfix 18.4.5 (2016-01-29), the current maximum rank is Mastery Level 21, Gold Tiger. (1,166,796 total points)
- Without any Exclusive Mastery items, the current maximum rank is Mastery Level 20, Silver Tiger. (1,031,796 total points)
| Category | Count | Mastery |
|---|---|---|
| Warframes | 39 | 234,000 |
| Primaries | 0 | 16,000 |
| Secondaries | 0 | 10,000 |
| Melee (including Zaws) |
0 | 6,000 |
| Kitguns | 0 | 0 |
| Normal Missions (nodes + Junctions) | 257 (257 + 0) | 0 (0 + 0) |
| The Steel Path (nodes + Junctions) | 257 (257 + 0) | 0 (0 + 0) |
| Railjack Intrinsics | 0 | 0 |
| Drifter Intrinsics | 0 | 0 |
| Sentinels | 0 | 0 |
| Sentinel Weapons | 0 | 0 |
| Robotic Weapons | 0 | 0 |
| Hound Weapons | 0 | 0 |
| Companions | 15 | 90,000 |
| Kubrows | 0 | 0 |
| Kavats | 0 | 0 |
| Predasites | 0 | 0 |
| Vulpaphylas | 0 | 0 |
| MOAs | 0 | 0 |
| Hounds | 0 | 0 |
| Plexus | 0 | 0 |
| Archwings | 4 | 24,000 |
| Archguns | 0 | 2,000 |
| Archmelees | 0 | 0 |
| Amps | 0 | 0 |
| K-Drives | 0 | 0 |
| Necramechs | 0 | 0 |
| Total | 557 | 292,000[?] |
| Minus Exclusives | 557 | 292,000[?] |
The 39 Warframes include:
- 16 through enemies (14 Bosses, 1 Eximi, 1 Manics)
- 11 Prime (1 Founder, 3 Vaulted)
- 5 through Quests
- 4 through Research
- 3 through missions (1 Alerts, 1 Spy, 1 Sorties)
The 248 Weapons include:
- 105 through Market Blueprints
- 46 through Research
- 25 Prime (2 founder exclusives, 6 retired)
- 13 purchasable with Credits
- 13 through Syndicates
- 12 Event Exclusive
- 10 through enemies (6 Assassins, 4 Bosses, 1 Drekar Troopers)
- 9 through Alerts
- 9 through Baro Ki'Teer
- 3 Market Retired
- 2 through Quests
- 2 through Sorties
- 1 through Conclaves
The 15 Companions include:
- 5 Kubrows
- 5 Sentinels through Market Blueprints
- 2 Sentinels through Research
- 2 Prime Sentinels
- 1 Sentinel through Baro Ki'Teer
The 10 Sentinel Weapons include:
- 5 from Market Blueprint Sentinels
- 2 from Researched Sentinels
- 2 from Prime Sentinels
- 1 from Baro Ki'Teer Sentinel
The 4 Archwings include:
The 15 Archwing Weapons include:
- 7 through Archwing Missions
- 4 through Research
- 2 through Quests
- 1 through Baro Ki'Teer
- 1 through Fomorian Sabotage Alerts
Exclusive Mastery
Most Mastery-rewarding items can be directly bought, built, or researched. However the following items had a limited distribution period or were removed from circulation entirely.
Acquisition: Events or Special Alerts
These items were once available from the Market but have since been removed. They cannot be traded, but may rarely appear as rewards for Events or Tactical Alerts.
| Item | Count | Mastery |
|---|---|---|
| Primary | 3,000 | |
| Total: | 1 | 3,000 |
Acquisition: None
These items were part of the Founders Program, rewarding those who donated during the crucial early stages of the game. They cannot be traded and will never be offered again.
| Item | Count | Mastery |
|---|---|---|
| Warframe | 6,000 | |
| Secondary | 3,000 | |
| Melee | 3,000 | |
| Total: | 3 | 12,000 |
Acquisition: Wolf Beacon and Nightwave Offerings
![]() Wolf Sledge is only obtainable by killing the Wolf of Saturn Six. He spawned during the Nightwave/Series 1 and can now only spawn with a Wolf Beacon.
Wolf Sledge is only obtainable by killing the Wolf of Saturn Six. He spawned during the Nightwave/Series 1 and can now only spawn with a Wolf Beacon. ![]() Vitrica is only obtainable by killing Nihil after purchasing the Nihil's Oubliette decoration and the Enter Nihil's Oubliette Key.
Vitrica is only obtainable by killing Nihil after purchasing the Nihil's Oubliette decoration and the Enter Nihil's Oubliette Key.
| Item | Count | Mastery |
|---|---|---|
| Melee | 3,000 | |
| Melee | 3,000 | |
| Total: | 2 | 6,000 |
Acquisition: Events, Special Alerts, or Celebrations
These items can appear as rewards for Events, Tactical Alerts, or celebratory periods. Their parts and/or blueprints can be traded except for all Dex Weapons, both Plague Zaw Strikes, and the ![]() Opticor Vandal.
Opticor Vandal.
| Item | Count | Mastery |
|---|---|---|
| Primary | 3,000 | |
| Arch-Gun | 3,000 | |
| Secondary | 3,000 | |
| Melee | 3,000 | |
| Primary | 3,000 | |
| Zaw Strike | 3,000 | |
| Zaw Strike | 3,000 | |
| Primary | 3,000 | |
| Primary | 3,000 | |
| Melee | 3,000 | |
| Total: | 10 | 30,000 |
- * Opticor Vandal can also be purchased from Baro Ki'Teer, which has the only tradeable version
Acquisition: Purchase or Trade
These items can occasionally appear with Baro Ki'Teer's merchandise. Unranked weapons can be traded.
| Item | Count | Mastery |
|---|---|---|
| Secondary | 3,000 | |
| Primary | 3,000 | |
| Primary | 3,000 | |
| Arch-Melee | 3,000 | |
| Melee | 3,000 | |
| Melee | 3,000 | |
| Primary | 3,000 | |
| Melee | 3,000 | |
| Melee | 3,000 | |
| Melee | 3,000 | |
| Primary | 3,000 | |
| Companion | 6,000 | |
| Robotic Weapon | 3,000 | |
| Primary | 3,000 | |
| Secondary | 3,000 | |
| Primary | 3,000 | |
| Melee | 3,000 | |
| Secondary | 3,000 | |
| Secondary | 3,000 | |
| Primary | 3,000 | |
| Secondary | 3,000 | |
| Secondary | 3,000 | |
| Primary | 3,000 | |
| Secondary | 3,000 | |
| Primary | 3,000 | |
| Arch-Gun | 3,000 | |
| Melee | 3,000 | |
| Melee | 3,000 | |
| Melee | 3,000 | |
| Melee | 3,000 | |
| Total: | 30 | 93,000 |
- * Prisma Burst Laser is included with Prisma Shade when purchased from Baro, but the items are separate when traded with other players.
- ‡ Aklex Prime and Akvasto Prime cannot be purchased directly. Aklex Prime parts can be obtained through Axi A2 Relics, and Akvasto Prime parts can be obtained through Axi A5 Relics, both of which are exclusively sold by Baro Ki'Teer.
Acquisition: Daily Tribute system
These weapons are available from the daily tribute system at milestones 100, 300, 500 & 700
| Item | Count | Mastery |
|---|---|---|
| Secondary | 3,000 | |
| Melee | 3,000 | |
| Primary | 3,000 | |
| Melee | 3,000 | |
| Total: | 4 | 12,000 |
- * Sigma & Octantis will only be available from Day 300
Acquisition: Legacy Relics, Trade, or Prime Vault Access
Relics containing their parts have been placed in the Prime Vault, no longer appearing in drop tables. However their parts and relics can be traded or used normally. These items are available on a random rotating schedule through the Prime Resurgence system.
| Item | Count | Mastery |
|---|---|---|
| Warframe | 6,000 | |
| Primary | 3,000 | |
| Melee | 3,000 | |
| Warframe | 6,000 | |
| Primary | 3,000 | |
| Melee | 3,000 | |
| Warframe | 6,000 | |
| Secondary | 3,000 | |
| Melee | 3,000 | |
| Warframe | 6,000 | |
| Primary | 3,000 | |
| Melee | 3,000 | |
| Warframe | 6,000 | |
| Melee | 3,000 | |
| Companion | 6,000 | |
| Sentinel Weapon | 3,000 | |
| Warframe | 6,000 | |
| Primary | 3,000 | |
| Secondary | 3,000 | |
| Warframe | 6,000 | |
| Archwing | 6,000 | |
| Warframe | 6,000 | |
| Primary | 3,000 | |
| Companion | 6,000 | |
| Sentinel Weapon | 3,000 | |
| Warframe | 6,000 | |
| Melee | 3,000 | |
| Warframe | 6,000 | |
| Secondary | 3,000 | |
| Melee | 3,000 | |
| Warframe | 6,000 | |
| Primary | 3,000 | |
| Melee | 3,000 | |
| Warframe | 6,000 | |
| Secondary | 3,000 | |
| Companion | 6,000 | |
| Sentinel Weapon | 3,000 | |
| Warframe | 6,000 | |
| Primary | 3,000 | |
| Melee | 3,000 | |
| Warframe | 6,000 | |
| Secondary | 3,000 | |
| Melee | 3,000 | |
| Warframe | 6,000 | |
| Secondary | 3,000 | |
| Melee | 3,000 | |
| Warframe | 6,000 | |
| Primary | 3,000 | |
| Melee | 3,000 | |
| Warframe | 6,000 | |
| Secondary | 3,000 | |
| Melee | 3,000 | |
| Warframe | 6,000 | |
| Primary | 3,000 | |
| Melee | 3,000 | |
| Warframe | 6,000 | |
| Secondary | 3,000 | |
| Melee | 3,000 | |
| Warframe | 6,000 | |
| Primary | 3,000 | |
| Melee | 3,000 | |
| Warframe | 6,000 | |
| Primary | 3,000 | |
| Melee | 3,000 | |
| Warframe | 6,000 | |
| Melee | 3,000 | |
| Companion | 6,000 | |
| Sentinel Weapon | 3,000 | |
| Warframe | 6,000 | |
| Primary | 3,000 | |
| Secondary | 3,000 | |
| Warframe | 6,000 | |
| Primary | 3,000 | |
| Melee | 3,000 | |
| Warframe | 6,000 | |
| Primary | 3,000 | |
| Melee | 3,000 | |
| Warframe | 6,000 | |
| Secondary | 3,000 | |
| Melee | 3,000 | |
| Total: | 80 | 333,000 |
- * Prime Laser Rifle is included with Wyrm Prime and cannot be obtained separately.
- † Sweeper Prime is included with Carrier Prime and cannot be obtained separately.
- ‡ Deconstructor Prime is included with Helios Prime and cannot be obtained separately.
- § Deth Machine Rifle Prime is included with Dethcube Prime and cannot be obtained separately.
Mastery Benefits
The Mastery system indicates a player's overall progression through the game, and each rank comes with its own benefits. Below is a table noting such benefits.
Equipment Unlock
Other Benefits
- The number of Extractors you can deploy is dependent on your Mastery Rank and whether or not you have Founders/Prime Access status. For every five mastery ranks, you can deploy one additional drone. Having Founder/Prime access lets you deploy one more additional drone. If you are both a Founder and have Prime Access, these bonuses stack. Contrary to common belief, reaching Mastery Rank 15 does not allow a player to deploy an additional drone.
- Mastery 0–4: 1 drone
- Mastery 5–9: 2 drones
- Mastery 10+: 3 drones
- Founder/Prime Access: +1 drone
- From Mastery Rank 1 onwards, ranking up allows the ability to earn 1000 additional standing points with a Syndicate per day. Resulting in (Mastery Rank +1) * 1000 = total daily bonus
- Mastery Rank 2 unlocks the Trade System, and each Mastery Rank gained will get you one trade permission per day.
- From Mastery Rank 2 onwards, ranking up every 2 times unlocks a new Loadout slot in the Arsenal.
- Mastery Rank 6 unlocks all Market and Secondary Syndicate weapons besides the Dragon Nikana which requires Mastery Rank 8.
- Mastery Rank 8 unlocks all clan Research weapons.
- Mastery Rank 8 unlocks all Relays.
- Mastery Rank 12 unlocks Primary Syndicate weapons.
Notes
- Certain weapons have a minimum mastery rank requirement (XP Locked).
- Applying forma to weapons does not allow you to obtain mastery with them again, each item can only be used to obtain mastery once.
- Variants, such as Primes, Wraiths, Vandals etc allow you to gain mastery separate from the original item. In example, contrary to belief, having a second pair of the anniversary Dex Furis will not allow you to gain mastery points for the Dex Furis twice.
- Stalker can appear during the test.[1]
- Resources dropped during the test seem to be identical to those dropped in the Orokin Void.[2]
See Also
- Weapons Mastery Rank
- Exclusive Mastery
Media

