Highly effective against Corpus Shields. Moderately effective against Infested Sinew and Grineer Alloy Armor. Cold Status Effect causes enemies to move and attack up to 90% slower and take up to 50% more Critical Damage with multiple stacks temporarily.
—In-game Description
Cold Damage is one of the four primary elemental damage types. It performs well against the standard Shields used by most Corpus units as well as the Alloy Armor worn by many high-level Grineer units, but is not very effective against most of the Infested.
The status effect of Cold damage is Freeze. It lasts 6 seconds and stacks to a maximum of 9 times, with each stack having its own duration. Any stacks applied after the 9th will replace the oldest stack.
The target receives +10% increased flat Critical Multiplier on initial proc and 5% per subsequent proc to a maximum of 50%, additive after mods.
For example, a Kunai with Primed Target Cracker will crit a target afflicted with 9 cold procs for 1.6x × (1 + 110%) + 0.5x = 3.86x Critical Damage.
Enemies under Overguard can only receive a maximum of 4 Cold procs until the health buffer is removed.
Railjack[]
Railjack <DT_FREEZE>Cold Damage results in an Immobilize Status Effect which disables enemy ship flight controls and slows them to a halt.
—In-Game Description
The status effect of Cold damage against Railjack space enemies is Immobilize, which disables the target ships' weapons and slows their movements to a complete stop for 6 seconds, refreshing the duration with subsequent procs. Against the Tenno's Railjack, it instead creates an Ice Hazard that disables interactive elements within the Railjack, such as the pilot seat, turrets, Archwing Slingshot, doors, and Resource Forge.
As with all damage types effective against armor, Cold damage's type modifier works in two ways: it ignores a percentage of the target's armor, and increases the damage dealt in the same way as a type modifier against hitpoints. Practically speaking, this means that Cold damage is only reduced by 75% of the target's whole Alloy Armor and the base damage is increased by +25%.
Elemental Combinations[]
Cold damage mods can be combined with other elemental mods to create a new elemental damage type.
Deploy a gem that shoots prismatic beams. The gem targets enemies that are taking weapon damage from Citrine and her allies. Its beams inflict Heat, Cold, Toxin, and Electricity Status Effects. Status Chance and Status Duration increase for nearby allies.
Citrine expends 75Energy to summon her Prismatic Gem, launching it forward horizontally for 5 meters from her location before it ceases movement. The Prismatic Gem is an untargetable Invulnerable floating object that lasts for 23 / 25 / 27 / 30 seconds, during which it emits a rainbow aurora spanning a radius of 10 / 12 / 13 / 15 meters.
Citrine and allied Warframes inside the aurora gain a 60% / 70% / 85% / 100%Status Chance bonus for their weapons, and 60% / 70% / 85% / 100%Status Duration bonus for both weapons and abilities.
Citrine and allies gain or lose status bonuses whenever they enter or leave the aurora.
Companions and allied NPCs do not benefit from status bonuses.
Multiple Citrines in the squad can stack Prismatic Gem's status buffs.
Status chance percentage bonus is displayed as a Prismatic Gem buff icon beside Citrine and her squadmates' hitpoints indicators. Status duration bonus remains hidden.
While affected by status bonuses, Citrine and her allies are visually followed by burrowing mineral deposits that puncture through the horizontal surface directly below them. Movement causes the minerals to retract and re-emerge in response while creating digging sounds.
Prismatic Beams
When Citrine or her allies inside the aurora lands a weapon attack on an enemy, or when an enemy inside the aurora is hit by a weapon attack from Citrine or her allies from anywhere, the Prismatic Gem projects 1 light beam for each individual ally onto the targeted enemies. Each beam attacks 1 target then induces a 0.4 seconds delay before Prismatic Gem can generate another beam triggered by the same ally.
Prismatic Gem does not require line-of-sight with its target to strike them with its beams.
Multiple consecutive hits from continuous fire, beam, and other rapid-fire weapons will allow the gem to focus its beams onto the same target.
Multiple beams for different allies from the same Prismatic Gem may attack separate numbers of targets per second.
Weapons with deployable extensions such as Azima and Zenistar trigger Prismatic Gem when the owner is standing in the aurora or when they hit enemies inside it.
The gem's beam possesses unrestricted range and bypasses all obstacles in the environment to strike its target, on each attack inflicts a single instance of 500 / 650 / 800 / 1,000 combined Heat, Cold, Electricity, and Toxin damage, with a guaranteed set of the 4 primary elemental status effects procced at 1 stack each.
Enemies hit by Fractured Blast while Citrine is inside the Prismatic Gem's aurora will extend its Impact and Slash status duration, while the gem sweeps its beam to each impacted enemy individually in rapid succession to inflict one instance of damage and a set of status effects.
Prismatic Gem contributes kills and assists to increase Preserving Shell's damage reduction.
Can be recast while active. Only 1 gem may be active at once; recasting will remove the previous crystal and place a new one.
Casting Prismatic Gem is a full-body animation that interrupts all movement, Maneuvers, and other actions.
Ability is not dispelled when Citrine herself enters an ability nullification zone. The gem is destroyed when it enters an ability nullification zone or when Citrine falls out of bounds.
Synergizes well with status-activated weapon arcanes such as Primary Frostbite, Conjunction Voltage, and Cascadia Flare. These buffs will stack and refresh their duration each time Citrine or any of her allies cause Prismatic Gem to fire a beam at any target.
Prismatic Gem reacts to weapon attacks made by Companions, allowing for semi-automated gem beams within the companion's attack range.
Control the Sentinel's attack range by equipping targeting mods, such as Carrier's Striker (10 meters), Assault Mode (30 meters), Djinn's Thumper (60 meters), and Diriga's Calculated Shot (70 meters). Zoom mods such as Eagle Eye equipped on their weapon further extend this targeting range.
In cooperative squads, deploy the gem near her allies to assist them with status bonuses and help Citrine secure assists and kills to sustain Preserving Shell's damage reduction. This is particularly useful whenever Citrine does not have line of sight to enemies from her position to fire her ranged weapon or use Fractured Blast to focus-fire the gem.
Due to the sheer quantity of various damage per second from Heat, Electricity and Toxin status effects, Prismatic Gem excels at securing the lethal hit on enemies for Citrine.
Be cautious around destructible objects such as explosive and nitrogen canisters, as the Blast and Cold status effects are affected by Prismatic Gem's status duration buff.
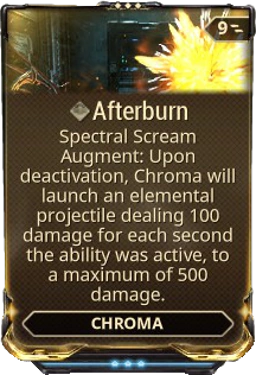
Wielding mastery over the deadly elements, Chroma can selectively change his elemental alignment, by tapping the ability key to freely cycle the selection wheel between Heat, Electricity, Toxin, or Cold.
Chroma's initial element once he enters a mission is determined by the primary emissive color in his Appearance customization; otherwise it will default to Heat.
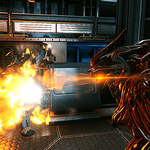
Hold down the ability key (default 1 ) to expend 10Energy to activate Spectral Scream. While active, Chroma holsters his weapons away and continuously exhales elemental energy in a cone 4 / 5 / 6.5 / 10 meters long that inflicts 200 / 250 / 300 / 400Heat, Electricity, Toxin, or Cold damage per second with a 100%status chance and a ?%Stagger chance; each enemy hit directly by Spectral Scream's cone will also spread its ability effects via an elemental energy stream to one other enemy within 10 meters.
Damage bypasses obstacles in the environment and does not decrease with distance.
Damage type is based on Chroma's current elemental alignment which is determined by Chroma's emissive color.
Spectral Scream's cone emits from Chroma's mouth, which changes direction based on where Chroma's model is facing (not the player camera) and can only be aimed within 90 degrees to each side and 45 degrees above or below Chroma.
While Chroma cannot use his weapons with Spectral Scream active, he is still able to cast abilities or maneuver just as freely.
Spectral Scream drains 3 energy per second and will remain active as long as Chroma has energy. Spectral Scream will end if Chroma runs out of energy or if deactivated by holding down the ability key again (default 1 ).
This ability can come in handy when used as a form of Crowd Control and can both be used as a damage ability, or with Heat or Electricity elemental damage creating a continuous crowd control stun.
This ability can be used to resist knockdowns, making it usable for walking through Corpus laser doors or shockwaves caused by MOAs or death orbs.
Rolling can be used to counteract the movement speed reduction and cover a large area in a short period of time.
Spectral Scream's conical area of effect can also break containers, as well as hazards such as explosive barrels. Regardless, increasing range, and having Elemental Ward active along with Spectral Scream will make it easier to clear rooms of containers.
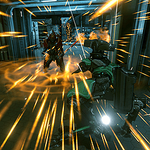
Chroma expends 50Energy to emit an aura of elemental energy, empowering himself and nearby allies within 6 / 8 / 10 / 12 meters for 10 / 15 / 20 / 25 seconds, providing both offensive and defensive buffs.
Elemental Ward exhibits different effects depending on Chroma's current elemental alignment, determined by Chroma's primary emission color or the selected element of Spectral Scream.
Generates a flame aura around Chroma and affected allies that increases base Health by 15% / 20% / 30% / 55% and inflicts 25 / 50 / 75 / 100Heat damage per second within a radius of 5 meters with a 2% / 5% / 7% / 10%status chance.
The health bonus stacks additively with base health modifiers, and the amount of health gained is determined by the affected Warframe's base health at rank 0. Since Chroma has 270 health at rank 0, a rank-3 Elemental Ward with a maxed Vitality and Intensify will increase Chroma's health at rank 30 to 270 × (1 + 2 + 1 + 0.55 × 1.3) = 1,273.05.
Damage bypasses obstacles in the environment and decreases with distance.
Electricity
Infuses Chroma and affected allies with an electric current that increases base Shields by 10% / 15% / 20% / 30% and converts incoming damage into arc discharges. An arc discharge inflicts 250% / 300% / 500% / 1,000% incoming damage as Electricity damage to a single target within 5 / 6 / 8 / 10 meters with a 10% / 15% / 20% / 25%status chance. Arc discharges will inflict a minimum of 50 / 60 / 100 / 200Electricity damage.
The shield bonus stacks additively with base shield modifiers, and the amount of shields gained is determined by the affected Warframe's base shields at rank 0. Since Chroma has 270 shields at rank 0, a rank-3 Elemental Ward with a maxed Redirection and Intensify will increase Chroma's shield capacity at rank 30 to 270 × (1 + 2 + 1 + 0.3 × 1.3) = 1,185.3.
Arc damage bypasses obstacles in the environment.
The final damage of an arc discharge is determined by the amount of shields and/or health lost by incoming damage. For example with a maxed Intensify, losing 100 shields from a single instance of damage will produce an arc that inflicts 100 × 10 × 1.3 = 1,300Electricity damage at rank 3 to a single target as long as it's within range.
When infused into Hildryn by the Helminth, the Shield drained by skills is also converted into damage, but the base multiplier is 1x instead of 10x.
Damage from environmental hazards can also be converted into arc discharges.
Arcs can strike the same target multiple times, and arcs can be produced in quick succession should Chroma and allies receive multiple instances of damage that exceed the minimum threshold.
Toxin
Emits an aura of noxious fumes around Chroma and affected allies that increases base Reload Speed by 15% / 25% / 30% / 35%, as well as weapon damage when Holstering by 15% / 25% / 30% / 35% for ? / ? / 3 / 3 seconds. Within a radius of 5 meters, the noxious fumes also have a 25% / 35% / 40% / 50% chance per second to deal 5% of an enemy's maximum health as Toxin damage with a 100%status chance.
The Toxin damage will only be applied to an enemy if it is not already affected by a Toxin proc, but can occur as soon as an existing Toxin proc expires. As such, its effect cannot stack with itself but can refresh itself every 7 seconds.
Damage bypasses obstacles in the environment and does not decrease with distance.
Cold
Encases Chroma and affected allies in a layer of frost that increases base Armor by 25% / 70% / 90% / 145% and creates an ice shield that reflects incoming fire back to its source. Reflected damage is increased by 150% / 200% / 250% / 300% and has a 10% / 15% / 20% / 25%status chance.
The armor bonus stacks additively with base armor modifiers, and the amount of armor gained is determined by the affected Warframe's base armor, according to the following formula: Base Armor × (1 + Armor Mods + Ability Modifier × (1 + Strength Mods)).
Since Chroma has 370 base armor, a rank-3 Elemental Ward with a maxed Steel Fiber and Intensify will increase Chroma's armor to 370 × (1 + 1 + 1.45 × (1 + 0.3)) = 1,437.45.
As with all other additive armor bonuses, Elemental Ward's bonus is applied before multiplicative armor bonuses.
Incoming hitscan and non-hitscan projectiles are physically redirected after hitting Chroma. As such, obstacles in the environment can prevent reflected damage from hitting enemies.
Hitscan projectiles are reflected directly to the source enemy regardless of distance from Chroma. Melee attacks are not reflected.
Non-hitscan projectiles are reflected in the direction of the source enemy.
Does not prevent damage to Chroma aside from the additional armor bonus and other damage reduction rules; Chroma will be hit normally before reflecting weapons fire.
Elemental Auras of any type from two or more Chromas do not stack and only the first aura will apply its benefits as long as the player is within buff range. For example, two Heat auras do not increase damage nor health values, and possessing a Heat aura will negate receiving a Cold aura.
Has a casting delay of 1 second. The animation interrupts movement and other actions.
Elemental Ward cannot be recast while active.
Elemental Ward does not work on Nekros' Shadows.
Subsuming Chroma to the Helminth will offer Elemental Ward and its augments to be used by other Warframes. The Ward's effects are determined by the Warframe's primary emission color.
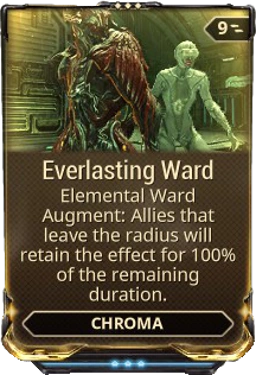
Everlasting Ward is a Warframe Augment Mod for Chroma that allows allies to retain Elemental Ward's effects upon moving out of its range, lasting for a percentage of Elemental Ward's remaining duration.
In a pinch, the bonus Health provided by the Ward can be used as a quick heal, as the Health granted is automatically added to your remaining health and is not reduced from your remaining health when Elemental Ward wears off.
The Ward is capable of damaging containers and hazards, albeit fairly slowly. Combining Elemental Ward with Spectral Scream and range mods will make for a useful farming tool so long as you have the energy to maintain it.
Electricity
Can be used to great effect on Survival and Exterminate missions where enemies approach you from all directions and are often difficult to locate or target. At maximum Ability Strength, the damage reflected can easily finish off weaker enemies and potentially stun any survivors.
Toxin
Works very well with weapons that require you to reload frequently or have long reload times.
Its dmg increase is considered as a Universal base dmg increase, same as Vex Armor and Arcane Arachne
Can reduce recharge delay for Cycron or a Kitgun equipped with Pax Charge, however, it does not affect recharge rate.
Cold
Properly modded, a Cold-oriented Ward can provide an armor bonus high enough that can counteract the armor penalty generated when casting Effigy.
The damage reflection is calculated using the damage before any damage reduction.
Bugs
Allies who enter, leave, then re-enter the radius of Heat-oriented Ward will not regain the buff on the same cast of Elemental Ward. This results in an empty space where the bonus health should have been, even if they took no damage at all.
This causes Medi-Ray and other healing abilities to attempt to heal the player, but if the player gets out of Elemental Ward's range, their health will return to normal again, wasting the health restored in the process.
The in-game UI shows the armor bonus from the Cold aura as a flat bonus rather than a percentage.
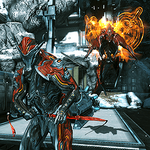
Chroma expends 50Energy to shed his outer pelt, imbued with elemental energy while sprouting wings and converting it into a stationary floating sentry with 1000 / 2000 / 4000 / 8000Fleshhealth and 140Ferrite Armor. The sentry will attack all enemies within 20 meters with a continuous stream of elemental energy, dealing 100 / 200 / 300 / 400Heat, Electricity, Toxin, or Cold damage per tick with a ?% status chance at 5 ticks per second. If enemies come within 5 meters of the sentry, it will periodically unleash a radial knockback that inflicts 200Heat, Electricity, Toxin, or Cold damage and Ragdoll. The sentry can also unleash a radial roar to temporarily stun all enemies within 30 meters.
Damage type is based on Chroma's current elemental alignment, determined by Chroma's primary emission color or the selected element of Spectral Scream.
Enemies killed by the sentry have a 15% / 30% / 45% / 60% chance to drop additional credits. In addition, all credits that drop within 10 meters of the sentry yield 25% / 50% / 75% / 100% additional credits.
For enemies killed by the sentry within the percentage credit bonus range, credit income is increased by an average of 43.75% / 95% / 153.75% / 220%. This assumes the credit chance on kill results in double credits from that enemy.
While Effigy is active, Chroma can fight in his lightened form, gaining 20% movement speed but with a 50% armor reduction.
The armor reduction is a multiplicative penalty that's applied to Chroma's total armor (e.g., with a maxed Steel Fiber and Intensify, Chroma with Vex Armor at full capacity will have his armor lowered to 350 × (1 + 1.1 + 3.5 × 1.3) × 0.5 = 1,163.75 when Effigy is activated).
Effigy drains 10 energy per second while active, and will deactivate if Chroma runs out of energy, sentry health is depleted, or if manually deactivated by pressing the ability key again (default 4 ).
Ability Synergy: Effigy's damage per tick and knockback damage can be boosted by the Fury aspect of Vex Armor.
Effigy will only maintain the damage increase from Fury so long as Chroma's Effigy is within range of Vex Armor.
When deactivated, Chroma can teleport his pelt from anywhere onto himself. This will stop movement and interrupt any action Chroma is doing, such as reloading, leaving a player vulnerable.
When deactivated while sliding, Chroma's pelt will be reapplied to him without triggering the animation, even if the player immediately cancels his slide.
Both the initial cast and the return of Chroma's pelt will cease any actions as they are a two-handed ability.
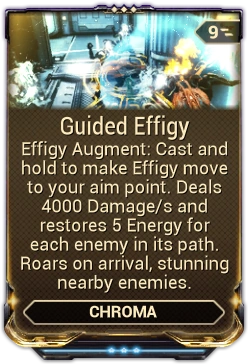
Guided Effigy is a Warframe Augment Mod for Chroma's Effigy that allows him to control the Effigy, dealing rapid damage to enemies in its path while recovering energy and stunning enemies at the destination.
The pelt usually unleashes its roar a few seconds after deploying. This allows you to quickly deploy the sentry for a temporary stun to all nearby enemies.
The pelt can be Banished, preventing damage from non-banished enemies while still being able to damage all enemies normally.
The pelt gains shields from the Shield Osprey Eximus Specter.
As the pelt will not move from the spot it is cast on (unless the Guided Effigy mod is equipped), it would serve quite well as an impromptu turret. As such, it is recommended to place the pelt on top of an objective that needs to be defended such as in a Defense mission. If that is the case, then it is recommended to equip energy-regenerating mods such as Rage or Hunter Adrenaline to keep the pelt active for as long as possible.
Frost expends 25Energy to launch an icy projectile in the direction of the reticle, traveling until it reaches an enemy or a surface. The projectile deals 150 / 225 / 275 / 350Cold damage to an enemy if hit directly and freezes them in place for 5 / 7 / 12 / 15 seconds. On impact, the projectile explodes in a 3 meters radius to inflict 50 / 100 / 125 / 150Cold damage with 600%status chance to all enemies within range.
Area damage affects the initial target, decreases with distance, and does not bypass obstacles in the environment.
The freeze duration will end prematurely if the initial target loses 50% of its current health during the time it is frozen.
While frozen, enemies are unable to regenerate Shields.
Ability Synergy:
Casting Freeze onto the exterior of a Snow Globe will destroy it, triggering an icy explosion that damages and ragdolls enemies in an area of effect.
Casting Avalanche on a target frozen by Freeze will override Freeze's effects. The target will remain frozen for Avalanche's duration while temporarily reducing the target's armor and removing Freeze's health threshold.
Freeze is a one-handed action. As such, it can be used while performing various maneuvers and actions without interruption.
Can be recast on a frozen target multiple times, restarting the freeze timer.
Freeze Force is a Warframe Augment Mod for Frost that allows Freeze to be held on cast, creating a wave of energy traveling outward from the user that temporarily grants the caster and nearby allies additional Cold damage to all attacks.
Its primary strength is that a direct hit causes the target to be frozen in place for a fixed 10 seconds, regardless of rank. This is particularly useful when fighting single enemies such as bosses to buy time for teammates to revive incapacitated Tenno, recharge shields, reload, etc.
Targets that are frozen will be freed of their immobility if they take health damage by anything. Freeze's utility can be easily wasted unless proper coordination with teammates is exercised.
Freeze can be used to set up an effective kill-combo on an enemy with a burst-damage attack.
Frost expends 50Energy to send forth a wave of ice shards that deals 300 / 445 / 565 / 700Cold damage with a 600%status chance to all targets in its area of effect. The wave has an initial width of 1.5 / 2 / 2.5 / 3 meters, disperses at a 30 / 35 / 40 / 45° angle, and travels over a distance of 10 / 12 / 17 / 20 meters.
Angle cannot exceed 60° under any circumstances.
Ice Wave follows terrain. With multiple levels of terrain, the ice shards can change elevation to damage enemies.
Can be recast while active to send forth new waves.
Subsuming Frost to the Helminth will offer Ice Wave and its augments to be used by other Warframes.
Ice Wave Impedance is a Warframe Augment Mod usable in both PvE and Conclave for Frost's Ice Wave that makes it leave a trail of frozen ground after casting, slowing down enemies that walk over it.
As a damage and crowd control ability, it can be dependent on the situation; it only affects those in front you rather than all around you. It works effectively against a large group of enemies rather than a single enemy like a boss.
Even though the wave moves along the floor, it is able to hit enemies that are slightly above or below it, such as Shield Ospreys.
Ice Wave is best used against enemies in a tightly-packed line. Loses effectiveness on Infested as Ancients resist much of the damage.
Since it passes through Snow Globe, Ice Wave can be used to clear the globe of enemies if Frost is somehow forced out of it.
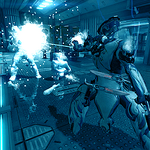
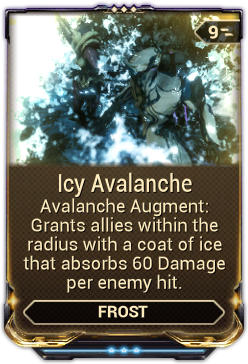
Frost expends 100Energy to crash an avalanche down around him, striking all surrounding enemies within 8 / 10 / 12 / 15 meters with a 600%Coldstatus chance. Shortly after, an icy pulse rapidly expands over the area, freezing enemies in place for 5 / 6 / 7 / 8 seconds and permanently reducing their total armor by ? / ? / ? / 60%. When the pulse dissipates, frozen enemies are immediately dealt 800 / 1000 / 1200 / 1500Cold damage. If an enemy dies from the sheer cold, they violently shatter upon death, dealing 100 / 200 / 300 / 400Cold damage to enemies in a 3 / 3.5 / 4 / 4.5 meter radius.
Shatter damage diminishes with distance and bypasses obstacles in the environment.
The armor reduction is applied after ~1 second of the casting animation has passed, but before the damage is dealt.
Recasting on frozen enemies multiple times refreshes the freeze duration.
While frozen, enemies are unable to regenerate Shields.
While the avalanche does not affect Storage Containers, the explosion from frozen enemies does.
Casting Freeze on a target frozen by Avalanche will extend the freeze duration. The effect will expire when Freeze ends or when Freeze's health threshold is reached.
With one player using Corrosive Projection, 100% armor strip can be achieved at 137% Ability Strength.
Avalanche can be used to immobilize large groups of enemies, as even if it does not kill enemies outright it lowers their armor, allowing players to finish off any survivors.
Avalanche staggers enemies back a small distance when cast, this may result in them being out of range for the freeze and subsequent damage when at the edge of the area of effect, so it is important to make sure you group enemies effectively before casting.
This ability can damage enemies through walls. Using Avalanche while pressed against a wall can clear a room without even entering.
Avalanche can hit enemies who are above or below Frost's position.
Scales well against Corpus as freeze does 50% more damage against shields, useful for destroying Corpus being protected by Shield Ospreys.
Avalanche can still serve as crowd control even with low Ability Duration, as the Cold status effects are not affected by mods and will stay on the target even when unfreezing (if the freeze duration is shorter than 6 seconds, that is).
Being a naturally cryogenic Warframe, any melee assailants that strike Frost have a chance to be frozen on impact. In Conclave, players will instead be inflicted with Coldproc.
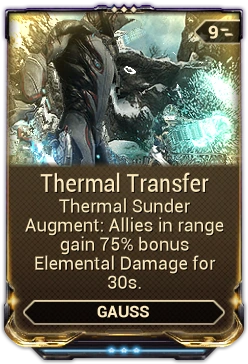
Siphon kinetic energy from the area, charging the battery and inflicting Cold Status on nearby enemies. Hold reverses the process, draining the battery and inflicting Heat Status on nearby enemies.
Gauss expends 50energy to manipulate the kinetic energy around him to create an area of extreme temperatures with an initial radius of 6 / 8 / 10 / 12 meters, which gradually shrinks to a final radius of 3 / 4 / 5 / 6 meters and lasts for 6 / 9 / 12 / 15 seconds.
Tap the ability key (default 3 ) to absorb kinetic energy, charging battery power by 10% to inflict a Cold proc on all enemies within range, lasting for a minimum duration of 2.5 / 3 / 3.5 / 4 seconds on empty battery, up to a maximum duration of 5 / 6 / 7 / 8 seconds on full battery. Enemies caught in the area creation receive a minimum of 75 / 100 / 125 / 150Cold damage on empty battery, up to a maximum of 375 / 500 / 625 / 750Cold damage on full battery; enemies lingering inside the area also receive damage per second, which diminishes in amount with the size of the area. When cast on enemies already affected by Cold proc, they are instantly frozen solid for the full status duration.
Hold down the ability key to expend kinetic energy, draining battery power by 10% to inflict a Heat proc on all enemies in range, lasting for a minimum duration of 2.5 / 3 / 3.5 / 4 seconds on empty battery, up to a maximum duration of 5 / 6 / 7 / 8 seconds on full battery. Enemies caught in the area creation receive a minimum of 150 / 200 / 250 / 300Heat damage on empty battery, up to a maximum of 750 / 1000 / 1250 / 1500Heat damage on full battery; enemies lingering inside the area also receive damage per second, which diminishes in amount with the size of the area. When cast on enemies already affected by Heat proc, Thermal Sunder deals its normal damage plus the damage of the current Heat proc[1].
Damage per second has a moderate chance to stagger light enemy units within the area.
Enemies already afflicted with a status effect of the same type will have it reapplied; its status duration uses the battery power level at the time of the new Thermal Sunder cast.
Casting Thermal Sunder of the opposite damage type on enemies already afflicted with Cold or Heat procs, combines the damage type into Blast. Affected enemies first have the initial status effect removed, receive the new status effect, they also receive a Blast proc and deals damage based on the mode being used plus the damage of the canceled status.
Remaining Proc Duration is based on the duration of the proc on the enemy being canceled, i.e. casting a Heat Thermal Sunder on an enemy affected by a Cold will use the remaining duration of the Cold proc.
For example: Casting a Heat Thermal Sunder at 80% battery followed by a Cold Thermal Sunder at 70% battery with 6 seconds left on the Heat proc will deal: [300 + 0.8 * (1500 - 300)] * 6 + [150 + 0.7 * (750 - 150)] = 8,130 damage.
At 100% battery with Redline, this formula can be simplified if the ability is recasted immediately: (12000 * Ability Duration + 750) * Ability Strength
The order in which the elemental procs are combined changes the direction in which enemies within the ability area are knocked back by the Blast proc. Casting Cold first then Heat will knock enemies outwards, while casting Heat first then Cold will pull enemies in towards the player.
When casting both elements, the elemental proc cast second will override and replace the first element already present, e.g. if enemies were affected by the Cold area first, casting Heat proc on them will remove the Cold proc and replace it with Heat.
Ability Synergy:
Mach Rush through a Thermal Sunder area to add its Cold or Heat damage to Mach Rush's knockdown and shockwave explosion.
Thermal Sunder gains bonuses to its status effects when Redline is active and above the redline battery charge (>80%):
The Cold proc freezes enemies solid instantly.
Heat mode's damage is doubled. This doubling is applied after the bonus damage from active heat procs on a target, allowing consecutive casts to do double the previous cast's damage.
The Blast proc permanently reduces enemy's current amount of armor based off of battery power level, up to a maximum of 100% with a full battery charge, before inflicting its damage.
Armor reduction scales linearly from 0% armor reduction at 80% battery to 100% armor reduction at 100% battery.
Can be recast while active to create new Cold or Heat sunder areas. Gauss may create up to 4 distinct areas of either element, resulting in only 8 total distinct areas active at once. Casting Thermal Sunder in a new area after reaching the maximum of Heat or Cold areas will remove the oldest area of corresponding element.
Subsuming Gauss to the Helminth will offer Thermal Sunder and its augments to be used by other Warframes.
The damage dealt by Subsumed Thermal Sunder is equivalent to 50% of Gauss's battery: 225 / 300 / 375 / 450Cold damage and 450 / 600 / 750 / 900Heat damage.
However, the damage scaling from Heat status is capped to 10x of the ability's damage.
Lavos charges forward in a sustained slide steerable with the left and right movement keys (default A , D ) for a distance of 30 meters, while his serpents rapidly throw out up to 14 / 17 / 20 / 24 vials from his waist belt. Thrown vials fall toward Lavos' left and right sides in an arcing trajectory, shattering on impact with solid surfaces leaving a trail behind him; shattered vials leave behind a pool of frozen residue at their impact zone, each lingering for 4 / 6 / 7 / 8 seconds and spanning a 2 meter radius that inflicts 100 / 150 / 200 / 250Cold and 100 / 150 / 200 / 250 Imbued Elemental damage and status effects per second, to all enemies standing within the pools. At the end of his charge, Lavos emits an icy explosion spanning a 4 / 5 / 7 / 9 meter radius that inflicts a single instance of the Cold and Imbued Elemental damage and status effects, while throwing out a ring of vials that shatter around his destination. Casting Vial Rush triggers a cooldown of 5 seconds at the end of Lavos' rush before he can charge again.
Explosion does not require enemies to be in direct line of sight to receive damage and status effects.
Cooldown timer countdown is shown on the ability icon after Lavos completes his charge.
While charging, Lavos is still land-bound and will drop down to the lowest terrain elevation in his path.
While charging, Lavos will attempt to slip pass obstacles in his path to continue his way. If held in place by an obstacle for at least two seconds, Vial Rush automatically stops, triggering the explosion and throwing the remaining vials out.
Due to being a non-damaging status effect, Vial Rush's Cold status procs will stack 3 times per application as part of Lavos' passive mechanics.
Vials have travel time as arcing projectiles that are affected by projectile-altering abilities such as Mag's Magnetize.
Halt Lavos in his tracks during his charge, triggering the explosion and releasing all remaining vials around him by pressing the jump key (default Spacebar ) to instantly stop; alternatively, press the ability key again (default 2 ) after Lavos dashed for at least 0.5 seconds to end Vial Rush early.
Ability Synergy:
Hold down the ability key (default 2 ) to add Cold damage to Lavos' mixing vial at no cost, as the Imbued Elemental damage type for his next ability cast.
Utilize Cold as key ingredient to produce Blast, Magnetic, or Viral damage.
Transmutation Probe reduces Vial Rush's active cooldown for each enemy it electrocuted. If enemies were electrocuted while Lavos is charging, the cooldown reduction carries over to Vial Rush's cooldown.
Cold status effects inflicted on enemies by Vial Rush enhance Catalyze's damage.
Can be cast and interrupted while moving or in midair.
Casting and interrupting Vial Rush are full-body animations that restrict movement and other actions.
Lavos will halt inside the bubble, triggering the icy explosion and releasing the remaining vials. Vials flung inside the nullification bubble will harmlessly disappear.
Vials touching the bubble from the outside will bounce away and land around it.
Residual pools fizzle away on contact with the bubble.
Lavos visually assumes a sliding posture as he charges forward with energy trailing from his hands, while his serpents frantically flail in the air, rapidly grabbing and throwing vials from his waist belt. Upon stopping his charge, Lavos reels back as the icy explosion rapidly expands around him. Energy trails, vials, and residue pools are affected by Lavos' Appearance colors.
Residue pools resemble a cluster of floating frozen ice blocks with the broken vial at their center. When Vial Rush is imbued with a different element, unique energy particle effects emit from the pools representing the additional elemental damage type.
Subsuming Lavos to the Helminth will offer Vial Rush and its augments to be used by other Warframes.
Subsumed Vial Rush includes the 0 energy cost, 5 second cooldown, as well as 3Cold status proc stacks per application from the explosion and residue pools.
Subsumed Vial Rush does not include the hold-cast to imbue the next ability cast with Cold damage.
Yareli expends 25energy to fling out a cluster of 5 water globules that spread apart in front of her, then settle and float in place from 5 meters away. When cast with enemies in direct line-of-sight and within 15 / 20 / 25 / 30 meters in the direction of the aiming reticle, the globules travel at a speed of 12.8 meters per second to home in on individual targets. Yareli may produce up to 15 globules with subsequent casts, with the new instances popping the oldest globules when past the limit.
Sea Snares without acquired targets are placed horizontally from Yareli's position. Globules will rebound away from walls before they settle in place.
If the acquired targets die before their globules reach them, those globules will stop moving and lay in wait for other enemies.
Sea Snares from the same cast will attempt to home into different targets. Globules from subsequent casts can home into targets of a previous cast.
Globules will not home into enemies already ensnared by Sea Snares.
Enemies protected by Overguard are still targeted by Sea Snares, which inflicts all of its effects except crowd control immobilization.
Sea Snares are floating proximity traps with a lifetime of 20 seconds that detect and respond to enemy presence in direct line-of-sight and within a radius of 10 meters around them; upon acquiring a target, each globule rapidly floats toward and splashes onto the nearest enemy in range. Once splashed onto an enemy, the globule bursts apart releasing bubbles that envelop the snared enemy to suspend it in aerial cryostasis for 6 / 8 / 10 / 12 seconds, while chilling it with lowering temperature that inflicts 100 / 150 / 200 / 250Cold damage per second, which further increases by 50 / 75 / 100 / 125Cold damage for each second spent ensnared, and +25% / +50% / +75% / +100%Damage Vulnerability.
When at least one enemy is ensnared by Sea Snares, the timer of the newest target appears on the ability icon.
Sea Snares' damage and damage increase per second benefit from Ability Strength and Ability Duration using the following expression:
Total Damage = (Ensnare DUR × Ability DUR × Cold Base DMG Per Sec × Ability STR) + (Modded DUR² - Modded DUR) × Cold DMG Increase Per Sec × Ability STR ÷ 2
At max ability rank with a rank 5 Intensify and Continuity equipped, Sea Snares will deal [12 × (1 + 30%) × 250 × (1 + 30%)] + [(12 × (1 + 30%))2 - 12 × (1 + 30%)] × 125 × (1 + 30%) ÷ 2 = 23,575.5Cold damage.
Modded Damage vulnerability is calculated with the following expression:
At ability rank 3 with a maxed Intensify equipped, Sea Snares inflicts 200% + 30% = 230% damage vulnerability.
Damage vulnerability is applied after damage type bonuses and weaknesses.
Applies to damage from Aquablades and Riptide, but does not apply to Sea Snares' innate Cold damage per second and damage increase per second.
Globules are untargetable and intangible to entities, allowing allies to move through them unhindered, and causing attacks from friend and foe alike to phase through them.
Globules still experience collision with terrain geometry and certain objects, such as Arctic Eximus globes, causing the globules to bounce away and ping-pong against physical obstacles in their path several times until they acquire a new target or harmlessly burst.
Each enemy can only be snared by a single globule at a time.
Upon ensnaring an enemy, that globule is considered destroyed and removed from the active globule count. Yareli can capture an unlimited amount of enemies with her Sea Snares.
Ability Synergy:
Sea Snares' casting animation is faster while aboard Merulina.
Killing enemies affected by Sea Snares with Merulina Guardian heals Merulina while increasing secondary fire rate and reload speed for a duration.
Sea Snares prevent snared enemies struck by Aquablades from being staggered away, allowing the blades to strike rapidly stacking multiple Slash status effects.
Riptide drags in and damages enemies ensnared by Sea Snares.
Can be recast while active to create new globules. Sea Snares has no delay between recasts.
Casting Sea Snares plays an upper-body animation whilst moving, or a full-body animation whilst standing, both allowing Yareli to continue movement but restricting other actions.
Sea Snares floating as proximity traps are not dispelled by entering an ability nullifying sphere from special enemies such as the Nullifier Crewman; the globules merely float in place unable to detect and hone into nearby enemies, but can be harmlessly popped if they collide with enemies.
Snared enemies will be released by the null sphere if they enter it.
Globules will rebound away if cast by Yareli standing near the null sphere.
Thrown globules cannot acquire nor hone into enemies within the coverage of a null sphere.
Yareli visually flails her left arm to the side to fling out the globules, as her right leg lifts briefly for balance. Water and bubbles spew forth along with Void energy.
Sea Snares globule visually resembles a large translucent water-filled bubble that glows brightly with Void energy and pulsates constantly to maintain its spherical shape, with water leaking from below. On contact with an enemy, the globule splashes water and splits into numerous other globules that move in constant fluctuating positions around the target, producing scores of smaller suds and bubbles.
Over the course of the ensnarement, the cloned globules gradually shrink and speed up in their movement until they pop one by one.
If the snared target is displaced away from their location, the cloned globules will quickly follow them and wrap around their target again.
Targets are immobilized and lifted airborne emitting an upward stream of energy that resembles the Lifted status effect, while liquid globs similar to the Bleeding Body Ephemera drip off from the targets' bodies.
Tips & Tricks
With high energy reserves and good Ability Efficiency, Sea Snares is a relatively cheap means of disabling a group of enemies quickly and thus provides decent crowd control.
As Sea Snares pin enemies in place, landing headshots becomes easier. It therefore synergizes with effects that are triggered by headshots such as with Ivara's Concentrated Arrow or Harrow's Covenant.
Bugs
More than one globule can hone in on the same enemy and pop on contact, potentially wasting globules due to a single enemy can only be ensnared by one globule.
Globules will frequently pop and dissolve away if they collide into environmental obstacles (e.g. walls) or splash into an already snared enemy.
Sea Snares' visual effect on snared enemies sometimes linger for a while after their victims died.
Nautilus' Cordon causes snared enemies to launch high into the air as they are pulled together.
Range:25 / 30 / 35 / 40 m (cast range) 15 m (range) 15 m (explosion radius)
Misc:
Ragdoll during suction 5 m (min suction range) 2 s (suction shrink threshold) 0.45 s (tick interval) Knockdown on burst 50 % (extra damage per enemy) 1.75 s (casting time)
Yareli expends 100energy to conjure forth a water cyclone within 25 / 30 / 35 / 40 meters at the location on her aiming reticle. Enemies within a sight detection radius of 15 meters from the cyclone succumb to the turbulent flow, becoming incapacitated by Ragdoll status whilst funneled to the apex of the spiral, which encapsulates its victims inside its liquid sphere lasting for 4 / 6 / 8 / 10 seconds. The cyclone's suction range shrinks from its maximum radius to 5 meters over the course of 2 seconds. All enemies dragged in receive 200 / 300 / 400 / 500Cold damage per tick, dealt once every 0.45 seconds.
Upon expiring or manually detonated by pressing the ability key (default 4 ) again, the cyclone bursts and splashes its contents outward, inflicting Knockdown and a base amount of 1,000 / 1,500 / 2,000 / 2,500Cold damage increased by 50% for each enemy still alive within Riptide, dealt to all enemies in a sight detection radius of 15 meters.
Riptide's damage on burst benefits from Ability Strength and number of affected enemies using the following expression:
Total Damage = Cold Base Damage × (1 + Ability Strength) × (1 + 0.5 × Number of Enemies)
At max ability rank with a rank 5 Intensify equipped and 5 enemies dragged in, Riptide will deal 2,500 × (1 + 0.3) × (1 + 0.5 × 5) = 11,375Cold damage on burst.
Damage on burst falls off with distance from the center from 100% to ~5%, therefore the above calculation's final damage value only applies to enemies trapped inside the liquid sphere.
Damage on burst can strike Enemy Body Parts to yield higher damage if the specific parts of enemy's ragdolled body align with the ability's hitbox.
Line of sight requirement is centered on the cyclone, regardless if Yareli herself sees the enemies or not.
Riptide's drag force on enemies is constant, which results in enemies farther away from the cyclone to drag along the ground and might not fully enter the liquid sphere before it bursts.
Only enemies that are trapped within the liquid sphere are launched away with a small impulse when it bursts.
Destructible Objects within the burst radius are always damaged, regardless of line of sight from Yareli or the cyclone.
Holding down the ability key (default 4 ) causes Yareli to consecutively cast Riptide's two phases with a 1.75 second Casting Speed, inflicting up to 4 ticks of Cold damage and the burst detonation.
Riptide inflicts its damage per tick faster when casting time is reduced, for both tap and hold cast versions.
Ability Synergy:
Riptide inflicts amplified damage against enemies ensnared by Sea Snares.
Yareli casts Riptide without stopping her movement while aboard Merulina.
Aquablades can damage and bleed enemies drawn near Yareli by Riptide.
Casting and detonating Riptide are full-body animations that stop Yareli's grounded movement and other actions. If Riptide expires on its own, Yareli does not play an animation.
Riptide is not dispelled if Yareli or the cyclone enter an ability nullifying sphere from special enemies, such as the Nullifier Crewman. Damage on burst will hit and damage the sphere, causing it to shrink.
Riptide's cyclone model can be spawned on top of a null sphere.
Riptide's cyclone model will attempt to rotate and adhere itself onto the surface at the location on the aiming reticle. If the spacing is insufficient and obstructed, the cyclone will attempt to spawn on the closest available space on the ground below. If there is no space available, the ability will not cast.
Yareli visually spins clockwise as she gathers Void-laced water, producing bubbles and liquid globs that drip from her arms, until she levitates off the ground to burst the cyclone apart.
Riptide visually erupts from a water puddle in a violent burst similar to a geyser eruption. A densely revolving torrent resembling a spinning narwhal tusk rises high into the air, as a mass of water forms along the torrent shaping into a giant bubble around the spiral's apex. Void energy courses through the water construct, enveloping the liquid drill that impales enemies helplessly upon itself.
When the cyclone bursts, the water within splashes outward and forms into scores of bubbles that evaporate away, while the torrent retreats into the dissolving puddle.
Tips & Tricks
Riptide can be used to 'safely' pull enemies into the middle of Hydroid's Pilfering Swarm or Khora's Pilfering Strangledome before exploding in a deadly fashion, ensuring the added drop chance upon enemies' deaths.
While all other elemental mods utilize the polarity, cold damage mods that aren't associated with secondary effects (like added status chance) use the polarity, which is tied to defensive mods.
Increased the maximum amount of stacks from 8 to 9.
Increased the additional per-stack Slow from 3.5% to 5%.
Increased the maximum Slow effect from 75% to 90%.
While we previously mentioned buffing Cold Slow Effect to 85% in our Citrine’s Last Wish update, we mistakenly only increased it to 75% instead.
Freeze Status Effect Additions:
Increased the Critical Damage taken by an enemy by 10% on initial Status Effect Subsequent Stacks increase this debuff by 5%, up to a maximum of 50%. This is additive after mods, not before.
Cold Damage has traditionally been one of the lesser-used and valued Status Effects within the community, as its effect on foes may not be as noticeable compared to its peers. As a result, we’ve decided to to make the following changes:
Increased base Slow from 25% to 50%.
Max stacks reduced from from 10 to 8.
Final result of the above is an overall increase in the Max Slow from 70% to 85%.
The first Cold Status Effect deals 25% slow. Subsequent Cold Status Effects deal +5% slow for a total of 70% slow at 10 procs. Each Cold Status has a duration of 6 seconds.
 Kunai with
 ")
")
")
")
")
")
")
")
")
")
")
")
")
")
")
")
")
")
")
")
")
")
")
")
")
")
")
")
")
")
")
")
")
")
")


")
")
")
")
")
")
")
")
")
")